Are you ready to plunge into the delicious world of seafood chowders? From the creamy goodness of New England clam chowder to the spicy kick of seafood chowder, there's a flavor for everyone. Each recipe has its own special twist that'll make your taste buds dance. So, whether you're hosting a cozy gathering or just craving something warm, these chowders are sure to impress. Let's check out what makes each one a must-try!
Classic New England Clam Chowder
Classic New England Clam Chowder is a rich, creamy soup that has become a quintessential dish of the Northeastern United States. This chowder is known for its hearty combination of tender clams, potatoes, onions, and a smooth, velvety base that's both comforting and satisfying. Perfect for a chilly day, this chowder can be served as a starter or a main course, and it's sure to warm the hearts and bellies of all who enjoy it.
Ingredients:
- 4 slices of bacon, chopped
- 1 medium onion, diced
- 2 cloves garlic, minced
- 2 cups diced potatoes (Yukon Gold or Russet)
- 2 cups clam juice
- 1 cup heavy cream
- 2 cans (6.5 oz each) chopped clams, drained, juice reserved
- 1 teaspoon dried thyme
- Salt and pepper to taste
- Fresh parsley, chopped (for garnish)
Cooking Instructions:
In a large pot over medium heat, cook the chopped bacon until crispy, then remove and set aside, leaving the rendered fat in the pot.
Add the diced onion and sauté until translucent, about 5 minutes. Stir in the minced garlic and cook for an additional minute.
Add the diced potatoes and clam juice, bringing the mixture to a boil. Reduce the heat to a simmer and cook until the potatoes are tender, about 15 minutes.
Next, stir in the heavy cream, chopped clams, thyme, and reserved clam juice. Let the chowder simmer for another 5-10 minutes, allowing the flavors to meld.
Season with salt and pepper to taste, and garnish with the crispy bacon and fresh parsley before serving.
Extra Tips:
For the best flavor, use fresh clams if available, but canned clams work well for convenience.
You can also experiment with adding other seafood, such as shrimp or fish, for a heartier chowder.
If you prefer a thicker consistency, mash some of the potatoes in the pot or add a slurry of cornstarch and water.
Don't forget to adjust the seasoning at the end, as the saltiness can vary depending on the bacon and clam juice used.
Enjoy your chowder with crusty bread or oyster crackers for a delightful meal!
Creamy Lobster Chowder

Creamy Lobster Chowder is a luxurious and indulgent dish that brings the taste of the sea right to your kitchen. This rich, velvety soup combines tender lobster meat with creamy broth, fresh vegetables, and aromatic herbs, making it the perfect comfort food for chilly nights or special occasions.
With its delightful flavors and elegant presentation, this chowder is sure to impress your family and friends.
Ingredients:
- 1 lb fresh lobster meat, cooked and chopped
- 4 slices bacon, diced
- 1 medium onion, chopped
- 2 cups potatoes, peeled and diced
- 1 cup corn (fresh or frozen)
- 2 cups heavy cream
- 4 cups seafood stock
- 2 tablespoons butter
- 1 teaspoon thyme
- Salt and pepper to taste
- Chopped fresh parsley for garnish
Cooking Instructions:
In a large pot, cook the diced bacon over medium heat until crispy, then remove and set aside, leaving the drippings in the pot.
Add the chopped onion and sauté until translucent. Stir in the diced potatoes and corn, followed by the seafood stock and thyme. Bring to a simmer and cook until the potatoes are tender, about 15-20 minutes.
Lower the heat and stir in the heavy cream and butter, allowing the mixture to heat through. Finally, fold in the chopped lobster meat and season with salt and pepper to taste.
Serve hot, garnished with crispy bacon and fresh parsley.
Extra Tips:
For an even richer flavor, consider adding a splash of white wine or sherry while sautéing the onions.
If you have any lobster shells left over, simmer them in the seafood stock for added depth of flavor.
Feel free to customize the chowder by adding your favorite seafood, such as shrimp or clams, and adjust the thickness by varying the amount of cream and stock to suit your preference.
Enjoy your chowder with crusty bread for a complete meal!
Spicy Seafood Chowder
Spicy Seafood Chowder is a delightful and warming dish that brings together the fresh flavors of the ocean with a kick of heat. Perfect for chilly evenings or casual gatherings, this chowder combines tender seafood with creamy broth and a blend of spices that will tantalize your taste buds.
Whether you're a seafood lover or just looking to try something new, this recipe is sure to impress.
Ingredients:
- 1 tablespoon olive oil
- 1 onion, diced
- 2 garlic cloves, minced
- 1 bell pepper, diced
- 2 medium potatoes, peeled and diced
- 4 cups fish stock
- 1 cup heavy cream
- 1 teaspoon smoked paprika
- 1 teaspoon cayenne pepper (adjust to taste)
- 1 pound mixed seafood (shrimp, scallops, and white fish)
- Salt and pepper to taste
- Fresh parsley, chopped (for garnish)
Cooking Instructions:
In a large pot, heat the olive oil over medium heat and sauté the diced onion, minced garlic, and bell pepper until they're soft and fragrant.
Add the diced potatoes and fish stock, bringing the mixture to a boil. Reduce the heat and let it simmer for about 15 minutes, or until the potatoes are tender.
Stir in the heavy cream, smoked paprika, and cayenne pepper, then add the mixed seafood. Cook for an additional 5-7 minutes, or until the seafood is cooked through and tender.
Season with salt and pepper to taste, and serve hot, garnished with fresh parsley.
Extra Tips:
For an even spicier chowder, consider adding diced jalapeños or a splash of hot sauce to the pot.
If you prefer a thicker chowder, you can blend a portion of the soup and then stir it back in for a creamier texture.
Don't hesitate to customize the seafood to your liking; crab or clams work wonderfully in this recipe as well.
Pair your chowder with crusty bread or a fresh salad for a complete meal. Enjoy!
Tomato-Based Fish Chowder

Tomato-based fish chowder is a delightful and hearty dish that combines the freshness of seafood with the rich flavors of tomatoes and aromatic herbs. Perfect for chilly evenings, this chowder isn't only comforting but also packed with nutrients.
With a blend of textures and tastes, it's a great way to enjoy a variety of fish and shellfish. This recipe is simple to follow and can be adjusted to suit your personal taste preferences.
Ingredients:
- 1 tablespoon olive oil
- 1 medium onion, diced
- 2 cloves garlic, minced
- 1 cup diced celery
- 1 cup diced carrots
- 1 (28-ounce) can crushed tomatoes
- 4 cups fish stock or vegetable broth
- 1 teaspoon dried thyme
- 1 teaspoon dried oregano
- 1 bay leaf
- Salt and pepper to taste
- 1 pound firm white fish (such as cod or halibut), cut into bite-sized pieces
- 1 cup shrimp, peeled and deveined
- 1 cup corn (fresh or frozen)
- 1 tablespoon lemon juice
- Fresh parsley, chopped (for garnish)
Instructions:
In a large pot, heat the olive oil over medium heat and sauté the onion, garlic, celery, and carrots until they're softened, about 5-7 minutes.
Stir in the crushed tomatoes, fish stock, thyme, oregano, bay leaf, salt, and pepper. Bring the mixture to a boil, then reduce the heat and let it simmer for 15-20 minutes to allow the flavors to meld.
Add the fish, shrimp, and corn, and cook for an additional 5-7 minutes, or until the seafood is fully cooked. Stir in the lemon juice and remove the bay leaf before serving. Garnish with fresh parsley.
Extra Tips:
For an extra depth of flavor, consider adding a splash of white wine or a pinch of red pepper flakes to the chowder while it simmers.
You can also customize the seafood based on your preferences or what's available; clams and mussels make excellent additions. If you prefer a thicker chowder, you can blend a portion of the soup and return it to the pot.
Serve the chowder with crusty bread or over a bed of rice for a complete meal.
Corn and Crab Chowder
Corn and Crab Chowder is a delightful and creamy soup that combines the sweetness of corn with the delicate flavor of crab. This dish is perfect for a cozy dinner or a special occasion, as it brings the taste of the sea right to your kitchen. The rich broth, improved with herbs and spices, makes each spoonful a comforting experience.
Whether you're using fresh crab or canned, this chowder is sure to impress your family and friends.
Ingredients:
- 1 pound fresh or canned crab meat
- 2 cups corn kernels (fresh, frozen, or canned)
- 4 slices bacon, chopped
- 1 medium onion, diced
- 2 cloves garlic, minced
- 2 medium potatoes, diced
- 4 cups chicken or seafood broth
- 1 cup heavy cream
- 1 teaspoon Old Bay seasoning
- Salt and pepper to taste
- 2 tablespoons fresh parsley, chopped (for garnish)
Instructions:
In a large pot, cook the chopped bacon over medium heat until crispy. Remove the bacon and set it aside, leaving the drippings in the pot.
Add the diced onion and garlic to the pot and sauté until they're translucent. Stir in the diced potatoes and corn, followed by the broth. Bring the mixture to a boil, then reduce the heat and let it simmer until the potatoes are tender, about 15 minutes.
Add the crab meat, heavy cream, and Old Bay seasoning, stirring gently to combine. Season with salt and pepper to taste, then heat through for another 5 minutes. Serve hot, garnished with the crispy bacon and fresh parsley.
Extra Tips:
For a thicker chowder, you can mash some of the potatoes against the side of the pot or blend a portion of the soup and return it to the pot.
If you're using fresh corn, be sure to cut the kernels off the cob for the best flavor. You can also experiment with different seafood, like shrimp or clams, for a twist on this classic recipe.
Adjust the seasoning according to your taste, and feel free to add a splash of lemon juice for a bit of brightness!
Shrimp and Potato Chowder

Shrimp and Potato Chowder is a comforting and hearty dish that combines the sweetness of shrimp with the creamy texture of potatoes. This chowder is perfect for a cozy evening, bringing warmth and flavor to your table.
With a blend of aromatic vegetables and spices, this chowder not only satisfies your hunger but also delights your taste buds with every spoonful.
Ingredients:
- 1 lb shrimp, peeled and deveined
- 2 cups potatoes, diced
- 1 cup onion, chopped
- 1 cup celery, chopped
- 3 cups vegetable or seafood broth
- 1 cup heavy cream
- 2 tablespoons butter
- 2 cloves garlic, minced
- 1 teaspoon dried thyme
- Salt and pepper, to taste
- Fresh parsley, chopped (for garnish)
Cooking Instructions:
In a large pot, melt the butter over medium heat and sauté the onions, celery, and garlic until they're soft and fragrant.
Add the diced potatoes and broth to the pot, bringing the mixture to a boil. Once boiling, reduce the heat and let it simmer for about 15 minutes or until the potatoes are tender.
Stir in the shrimp, heavy cream, and thyme, cooking for an additional 5-7 minutes until the shrimp are pink and cooked through.
Season with salt and pepper, then remove from heat and garnish with fresh parsley before serving.
Extra Tips:
For added depth of flavor, consider using seafood stock instead of vegetable broth.
Additionally, you can customize the chowder by adding other seafood like scallops or clams.
If you prefer a thicker chowder, mash some of the potatoes before adding the shrimp, or incorporate a cornstarch slurry to achieve your desired consistency.
Serve with crusty bread for a complete meal that everyone will love!
Coconut Curry Seafood Chowder

Coconut Curry Seafood Chowder is a delightful and warming dish that combines the creaminess of coconut milk with the aromatic flavors of curry, creating a rich base for tender seafood. This chowder is perfect for a cozy night in or an impressive dish to serve at gatherings.
With a mix of fresh seafood and vibrant spices, it's sure to please seafood lovers and curry enthusiasts alike.
Ingredients:
- 1 tablespoon coconut oil
- 1 small onion, diced
- 2 cloves garlic, minced
- 1 tablespoon fresh ginger, minced
- 2 tablespoons red curry paste
- 1 can (14 oz) coconut milk
- 2 cups fish or vegetable broth
- 2 medium potatoes, diced
- 1 cup corn (fresh or frozen)
- 1 cup shrimp, peeled and deveined
- 1 cup scallops, cleaned
- Salt and pepper to taste
- Fresh cilantro, for garnish
- Lime wedges, for serving
Cooking Instructions:
In a large pot, heat the coconut oil over medium heat and sauté the diced onion until translucent, about 5 minutes.
Add the minced garlic and ginger, cooking for an additional minute until fragrant. Stir in the red curry paste, allowing it to cook for a minute to release its flavors.
Pour in the coconut milk and broth, then add the diced potatoes. Bring to a simmer and cook until the potatoes are tender, about 10-15 minutes.
Add the corn, shrimp, and scallops, cooking until the seafood is just opaque, approximately 5-7 minutes. Season with salt and pepper to taste before removing from heat.
Extra Tips:
For an extra depth of flavor, you can add a splash of fish sauce or a squeeze of lime juice at the end of cooking.
If you prefer a thicker chowder, consider mashing some of the potatoes before adding the seafood. Additionally, feel free to customize the seafood mix based on what's fresh or available; crab and mussels can make great additions.
Serve the chowder with warm crusty bread for a satisfying meal!
Smoked Salmon Chowder

Smoked salmon chowder is a deliciously rich and creamy dish that brings the flavors of the sea right to your dining table. This comforting chowder is perfect for chilly evenings and can be made quickly using simple ingredients.
The smoky flavor of the salmon pairs beautifully with the creamy base, while the addition of vegetables adds texture and freshness. Serve it with crusty bread for a complete meal that will warm both your body and soul.
Ingredients:
- 8 ounces smoked salmon, chopped
- 4 cups vegetable or fish stock
- 2 cups heavy cream
- 1 medium onion, diced
- 2 cloves garlic, minced
- 2 medium potatoes, diced
- 1 cup corn (fresh or frozen)
- 1 cup diced celery
- 1 teaspoon dried dill
- Salt and pepper to taste
- Chopped fresh chives or parsley for garnish
Instructions:
In a large pot, sauté the diced onion and minced garlic over medium heat until softened, about 3-4 minutes.
Add the diced potatoes, corn, and celery, followed by the vegetable or fish stock. Bring the mixture to a boil, then reduce the heat and let it simmer for about 15 minutes, or until the potatoes are tender.
Stir in the heavy cream, chopped smoked salmon, and dried dill, and let it simmer for an additional 5-7 minutes. Season with salt and pepper to taste, and garnish with fresh chives or parsley before serving.
Extra Tips:
For a thicker chowder, you can mash some of the potatoes with a fork before adding the cream, or you can blend a portion of the chowder and then mix it back in.
If you prefer a bit of heat, consider adding a pinch of red pepper flakes. This chowder can be made ahead of time and reheated gently, but be cautious not to boil it again after adding the cream to prevent curdling.
Enjoy your delicious smoked salmon chowder!
Manhattan Clam Chowder

Manhattan Clam Chowder is a delightful twist on the traditional creamy chowder, featuring a tomato-based broth that brings a fresh and vibrant flavor to the dish. This chowder isn't only hearty but also boasts a medley of vegetables and tender clams, making it a satisfying meal perfect for any occasion.
Whether you're warming up on a chilly day or looking to impress guests at a dinner party, this chowder is sure to please.
Ingredients:
- 4 slices of bacon, chopped
- 1 medium onion, diced
- 2 garlic cloves, minced
- 2 medium carrots, diced
- 2 stalks of celery, diced
- 1 can (14.5 ounces) diced tomatoes, undrained
- 2 cups clam juice
- 1 cup potatoes, diced
- 1 teaspoon dried thyme
- 1 bay leaf
- 2 cans (6.5 ounces each) chopped clams, drained
- Salt and pepper to taste
- Fresh parsley, chopped (for garnish)
Cooking Instructions:
In a large pot or Dutch oven, cook the chopped bacon over medium heat until crispy. Remove the bacon and set aside, leaving the rendered fat in the pot.
Add the diced onion, garlic, carrots, and celery to the pot, and sauté until the vegetables are tender, about 5-7 minutes. Stir in the diced tomatoes, clam juice, potatoes, thyme, and bay leaf.
Bring the mixture to a boil, then reduce the heat and let it simmer for about 20 minutes, or until the potatoes are tender. Finally, add the chopped clams and cooked bacon back into the pot, and simmer for an additional 5 minutes.
Season with salt and pepper to taste, and garnish with fresh parsley before serving.
Extra Tips:
To improve the flavor of your Manhattan Clam Chowder, consider using fresh clams if available. Simply steam them until they open and add them to the chowder at the end of the cooking process.
If you prefer a thicker chowder, you can mash some of the potatoes before adding the clams. Also, feel free to adjust the seasoning according to your taste; a splash of hot sauce can add a nice kick!
Serve the chowder with crusty bread or oyster crackers for a complete meal.
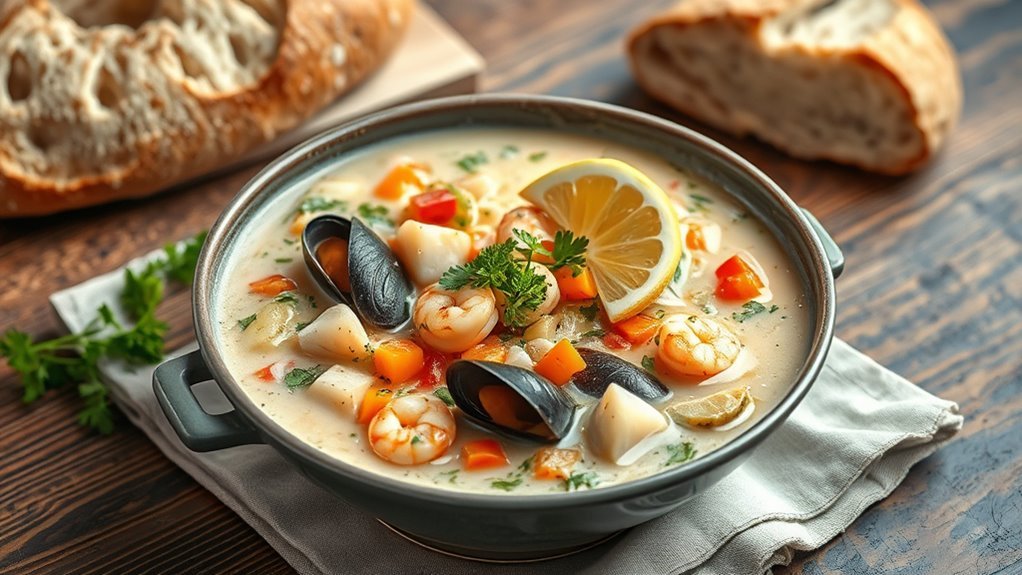
Mediterranean Seafood Chowder

Mediterranean Seafood Chowder is a delightful fusion of flavors that brings the essence of coastal cuisine right to your kitchen. This creamy chowder isn't only hearty and satisfying but also highlights the fresh tastes of the Mediterranean, featuring an array of seafood, aromatic herbs, and vegetables. Perfect for a family dinner or an elegant gathering, this dish is sure to impress with its rich flavor profile and comforting texture.
Ingredients:
- 1 tablespoon olive oil
- 1 onion, diced
- 2 cloves garlic, minced
- 1 carrot, diced
- 1 celery stalk, diced
- 1 red bell pepper, diced
- 1 teaspoon dried oregano
- 1 teaspoon dried thyme
- 1/2 teaspoon red pepper flakes (optional)
- 4 cups vegetable or fish stock
- 1 cup heavy cream
- 1 pound mixed seafood (shrimp, scallops, mussels, and fish fillets)
- Salt and pepper to taste
- Fresh parsley, chopped (for garnish)
- Lemon wedges (for serving)
In a large pot, heat the olive oil over medium heat. Add the diced onion, garlic, carrot, celery, and red bell pepper, and sauté until the vegetables are tender, about 5-7 minutes.
Stir in the dried oregano, thyme, and red pepper flakes, cooking for an additional minute. Pour in the vegetable or fish stock and bring the mixture to a gentle boil. Lower the heat and add the heavy cream, stirring to combine.
Gently add the mixed seafood, cooking until the seafood is just cooked through, about 5 minutes. Season with salt and pepper to taste, and garnish with fresh parsley before serving with lemon wedges on the side.
When making Mediterranean Seafood Chowder, be sure to use the freshest seafood available for the best flavor. You can customize the chowder by adding your favorite vegetables or adjusting the spices according to your taste.
If you're looking for a lighter version, you can substitute the heavy cream with a mix of milk and a splash of white wine for a delicious twist.
Finally, this chowder pairs wonderfully with crusty bread or a fresh salad, making it a perfect meal for any occasion. Enjoy your culinary journey to the Mediterranean!