Tag: culinary skills

  • 10 Best Ahi Tuna Recipes

    10 Best Ahi Tuna Recipes

    If you're a fan of seafood, Ahi Tuna is a must-try! This fish is super versatile and can be enjoyed in so many delicious ways. From the invigorating Ahi Tuna Poke Bowl to the savory Seared Ahi Tuna with a sesame crust, there's something for everyone. Whether you like it raw or cooked, Ahi Tuna brings a burst of flavor to your plate. Curious about the best recipes? Let's investigate!

    Seared Ahi Tuna With Sesame Crust

    Seared Ahi Tuna with a sesame crust is a delicious and elegant dish that brings together the rich flavors of fresh tuna with the nutty crunch of sesame seeds. This dish is quick to prepare, making it perfect for a weeknight dinner or a special occasion.

    The key to achieving perfectly seared tuna is to use high-quality sushi-grade fish and to cook it quickly over high heat, ensuring that the center remains rare while the crust gets beautifully golden.

    Ingredients:

    • 2 ahi tuna steaks (about 6 ounces each)
    • 1/4 cup sesame seeds (white and black mixed)
    • 2 tablespoons soy sauce
    • 1 tablespoon olive oil
    • 1 teaspoon ginger, grated
    • 1 clove garlic, minced
    • Salt and pepper, to taste
    • Optional: scallions and wasabi for garnish

    Instructions:

    Begin by marinating the ahi tuna steaks in a mixture of soy sauce, olive oil, grated ginger, minced garlic, salt, and pepper for about 15 minutes.

    While the tuna marinates, spread the sesame seeds on a plate. Once marinated, remove the tuna from the marinade and press each side into the sesame seeds to create a crust.

    Heat a non-stick skillet over high heat and add a drizzle of oil. When the skillet is hot, carefully place the tuna steaks in the pan, cooking for about 1-2 minutes on each side for a rare finish.

    Remove from heat and let rest for a minute before slicing.

    Extra Tips:

    When selecting your ahi tuna, look for bright red color and a firm texture, which indicates freshness.

    If you prefer your tuna cooked more than rare, adjust the cooking time accordingly, but be cautious not to overcook it, as it can become dry.

    You can also experiment with different seed mixtures or add a touch of chili flakes for some heat.

    Serve the seared tuna with a side of steamed vegetables or over a bed of rice for a complete meal, and don't forget the garnish for a beautiful presentation!

    Ahi Tuna Poke Bowl

    fresh ahi tuna bowl

    Ahi Tuna Poke Bowl is a delightful and invigorating dish originating from Hawaii, celebrated for its vibrant flavors and healthy ingredients. This dish features succulent raw Ahi tuna marinated in a savory sauce, served over a bed of rice and topped with an array of fresh vegetables and garnishes.

    It's perfect for a light lunch or dinner and can be customized to suit your taste preferences. Let's plunge into making this delicious poke bowl that's not only easy to prepare but also bursting with flavor.

    Ingredients:

    • 1 lb Ahi tuna, sushi-grade, diced
    • 2 cups sushi rice
    • 1/4 cup soy sauce
    • 1 tablespoon sesame oil
    • 1 tablespoon rice vinegar
    • 1 teaspoon honey or agave syrup
    • 1 avocado, sliced
    • 1 cucumber, thinly sliced
    • 1 carrot, julienned
    • 2 green onions, chopped
    • 1 tablespoon sesame seeds
    • Seaweed salad (optional)
    • Pickled ginger (optional)
    • Wasabi (optional)

    Instructions:

    Begin by preparing the sushi rice according to the package instructions, typically rinsing it until the water runs clear, then cooking it and letting it cool.

    While the rice is cooling, in a bowl, combine the diced Ahi tuna, soy sauce, sesame oil, rice vinegar, and honey, mixing well to coat the tuna evenly. Let the tuna marinate for about 10-15 minutes.

    Once the rice has cooled, fluff it with a fork and divide it into serving bowls. Top the rice with the marinated tuna, sliced avocado, cucumber, and carrot. Finish with a sprinkle of sesame seeds, green onions, and any additional toppings you desire.

    Extra Tips:

    When selecting Ahi tuna, confirm it's sushi-grade to guarantee freshness and safety for raw consumption.

    Feel free to customize your poke bowl by adding or substituting toppings such as radishes, mango, or edamame. For added flavor, consider drizzling some spicy mayo or Sriracha on top.

    This dish is best enjoyed fresh, but if you have leftovers, store the components separately to maintain their texture and flavor.

    Grilled Ahi Tuna Tacos

    Grilled Ahi Tuna Tacos are a fresh and flavorful twist on traditional tacos, perfect for a summer meal or a quick weeknight dinner. The rich, meaty texture of the Ahi tuna pairs beautifully with vibrant toppings and a zesty sauce, creating a delightful balance of flavors.

    These tacos aren't only easy to prepare but also allow for customization based on your preferred toppings, making them a crowd-pleaser for any occasion.

    Ingredients:

    • 1 lb Ahi tuna steak
    • 2 tablespoons olive oil
    • 1 teaspoon garlic powder
    • 1 teaspoon chili powder
    • Salt and pepper to taste
    • 8 small corn tortillas
    • 1 cup shredded cabbage
    • 1 ripe avocado, sliced
    • ½ cup diced tomatoes
    • ¼ cup chopped fresh cilantro
    • ¼ cup sour cream or Greek yogurt
    • 1 lime, cut into wedges

    Cooking Instructions:

    Preheat your grill to medium-high heat. In a small bowl, mix olive oil, garlic powder, chili powder, salt, and pepper to create a marinade.

    Brush the marinade over the Ahi tuna steak and let it sit for about 10 minutes. Place the tuna on the grill and cook for about 2-3 minutes per side, or until it reaches your desired level of doneness (medium-rare is recommended).

    Remove the tuna from the grill and let it rest for a few minutes before slicing it into bite-sized pieces. Warm the corn tortillas on the grill for about 30 seconds on each side, then assemble your tacos by placing the sliced tuna on the tortilla and topping with shredded cabbage, avocado, diced tomatoes, cilantro, and a drizzle of sour cream.

    Serve with lime wedges on the side.

    Extra Tips:

    For best flavor, consider marinating the Ahi tuna for a longer period, up to 30 minutes, to allow the spices to penetrate the fish.

    If you prefer a bit of heat, add sliced jalapeños or a drizzle of hot sauce atop your tacos. Always choose sushi-grade Ahi tuna for the best quality and safety, and feel free to get creative with your toppings—pickled onions, mango salsa, or a spicy aioli can enhance your tacos even further.

    Enjoy your delicious grilled Ahi tuna tacos!

    Ahi Tuna Sashimi With Soy Sauce and Wasabi

    sashimi with soy wasabi

    Ahi tuna sashimi is a delightful and invigorating dish that showcases the exquisite flavor and texture of high-quality raw tuna. This simple recipe allows the natural taste of the fish to shine through while being complemented by the bold flavors of soy sauce and wasabi.

    Perfect for a light appetizer or a sophisticated starter, this dish is quick to prepare and requires minimal ingredients, making it an excellent choice for sushi lovers and culinary adventurers alike.

    Ingredients:

    • Fresh Ahi tuna (sushi-grade)
    • Soy sauce
    • Wasabi
    • Optional garnishes: sliced green onions, pickled ginger, sesame seeds

    Instructions:

    Start by selecting high-quality, sushi-grade Ahi tuna from a reputable fish market. Using a sharp knife, slice the tuna into thin, even slices, approximately 1/4 inch thick.

    Arrange the slices neatly on a chilled plate. Serve the sashimi with small dishes of soy sauce and a dollop of wasabi on the side, allowing your guests to dip the fish to their liking.

    Extra Tips:

    When preparing Ahi tuna sashimi, freshness is key, so make sure to purchase the fish on the day you plan to serve it. Keep the tuna chilled until you're ready to slice it to maintain its quality.

    If you want to improve the presentation, consider using a mandoline slicer for perfectly uniform slices or garnishing with microgreens or edible flowers.

    And remember, the quality of the soy sauce and wasabi can greatly impact the dish's overall flavor, so opt for high-quality brands. Enjoy your sashimi while it's fresh for the best experience!

    Blackened Ahi Tuna Steaks

    Blackened Ahi tuna steaks are a delicious and flavorful dish that brings a taste of the ocean right to your kitchen. The blackening technique, which involves searing the fish in a hot skillet with a blend of spices, creates a crispy, charred exterior while keeping the inside tender and juicy.

    This recipe is perfect for a quick weeknight dinner or an impressive meal for guests, showcasing the rich, meaty texture of the ahi tuna paired with a zesty spice mix that enhances its natural flavors.

    Ingredients:

    • 2 ahi tuna steaks (about 6-8 ounces each)
    • 2 tablespoons olive oil
    • 1 tablespoon paprika
    • 1 teaspoon cayenne pepper
    • 1 teaspoon garlic powder
    • 1 teaspoon onion powder
    • 1 teaspoon dried thyme
    • 1 teaspoon dried oregano
    • Salt and black pepper to taste
    • Lemon wedges, for serving

    Instructions:

    Begin by patting the ahi tuna steaks dry with paper towels and then brush both sides with olive oil.

    In a small bowl, mix together the paprika, cayenne pepper, garlic powder, onion powder, thyme, oregano, salt, and black pepper to create the blackening spice blend.

    Generously coat each tuna steak with the spice mixture, pressing it into the fish to guarantee it sticks well.

    Heat a cast-iron skillet or heavy pan over high heat until it's very hot, then carefully place the tuna steaks in the skillet.

    Cook for about 1-2 minutes on each side, or until a dark crust forms and the inside is still rare to medium-rare, depending on your preference.

    Remove from heat and let rest for a minute before slicing.

    Extra Tips:

    When cooking blackened ahi tuna, it's important to use a very hot pan to achieve that signature crust without overcooking the fish inside.

    For best results, choose fresh, high-quality tuna and verify your spices are fresh as well for maximum flavor.

    If you prefer a milder flavor, feel free to adjust the amount of cayenne pepper.

    Serve your blackened tuna steaks with lemon wedges to squeeze over the top, enhancing the dish's brightness.

    Pair it with a fresh salad or steamed vegetables for a complete meal.

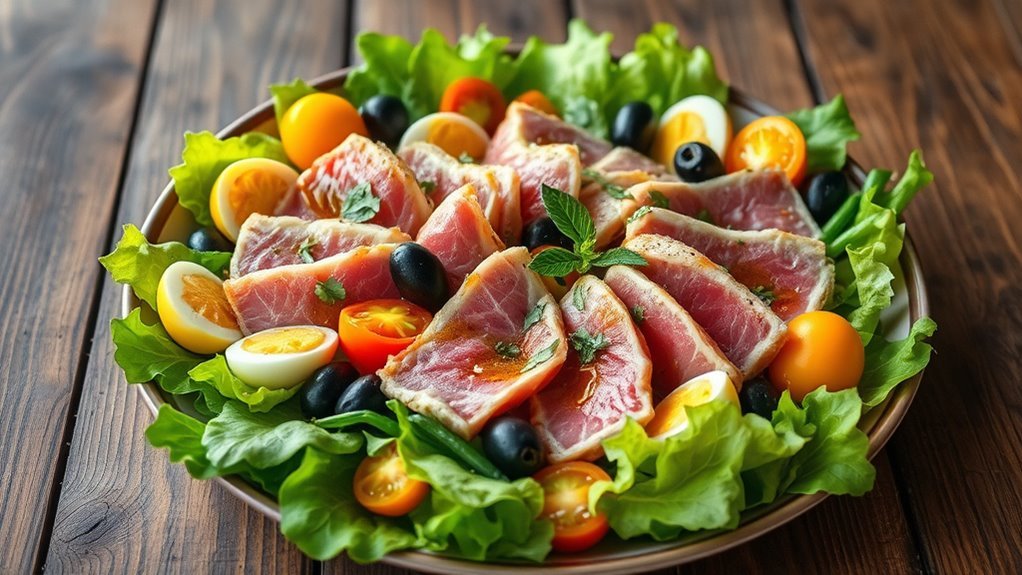
    Ahi Tuna Salad With Avocado and Mango

    fresh ahi tuna salad

    Ahi Tuna Salad with Avocado and Mango is a vibrant and invigorating dish that combines the rich flavors of seared tuna with the creamy texture of avocado and the sweet juiciness of mango.

    This salad is perfect for a light lunch or a beautiful dinner, showcasing the freshness of the ingredients. The combination of flavors and colors not only makes it visually appealing but also provides a delightful culinary experience that's both satisfying and healthy.

    Ingredients:

    • 2 Ahi tuna steaks
    • 1 ripe avocado, diced
    • 1 ripe mango, diced
    • 4 cups mixed greens (such as arugula, spinach, and romaine)
    • 1/4 red onion, thinly sliced
    • 1/4 cup fresh cilantro, chopped
    • 2 tablespoons olive oil
    • 2 tablespoons soy sauce
    • 1 tablespoon lime juice
    • Salt and pepper to taste
    • Sesame seeds for garnish (optional)

    Cooking Instructions:

    Start by patting the Ahi tuna steaks dry with paper towels and seasoning them with salt and pepper.

    In a skillet over high heat, add 1 tablespoon of olive oil and sear the tuna for about 1-2 minutes on each side, until the outside is browned but the inside remains rare.

    Remove the tuna from the skillet, let it rest for a minute, and then slice it thinly.

    In a large bowl, combine the mixed greens, avocado, mango, red onion, and cilantro.

    In a small bowl, whisk together the remaining olive oil, soy sauce, and lime juice.

    Drizzle the dressing over the salad, toss gently to combine, and finally top with the sliced tuna and sesame seeds, if using.

    Extra Tips:

    When preparing Ahi Tuna Salad, it's important to use the freshest tuna possible, ideally sushi-grade, to guarantee the best flavor and safety.

    If you prefer your tuna cooked through, feel free to sear it longer to your desired doneness.

    Additionally, you can customize the salad by adding other toppings such as sliced radishes, cucumber, or a sprinkle of chili flakes for an extra kick.

    Serve the salad immediately for the best texture and flavor, and consider pairing it with a light white wine or sparkling water for an invigorating meal.

    Ahi Tuna Sushi Rolls

    fresh ahi tuna rolls

    Ahi tuna sushi rolls, also known as maki, are a delightful way to enjoy the fresh flavors of this exquisite fish. These rolls combine the rich taste of ahi tuna with creamy avocado, crisp cucumber, and perfectly seasoned sushi rice, all wrapped in nori for a satisfying bite.

    Whether you're a sushi-making novice or an experienced chef, this recipe will guide you through the process of creating delicious ahi tuna sushi rolls at home.

    Ingredients:

    • 1 cup sushi rice
    • 1 ¼ cups water
    • 2 tablespoons rice vinegar
    • 1 tablespoon sugar
    • ½ teaspoon salt
    • 4 sheets of nori (seaweed)
    • 8 ounces of fresh ahi tuna, sushi-grade
    • 1 ripe avocado, sliced
    • 1 small cucumber, julienned
    • Soy sauce, for serving
    • Wasabi and pickled ginger, for garnish (optional)

    Cooking Instructions:

    Begin by rinsing the sushi rice under cold water until the water runs clear, then drain. In a medium saucepan, combine the rinsed rice and water, bringing to a boil.

    Cover and reduce heat to low, simmering for about 20 minutes or until the water is absorbed. Once cooked, remove from heat and let it sit covered for an additional 10 minutes.

    In a small bowl, mix rice vinegar, sugar, and salt until dissolved, then gently fold this mixture into the warm rice. Allow the rice to cool to room temperature.

    To assemble the rolls, place a sheet of nori on a bamboo sushi mat, spread an even layer of sushi rice over the nori, leaving a 1-inch border at the top.

    Lay strips of ahi tuna, avocado, and cucumber across the center of the rice. Using the mat, carefully roll the sushi away from you, applying gentle pressure to keep it tight.

    Seal the edge with a bit of water, then slice the roll into bite-sized pieces.

    Extra Tips:

    When preparing your ahi tuna sushi rolls, freshness is key—always use sushi-grade tuna for safety and flavor.

    It's also essential to keep your hands wet while handling sushi rice to prevent sticking. If you're new to sushi rolling, practice makes perfect, so don't be discouraged by a few imperfect rolls.

    Experiment with other fillings like mango, bell pepper, or cream cheese to create your unique variations. For an extra touch, serve the rolls with a drizzle of spicy mayo or sesame oil for added flavor.

    Enjoy your homemade sushi experience!

    Ahi Tuna Ceviche

    fresh ahi tuna dish

    Ahi Tuna Ceviche is a revitalizing and vibrant dish that showcases the delicate flavor of fresh Ahi tuna, marinated in a zesty citrus mixture. This dish is perfect as an appetizer or light meal, and it's incredibly easy to prepare.

    The key to a successful ceviche lies in the quality of the tuna and the balance of flavors from the lime juice, cilantro, and other fresh ingredients. Serve it chilled with tortilla chips or on its own for a delightful seafood experience.

    Ingredients:

    • 1 pound Ahi tuna, sushi-grade
    • 1/2 cup freshly squeezed lime juice
    • 1/4 cup red onion, finely chopped
    • 1 jalapeño, seeded and minced
    • 1/4 cup fresh cilantro, chopped
    • 1 avocado, diced
    • Salt and pepper to taste
    • Tortilla chips or tostadas for serving

    Cooking Instructions:

    Start by cutting the Ahi tuna into small, bite-sized cubes and place them in a medium-sized bowl.

    Pour the freshly squeezed lime juice over the tuna, making sure all pieces are well-coated. Add the red onion, jalapeño, and chopped cilantro to the bowl, and gently mix everything together.

    Allow the mixture to marinate in the refrigerator for about 15-30 minutes, until the tuna turns opaque and absorbs the citrus flavors. Just before serving, fold in the diced avocado and season with salt and pepper to taste.

    Extra Tips:

    Always use the freshest sushi-grade Ahi tuna for ceviche to guarantee safety and flavor.

    If you prefer a milder heat, you can adjust the amount of jalapeño or omit it entirely. Additionally, for a unique twist, consider adding diced mango or pineapple to the ceviche for a hint of sweetness.

    Serve the ceviche immediately after mixing to maintain the tuna's texture, and enjoy it with crispy tortilla chips for a crunch that complements the tender fish beautifully.

    Ahi Tuna Pasta With Garlic and Olive Oil

    ahi tuna pasta dish

    Ahi Tuna Pasta with Garlic and Olive Oil is a delightful dish that combines the rich flavors of fresh ahi tuna with the simplicity of pasta, improved by the aromatic touch of garlic and the smoothness of olive oil.

    This recipe is perfect for a quick weeknight dinner or a special occasion, showcasing the quality of the tuna while allowing the other ingredients to complement its unique taste. With just a few simple steps, you can create a delicious meal that's both satisfying and impressive.

    Ingredients:

    • 8 oz pasta (spaghetti or linguine)
    • 1 lb fresh ahi tuna, cubed
    • 4 cloves garlic, minced
    • 1/4 cup olive oil
    • 1/4 tsp red pepper flakes (optional)
    • Salt and pepper to taste
    • 2 tbsp fresh parsley, chopped
    • 1 lemon, zested and juiced
    • Grated Parmesan cheese (for serving)

    Instructions:

    Begin by cooking the pasta according to package instructions in a large pot of salted boiling water until al dente.

    While the pasta is cooking, heat the olive oil in a large skillet over medium heat. Add the minced garlic and red pepper flakes, sautéing for about 1 minute until fragrant but not browned.

    Add the cubed ahi tuna to the skillet, seasoning with salt and pepper, and sear for about 2-3 minutes, turning occasionally until the tuna is just cooked through but still pink in the center.

    Once the pasta is ready, drain it and add it to the skillet with the tuna. Toss everything together, adding the lemon zest, lemon juice, and chopped parsley. Serve immediately, garnished with grated Parmesan cheese.

    Extra Tips:

    For the best flavor, use high-quality, sushi-grade ahi tuna and be careful not to overcook it, as it's best enjoyed medium-rare.

    Feel free to customize the recipe by adding vegetables like cherry tomatoes or spinach for added nutrition and color.

    To improve the dish further, you can drizzle a little extra olive oil or a splash of white wine into the skillet before serving for an extra layer of flavor.

    Enjoy your Ahi Tuna Pasta with a crisp green salad and a glass of white wine for a complete meal!

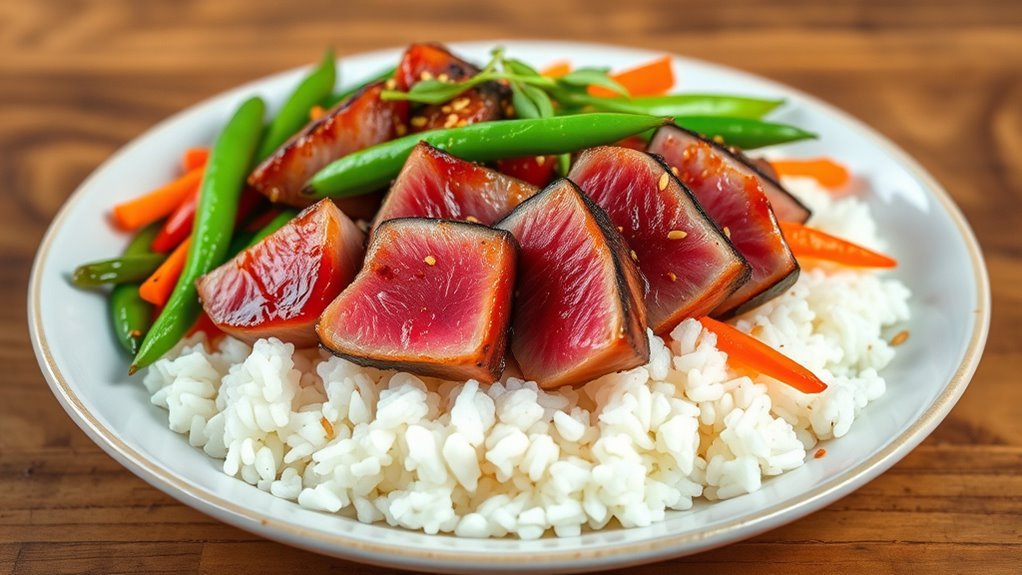
    Ahi Tuna Stir-Fry With Vegetables

    ahi tuna vegetable stir fry

    Ahi Tuna Stir-Fry with Vegetables is a quick and delicious meal that combines the rich flavors of fresh ahi tuna with a medley of colorful vegetables. This dish not only highlights the tender and buttery texture of the tuna but also allows for a variety of vegetables to shine through, making it a healthy and satisfying dinner option.

    Perfect for busy weeknights, this stir-fry is both easy to prepare and packed with nutrients, ensuring that you and your family can enjoy a flavorful meal in no time.

    Ingredients:

    • 1 lb ahi tuna, cut into 1-inch cubes
    • 2 tablespoons soy sauce
    • 1 tablespoon sesame oil
    • 1 bell pepper, thinly sliced
    • 1 cup snap peas, trimmed
    • 1 carrot, julienned
    • 1 small onion, thinly sliced
    • 2 cloves garlic, minced
    • 1 teaspoon ginger, minced
    • 2 tablespoons vegetable oil
    • Salt and pepper to taste
    • Cooked rice or quinoa for serving
    • Sesame seeds for garnish

    Instructions:

    Heat the vegetable oil in a large skillet or wok over medium-high heat. Add the onion, garlic, and ginger, stirring for about 1 minute until fragrant.

    Then, add the bell pepper, snap peas, and carrot, cooking for another 3-4 minutes until the vegetables are tender-crisp. Push the vegetables to the side of the pan, and add the ahi tuna cubes, pouring the soy sauce and sesame oil over them.

    Cook the tuna for about 2-3 minutes, stirring gently, until the outside is seared but the inside remains rare. Season with salt and pepper to taste, and serve the stir-fry over cooked rice or quinoa, garnishing with sesame seeds.

    Extra Tips:

    For the best flavor, use high-quality, sushi-grade ahi tuna. If you prefer your tuna cooked through, you can extend the cooking time slightly, but be careful not to overcook it, as it can become dry.

    Feel free to customize the vegetable mix based on what you have on hand or your personal preferences, such as adding broccoli, zucchini, or bok choy. Additionally, for a spicy kick, consider adding sliced chili peppers or a dash of sriracha to the stir-fry.

    Enjoy your meal!

  • 10 Best Lobster Bisque Recipes

    10 Best Lobster Bisque Recipes

    Are you ready to plunge into the delicious world of lobster bisque? This creamy, dreamy soup isn't just for fancy restaurants anymore. You can whip up some remarkable versions right at home, from the classic recipe to exciting twists like spicy and Thai-inspired flavors. Trust me, you'll want to impress your friends with these tasty creations. Stick around, and I'll share the top 10 recipes that'll have your taste buds dancing!

    Classic Lobster Bisque

    Classic Lobster Bisque is a luxurious and creamy soup that celebrates the rich flavor of lobster, making it a perfect starter for a special occasion or a comforting dish on a chilly evening.

    This recipe takes you through the process of creating a smooth and velvety bisque, infused with aromatic vegetables and finished with a splash of sherry for depth. Although it may seem a bit elaborate, the result is well worth the effort, and your guests will be impressed by your culinary skills.

    Ingredients:

    • 2 lobsters (1.5 to 2 pounds each)
    • 4 cups fish stock or seafood broth
    • 1 cup heavy cream
    • 1 onion, diced
    • 2 carrots, diced
    • 2 stalks celery, diced
    • 2 cloves garlic, minced
    • 1/4 cup tomato paste
    • 1/2 cup dry sherry
    • 1/4 cup brandy (optional)
    • 1 teaspoon fresh thyme
    • 2 bay leaves
    • Salt and pepper to taste
    • 2 tablespoons olive oil
    • Chopped fresh chives or parsley for garnish

    Cooking Instructions:

    Start by bringing a large pot of salted water to a boil and cooking the lobsters for about 8-10 minutes until they turn bright red.

    Remove the lobsters, let them cool, and then extract the meat from the tails and claws, chopping it into bite-sized pieces.

    In a separate large pot, heat olive oil over medium heat, then add the onions, carrots, celery, and garlic, sautéing until softened.

    Stir in the tomato paste, followed by the sherry and brandy, scraping up any bits from the bottom of the pot.

    Add the fish stock, thyme, bay leaves, and reserved lobster shells, simmering for about 30 minutes.

    Remove the shells, blend the soup until smooth, and return it to the pot.

    Stir in the heavy cream and lobster meat, seasoning with salt and pepper.

    Heat through and serve garnished with chives or parsley.

    Extra Tips:

    For an even richer flavor, consider roasting the lobster shells in the oven before adding them to the pot.

    This step improves the bisque's depth considerably.

    Additionally, if you want a more refined texture, strain the soup through a fine mesh sieve after blending to remove any remaining solids.

    Finally, be cautious with the seasoning; taste as you go to confirm the flavors balance perfectly without overwhelming the delicate lobster taste.

    Enjoy your homemade lobster bisque!

    Creamy Tomato Lobster Bisque

    lobster infused creamy tomato soup

    Creamy Tomato Lobster Bisque is a delightful fusion of rich flavors, combining the sweetness of lobster with the comforting warmth of tomato soup. This soup is perfect for a cozy night in or as a luxurious starter for a dinner party.

    The creamy texture and vibrant color make it not just delicious but also visually appealing. With just a few key ingredients and straightforward steps, you can whip up this gourmet dish in no time.

    Ingredients:

    • 1 cup cooked lobster meat, chopped
    • 2 tablespoons olive oil
    • 1 medium onion, diced
    • 2 cloves garlic, minced
    • 1 can (28 ounces) crushed tomatoes
    • 2 cups vegetable or seafood broth
    • 1 cup heavy cream
    • 1 teaspoon dried thyme
    • 1 teaspoon sugar
    • Salt and pepper to taste
    • Fresh basil leaves for garnish

    Cooking Instructions:

    In a large pot, heat the olive oil over medium heat and sauté the diced onion until translucent, about 5 minutes.

    Add the minced garlic and cook for another minute until fragrant. Stir in the crushed tomatoes, broth, thyme, and sugar, and bring the mixture to a simmer. Allow it to cook for 15-20 minutes, stirring occasionally.

    Once the flavors meld, use an immersion blender to puree the soup until smooth. Return to low heat and stir in the heavy cream and chopped lobster meat, allowing it to warm through.

    Season with salt and pepper to taste before serving.

    Extra Tips:

    For an even richer flavor, consider adding a splash of sherry or white wine to the soup during the cooking process.

    If you prefer a chunkier bisque, reserve some lobster meat to add in at the end. To elevate presentation, drizzle a little extra cream on top before serving and sprinkle with fresh basil.

    Serve with crusty bread for a complete meal that will impress your guests.

    Spicy Lobster Bisque

    Spicy Lobster Bisque is a rich and flavorful dish that combines the sweetness of lobster with a kick of heat, making it a perfect option for those looking to impress their guests or simply indulge in a comforting bowl of soup. This bisque isn't only luxurious but also surprisingly easy to make, allowing you to enjoy the sophisticated flavors of lobster without spending hours in the kitchen.

    With a blend of aromatic spices, cream, and the unmistakable taste of fresh lobster, this recipe will raise your dining experience to new heights.

    Ingredients:

    • 2 live lobsters (about 1 ½ pounds each)
    • 4 cups seafood stock
    • 1 medium onion, diced
    • 2 cloves garlic, minced
    • 1 carrot, diced
    • 2 stalks celery, diced
    • 1 tablespoon tomato paste
    • 1 teaspoon red pepper flakes (adjust for spice preference)
    • 1 teaspoon smoked paprika
    • 1/2 cup dry white wine
    • 1 cup heavy cream
    • 2 tablespoons butter
    • Salt and black pepper to taste
    • Fresh chives or parsley for garnish

    To prepare the Spicy Lobster Bisque, begin by cooking the lobsters in a large pot of boiling salted water for about 8-10 minutes until they turn bright red.

    Once cooked, remove the lobsters, cool them slightly, and then extract the meat from the tails and claws, chopping it into bite-sized pieces.

    In a large pot, melt the butter over medium heat, then add the onion, garlic, carrot, and celery, sautéing until softened.

    Stir in the tomato paste, red pepper flakes, and smoked paprika, cooking for an additional minute.

    Pour in the white wine, allowing it to reduce by half, then add the seafood stock.

    Bring to a simmer and let it cook for about 15 minutes.

    Finally, stir in the heavy cream and lobster meat, seasoning with salt and black pepper to taste.

    Simmer for an additional 5 minutes before serving hot, garnished with fresh chives or parsley.

    When cooking Spicy Lobster Bisque, keep in mind that the quality of your lobster and seafood stock will greatly affect the dish's flavor, so opt for fresh or high-quality ingredients.

    Feel free to adjust the level of heat by modifying the amount of red pepper flakes or even adding a splash of hot sauce for an extra kick.

    Additionally, you can improve the bisque by incorporating other seafood such as shrimp or crab for a mixed seafood version.

    Serve the bisque with crusty bread or a light salad for a complete meal. Enjoy!

    Lobster Bisque With Cognac

    lobster bisque with cognac

    Lobster bisque with cognac is a luxurious yet surprisingly approachable dish that brings the rich, sweet flavors of lobster to the forefront, improved by a splash of cognac. This creamy soup is perfect for special occasions or as a delightful starter for an intimate dinner. The combination of fresh lobster meat, aromatic vegetables, and the warming notes of cognac creates a bisque that's both comforting and sophisticated.

    Ingredients:

    • 2 live lobsters (about 1.5 pounds each)
    • 4 tablespoons unsalted butter
    • 1 onion, chopped
    • 1 carrot, chopped
    • 1 celery stalk, chopped
    • 2 cloves garlic, minced
    • 1 teaspoon tomato paste
    • 1 cup cognac
    • 4 cups seafood stock
    • 1 cup heavy cream
    • Salt and pepper to taste
    • Fresh chives or parsley for garnish

    Instructions:

    Begin by cooking the lobsters in boiling salted water for about 8-10 minutes until they turn bright red. Remove them from the water and let them cool before extracting the meat from the claws and tails.

    In a large pot, melt the butter over medium heat and add the onion, carrot, and celery, sautéing until tender, about 5 minutes. Stir in the garlic and tomato paste, cooking for an additional minute.

    Add the cognac and allow it to reduce by half, scraping up any browned bits from the bottom of the pot. Pour in the seafood stock and bring to a simmer. Once simmering, add the lobster shells to infuse flavor; simmer for about 30 minutes.

    Remove the shells and stir in the heavy cream. Blend the mixture until smooth, then return the lobster meat to the pot. Season with salt and pepper to taste, and heat gently before serving.

    Extra Tips:

    For an even more flavorful bisque, consider roasting the lobster shells before adding them to the soup base to improve the depth of flavor.

    Be sure to taste as you go, adjusting the seasoning to your preference. If you're looking for a touch of elegance, serve the bisque in small cups with a dash of cognac on top, garnished with finely chopped chives or parsley.

    Pair the dish with crusty bread or a light salad for a complete meal. Enjoy the rich, creamy texture and the delightful essence of lobster in every spoonful!

    Coconut Lobster Bisque

    Coconut Lobster Bisque is a luxurious and creamy soup that combines the rich flavor of lobster with the tropical essence of coconut milk. This dish is perfect for special occasions or a cozy night in, offering a delightful blend of flavors and textures.

    The sweetness of the coconut beautifully complements the savory notes of the lobster, creating a bisque that's both comforting and exotic. Follow this recipe to impress your guests or indulge in a gourmet meal at home.

    Ingredients:

    • 2 lobster tails, cooked and chopped
    • 1 tablespoon olive oil
    • 1 small onion, diced
    • 2 cloves garlic, minced
    • 1 red bell pepper, diced
    • 1 can (14 oz) coconut milk
    • 4 cups seafood stock
    • 1 teaspoon curry powder
    • 1 teaspoon paprika
    • Salt and pepper to taste
    • Fresh cilantro, for garnish
    • Lime wedges, for serving

    Cooking Instructions:

    In a large pot, heat the olive oil over medium heat and sauté the onion, garlic, and red bell pepper until they're soft and fragrant, about 5 minutes.

    Add the curry powder and paprika, stirring for another minute before pouring in the seafood stock and coconut milk. Bring the mixture to a gentle simmer, allowing the flavors to meld for about 10 minutes.

    Stir in the chopped lobster tails and season with salt and pepper to taste. Allow the bisque to simmer for an additional 5 minutes before removing it from heat. Use an immersion blender for a smoother texture, if desired.

    Extra Tips:

    For added depth of flavor, consider roasting the lobster shells before adding them to the pot to create a richer broth.

    Additionally, you can improve the bisque by incorporating a splash of lime juice just before serving, which brightens the dish and balances the creaminess of the coconut milk.

    Don't forget to garnish with fresh cilantro and serve with lime wedges for an extra burst of flavor!

    Lobster Bisque With Roasted Garlic

    creamy garlic lobster soup

    Lobster Bisque with Roasted Garlic is a luxurious and flavorful dish that improves the classic bisque by incorporating the rich, sweet notes of roasted garlic. This creamy soup is perfect for special occasions or as a comforting treat on a chilly day. The combination of succulent lobster meat, aromatic herbs, and the deep flavor of roasted garlic creates a bisque that's both indulgent and satisfying.

    Ingredients:

    • 2 lobsters (1.5 pounds each)
    • 1 head of garlic
    • 2 tablespoons olive oil
    • 1 medium onion, diced
    • 1 celery stalk, diced
    • 1 carrot, diced
    • 4 cups seafood stock
    • 1 cup heavy cream
    • 1/4 cup brandy
    • 2 tablespoons tomato paste
    • 1 teaspoon thyme leaves
    • Salt and pepper to taste
    • Chopped chives for garnish

    Instructions:

    Begin by preheating your oven to 400°F (200°C). Cut the top off the head of garlic, drizzle it with olive oil, and wrap it in foil.

    Roast the garlic in the oven for about 30-35 minutes until soft and caramelized, then let it cool. While the garlic is roasting, bring a large pot of water to a boil and cook the lobsters for about 8-10 minutes until bright red.

    Remove the lobsters, let them cool, and then extract the meat, reserving the shells. In the same pot, sauté the onion, celery, and carrot in olive oil until softened.

    Add the lobster shells, brandy, tomato paste, and thyme, cooking for an additional 2-3 minutes. Pour in the seafood stock and simmer for 30 minutes.

    After simmering, strain the mixture to remove the shells and return the liquid to the pot. Squeeze the roasted garlic into the bisque, add the heavy cream, and bring to a gentle simmer.

    Stir in the lobster meat, season with salt and pepper, and serve hot, garnished with chopped chives.

    Extra Tips:

    For an even richer flavor, consider adding a splash of sherry or white wine along with the brandy.

    If you prefer a smoother texture, you can blend the bisque before adding the lobster meat. Make sure to taste and adjust the seasoning as needed, especially since the salt content can vary in seafood stock.

    Additionally, serving the bisque in warm bowls will improve the enhanced dining experience. Enjoy your luxurious lobster bisque with roasted garlic!

    Lobster Bisque With Corn and Chives

    creamy seafood soup recipe

    Lobster Bisque with Corn and Chives is a delightful twist on the classic bisque that combines the rich flavors of lobster with the sweetness of corn and the freshness of chives. This creamy soup is perfect for special occasions or a cozy night in, and it's surprisingly simple to prepare.

    The dish showcases the luxurious taste of lobster, while the corn adds a burst of sweetness and texture, making each spoonful a comforting experience.

    Ingredients:

    • 1 ½ pounds of lobster tails (about 2 tails)
    • 4 cups of chicken or seafood broth
    • 1 cup of sweet corn kernels (fresh or frozen)
    • 1 medium onion, diced
    • 2 cloves garlic, minced
    • 1 cup heavy cream
    • 2 tablespoons olive oil
    • 2 tablespoons butter
    • 1 tablespoon tomato paste
    • 1 teaspoon paprika
    • Salt and pepper to taste
    • ¼ cup fresh chives, chopped

    Instructions:

    Begin by cooking the lobster tails. In a large pot, bring salted water to a boil and cook the lobster tails for about 8-10 minutes, until they turn bright red.

    Remove the lobster and let it cool before removing the meat from the shells, chopping it into bite-sized pieces. In the same pot, heat olive oil and butter over medium heat, and sauté the onion and garlic until translucent.

    Stir in the tomato paste and paprika, cooking for another minute. Add the broth and corn, bringing it to a simmer. Let it cook for about 15 minutes.

    Use an immersion blender to puree the soup until smooth, then stir in the heavy cream and lobster meat, cooking for an additional 5 minutes. Season with salt and pepper, and finish with chopped chives before serving.

    Extra Tips:

    For a richer flavor, consider roasting the lobster shells in the oven before adding them to the broth, as this will improve the bisque's depth.

    You can also substitute the corn with diced vegetables like carrots or bell peppers for a different flavor profile. If you prefer a lighter bisque, reduce the amount of heavy cream or substitute it for half-and-half.

    To raise your presentation, garnish with additional chives or a drizzle of high-quality olive oil.

    Thai-Inspired Lobster Bisque

    thai lobster bisque recipe

    Indulge in a luxurious Thai-inspired lobster bisque that combines the rich flavors of traditional bisque with the vibrant spices of Thai cuisine. This recipe raises the classic creamy soup with the addition of coconut milk, lemongrass, and red curry paste, creating a harmonious blend of savory and aromatic notes.

    Perfect for special occasions or an impressive dinner party, this bisque is sure to delight your guests and tantalize their taste buds.

    Ingredients:

    • 2 lobsters (1 to 1.5 lbs each)
    • 4 cups seafood stock
    • 1 can (13.5 oz) coconut milk
    • 2 tablespoons red curry paste
    • 1 stalk lemongrass, bruised and chopped
    • 1 medium onion, diced
    • 2 cloves garlic, minced
    • 1 tablespoon ginger, minced
    • 2 tablespoons fish sauce
    • 1 tablespoon lime juice
    • Fresh cilantro for garnish
    • Salt and pepper to taste
    • 2 tablespoons vegetable oil

    Instructions:

    Begin by cooking the lobsters in boiling salted water for about 8-10 minutes until fully cooked. Remove from water and let them cool before extracting the meat, which should be roughly chopped.

    In a large pot, heat the vegetable oil over medium heat and sauté the onion, garlic, and ginger until softened. Stir in the red curry paste and cook for an additional minute.

    Add the seafood stock, coconut milk, lemongrass, fish sauce, and lime juice, bringing the mixture to a gentle simmer. Allow it to cook for 15 minutes, then remove the lemongrass and blend the soup until smooth.

    Stir in the lobster meat and season with salt and pepper to taste before serving hot, garnished with fresh cilantro.

    Extra Tips:

    For an improved depth of flavor, consider roasting the lobster shells before simmering them in the broth. This adds a delightful umami richness to the bisque.

    Additionally, feel free to adjust the heat level by varying the amount of red curry paste used, and don't hesitate to experiment with other seafood additions like shrimp or scallops for a more decadent dish.

    Serve the bisque with crusty bread or over a bed of jasmine rice for a complete meal experience.

    Lobster Bisque With Sherry

    lobster bisque with sherry

    Lobster bisque with sherry is a luxurious and creamy soup that captures the essence of the sea while adding a touch of sophistication with the inclusion of sherry. This rich and flavorful dish is perfect for special occasions or a cozy night in.

    The sweetness of the lobster paired with the nutty notes of sherry creates a harmonious balance in this velvety soup, making it a true culinary delight.

    Ingredients:

    • 2 lobsters (about 1.5 pounds each)
    • 4 cups fish stock or seafood stock
    • 1 cup dry sherry
    • 1 onion, chopped
    • 2 carrots, chopped
    • 2 celery stalks, chopped
    • 3 cloves garlic, minced
    • 1 cup heavy cream
    • 1/4 cup tomato paste
    • 1 tablespoon olive oil
    • 1 tablespoon butter
    • Salt and pepper to taste
    • Fresh chives or parsley for garnish

    Cooking Instructions:

    Begin by bringing a large pot of salted water to a boil. Add the lobsters and cook for about 8-10 minutes until they turn bright red.

    Remove the lobsters and let them cool. Reserve the cooking liquid and use it to make a seafood stock by simmering with additional water, onion, carrots, and celery for about 30 minutes, then strain.

    In a separate pot, heat olive oil and butter over medium heat. Add onion, carrots, celery, and garlic, and sauté until softened.

    Stir in the tomato paste, then pour in the sherry and allow it to reduce for a few minutes. Add the prepared stock and bring to a simmer.

    Remove the lobster meat from the shells, chop it into bite-sized pieces, and add it to the pot. Finally, stir in the heavy cream and season with salt and pepper.

    Blend the bisque for a smoother texture if desired, and serve hot, garnished with fresh chives or parsley.

    Extra Tips:

    For the best flavor, use fresh live lobsters, and don't discard the shells, as they can be used to make a more robust stock.

    If you prefer a smoother bisque, use an immersion blender or a regular blender to puree the soup until velvety.

    Adjust the seasoning to taste, and feel free to experiment with additional herbs like thyme or bay leaves for extra depth.

    Pair the bisque with crusty bread or a light salad for a complete meal.

    Vegan Lobster Bisque Alternative

    vegan seafood soup recipe

    If you're craving the creamy, rich flavors of lobster bisque but want a vegan alternative, this Vegan Lobster Bisque is the perfect solution. Made with hearty vegetables, coconut milk, and a special blend of spices to mimic the ocean's essence, this dish is both satisfying and guilt-free. With the addition of plant-based ingredients, you can enjoy a velvety soup that's reminiscent of the classic recipe while being entirely animal-free.

    Ingredients:

    • 1 tablespoon olive oil
    • 1 medium onion, diced
    • 2 cloves garlic, minced
    • 2 medium carrots, diced
    • 2 celery stalks, diced
    • 1 red bell pepper, diced
    • 1 cup mushrooms, chopped
    • 4 cups vegetable broth
    • 1 can (14 oz) coconut milk
    • 1 tablespoon tomato paste
    • 1 teaspoon Old Bay seasoning
    • 1 teaspoon smoked paprika
    • Salt and pepper to taste
    • 1 cup cooked and shredded jackfruit (for texture)
    • Fresh parsley, chopped (for garnish)

    To prepare the Vegan Lobster Bisque, heat the olive oil in a large pot over medium heat. Add the diced onion and garlic, sautéing until translucent.

    Then, stir in the carrots, celery, and red bell pepper, cooking until the vegetables soften. Add the mushrooms and cook for another few minutes.

    Next, pour in the vegetable broth, coconut milk, and tomato paste, stirring to combine. Season with Old Bay seasoning, smoked paprika, salt, and pepper.

    Bring the mixture to a gentle simmer and let it cook for about 20 minutes. Finally, add the shredded jackfruit and allow it to heat through.

    Blend the soup with an immersion blender until smooth, or leave it chunky, depending on your preference. Serve hot, garnished with fresh parsley.

    When making this Vegan Lobster Bisque, feel free to adjust the seasoning to suit your taste. You can add a splash of lemon juice for a bit of brightness or include a few drops of seaweed extract to amplify the ocean flavor.

    If you don't have jackfruit on hand, you can substitute it with tofu or tempeh for added protein. This bisque pairs wonderfully with crusty bread or a fresh side salad for a complete meal. Enjoy your delicious and creamy vegan creation!

  • 10 Best Fish Risotto Recipes

    10 Best Fish Risotto Recipes

    If you're looking to spice up your dinner table, fish risotto is a fantastic choice. It's creamy, comforting, and packed with flavors that can truly make your taste buds dance. Think about the rich taste of Smoked Salmon and Asparagus or the zesty twist of Coconut Curry Fish Risotto. Intrigued? Well, get ready, because we've got a list of 10 mouthwatering recipes that'll have you diving right into the kitchen!

    Lemon and Herb Fish Risotto

    Lemon and Herb Fish Risotto is a delightful dish that combines the creamy texture of risotto with the fresh and zesty flavors of lemon and herbs, perfectly complementing the delicate taste of fish. This dish isn't only comforting but also elegant enough for a special dinner.

    Whether you choose to use white fish like cod or a more robust option like salmon, the result is a fragrant and flavorful meal that will impress your family or guests.

    Ingredients:

    • 1 cup Arborio rice
    • 4 cups fish stock
    • 1 cup white wine
    • 1 medium onion, finely chopped
    • 2 cloves garlic, minced
    • 2 tablespoons olive oil
    • 1 tablespoon butter
    • 1 cup fish fillets (cod, salmon, or your choice), cut into bite-sized pieces
    • Zest of 1 lemon
    • Juice of 1 lemon
    • 1/4 cup fresh parsley, chopped
    • 1/4 cup fresh dill, chopped
    • Salt and pepper to taste
    • Grated Parmesan cheese for serving (optional)

    Cooking Instructions:

    In a large saucepan, heat the olive oil and butter over medium heat, then add the chopped onion and garlic, sautéing until softened and translucent.

    Stir in the Arborio rice and cook for 1-2 minutes until the rice is lightly toasted. Gradually add the white wine, stirring constantly until it's absorbed.

    Begin adding the fish stock, one ladle at a time, stirring frequently and allowing the liquid to absorb before adding more. After about 15-20 minutes, when the rice is creamy and al dente, gently fold in the fish pieces, lemon zest, juice, parsley, and dill.

    Cook for an additional 5 minutes, or until the fish is cooked through. Season with salt and pepper to taste.

    Extra Tips:

    To guarantee the best flavor, use homemade or high-quality fish stock, as it greatly improves the taste of the risotto.

    Stirring frequently is key to achieving that creamy texture risotto is known for. If you prefer a richer flavor, consider adding a splash of cream at the end of cooking.

    For a touch of elegance, garnish the dish with extra herbs and a sprinkle of Parmesan cheese before serving. Enjoy this dish fresh, as risotto is best served immediately!

    Creamy Seafood Risotto With Shrimp and Scallops

    seafood risotto with shrimp

    Creamy Seafood Risotto with Shrimp and Scallops is a luxurious dish that brings the flavors of the sea right to your dining table. This dish combines tender shrimp and succulent scallops with a rich, creamy risotto that has been infused with the essence of seafood broth. Perfect for a special occasion or a cozy dinner at home, this risotto is sure to impress both family and friends with its delightful flavors and creamy texture.

    Ingredients:

    • 1 cup Arborio rice
    • 1/2 pound shrimp, peeled and deveined
    • 1/2 pound scallops
    • 4 cups seafood or fish stock
    • 1 small onion, finely chopped
    • 2 cloves garlic, minced
    • 1/2 cup white wine
    • 1/2 cup grated Parmesan cheese
    • 3 tablespoons butter
    • 2 tablespoons olive oil
    • Salt and pepper, to taste
    • Fresh parsley, chopped (for garnish)
    • Lemon wedges (for serving)

    Cooking Instructions:

    In a large saucepan, heat olive oil and 1 tablespoon of butter over medium heat. Add the chopped onion and garlic, sautéing until the onion becomes translucent.

    Stir in the Arborio rice, ensuring each grain is coated with the oil and butter, and cook for 1-2 minutes until slightly toasted. Pour in the white wine and let it simmer until absorbed.

    Gradually add the warm seafood stock, one ladle at a time, stirring continuously until the liquid is mostly absorbed before adding more. After about 15 minutes, when the rice is creamy and al dente, gently fold in the shrimp and scallops, cooking until the seafood is just opaque.

    Remove from heat, stir in the remaining butter and Parmesan cheese, and season with salt and pepper to taste.

    Extra Tips:

    For the best results, use high-quality seafood and homemade or good-quality stock, as this will greatly improve the flavor of your risotto.

    Always keep your stock warm while cooking; adding cold stock will slow down the cooking process. Remember to stir the risotto continuously to release the starch from the rice, which creates that creamy texture.

    If you prefer, you can also add some fresh herbs like basil or dill for a different flavor profile, and lemon juice can be added before serving for a revitalizing zing.

    Enjoy your delicious seafood risotto!

    Tomato and Basil Fish Risotto

    Tomato and Basil Fish Risotto is a delightful dish that combines the creaminess of traditional risotto with the fresh flavors of tomatoes and basil, improved by tender pieces of fish. This recipe is perfect for a cozy dinner and showcases the beautiful harmony of seafood and herbs.

    The slow-cooked rice absorbs all the flavors, creating a comforting and satisfying meal that's sure to impress family and friends.

    Ingredients:

    • 1 cup Arborio rice
    • 1 tablespoon olive oil
    • 1 small onion, finely chopped
    • 2 garlic cloves, minced
    • 1 can (14 oz) diced tomatoes
    • 4 cups fish stock (or vegetable stock)
    • 1 cup white wine
    • 1 cup cooked fish (such as cod or salmon), flaked
    • 1/2 cup grated Parmesan cheese
    • 1/4 cup fresh basil leaves, chopped
    • Salt and pepper to taste
    • Lemon wedges for serving

    Instructions:

    In a large saucepan, heat the olive oil over medium heat and sauté the onion until it becomes translucent.

    Add the minced garlic and cook for an additional minute. Stir in the Arborio rice, coating it with the oil, then pour in the white wine, allowing it to absorb completely.

    Gradually add the fish stock, one ladle at a time, stirring frequently, and wait for the liquid to be absorbed before adding more.

    After about 15 minutes, add the diced tomatoes and continue cooking until the rice is creamy and al dente.

    Gently fold in the flaked fish, grated Parmesan, and chopped basil, then season with salt and pepper to taste.

    Extra Tips:

    For an even richer flavor, consider adding a splash of lemon juice or zest to the risotto before serving.

    Make sure to stir frequently to prevent the rice from sticking and to achieve that creamy texture characteristic of risotto.

    If you prefer a lighter version, you can substitute the creaminess with a little more stock and skip the cheese, while still enjoying the vibrant flavors of the dish.

    Finally, always taste and adjust the seasoning as needed, and feel free to garnish with additional fresh basil and a drizzle of olive oil for an extra touch!

    Saffron-Infused Risotto With White Fish

    saffron risotto with fish

    Saffron-Infused Risotto with White Fish is a luxurious and comforting dish that brings together the creamy texture of risotto with the delicate flavors of white fish. This recipe emphasizes the use of saffron, which not only imparts a beautiful golden hue to the risotto but also adds a distinct aromatic quality that raises the dish. Perfect for a special occasion or a cozy dinner, this risotto pairs wonderfully with a crisp white wine and a sprinkle of fresh herbs.

    Ingredients:

    • 1 cup Arborio rice
    • 4 cups fish stock
    • 1 medium onion, finely chopped
    • 2 cloves garlic, minced
    • 1/2 cup dry white wine
    • 1/4 tsp saffron threads
    • 1 cup white fish fillets (such as cod or halibut), diced
    • 1/2 cup grated Parmesan cheese
    • 2 tbsp olive oil
    • 2 tbsp butter
    • Salt and pepper, to taste
    • Fresh parsley, chopped (for garnish)
    • Lemon wedges (for serving)

    Cooking Instructions:

    In a saucepan, warm the fish stock over low heat and add the saffron threads to infuse the stock with color and flavor.

    In a separate large skillet, heat the olive oil and 1 tablespoon of butter over medium heat. Add the chopped onion and garlic, cooking until softened and translucent.

    Stir in the Arborio rice, allowing it to toast slightly for about 2 minutes. Pour in the white wine, stirring until it's mostly absorbed.

    Gradually add the warm saffron-infused fish stock, one ladle at a time, stirring continuously until the liquid is absorbed before adding more. Continue this process for about 18-20 minutes, or until the rice is creamy and al dente.

    Gently fold in the diced white fish during the final 5 minutes of cooking, allowing it to cook through. Ultimately, stir in the remaining butter and grated Parmesan cheese, seasoning with salt and pepper to taste.

    Extra Tips:

    When making saffron-infused risotto, be sure to stir frequently to release the starches from the Arborio rice, which is key to achieving a creamy consistency.

    If you want to improve the flavor of the dish, consider adding a pinch of red pepper flakes or a splash of lemon juice for brightness.

    For an even richer taste, feel free to substitute half of the fish stock with white wine.

    Finally, let the risotto rest for a minute before serving; this will help it reach the perfect creamy texture. Garnish with fresh parsley and serve with lemon wedges to brighten the dish further. Enjoy!

    Smoked Salmon and Asparagus Risotto

    Smoked Salmon and Asparagus Risotto is a deliciously creamy dish that combines the rich flavors of smoked salmon with the freshness of asparagus. This risotto is perfect for a special occasion or a cozy weeknight dinner, and it exemplifies the beauty of Italian cuisine with its simple yet indulgent ingredients.

    The process may seem intimidating, but with a little patience and attention, you'll create a comforting and impressive meal that will leave your taste buds satisfied.

    Ingredients:

    • 1 cup Arborio rice
    • 4 cups vegetable broth
    • 1 cup dry white wine
    • 1 small onion, finely chopped
    • 2 cloves garlic, minced
    • 1 tablespoon olive oil
    • 1 tablespoon butter
    • 1 bunch asparagus, trimmed and cut into 1-inch pieces
    • 4 ounces smoked salmon, sliced
    • 1/2 cup grated Parmesan cheese
    • Salt and pepper to taste
    • Fresh dill or chives for garnish (optional)

    Cooking Instructions:

    In a large saucepan, heat the vegetable broth over low heat and keep it warm.

    In another pan, heat the olive oil and butter over medium heat. Add the chopped onion and garlic, sautéing until softened.

    Stir in the Arborio rice, cooking for about 2 minutes until it becomes translucent.

    Pour in the white wine and let it simmer until mostly absorbed. Gradually add the warm vegetable broth, one ladle at a time, stirring frequently and allowing each addition to be absorbed before adding more.

    After about 15 minutes, add the asparagus pieces and continue to stir and cook until the rice is creamy and al dente, about 5 more minutes.

    Remove from heat, fold in the smoked salmon and Parmesan cheese, and season with salt and pepper to taste.

    Extra Tips:

    To achieve the best texture for your risotto, make sure to stir it often, as this helps release the starches from the rice, creating that creamy consistency.

    Additionally, using high-quality smoked salmon will improve the dish's flavor greatly. If you prefer a lighter version, you can substitute the butter with more olive oil and use a low-fat cheese.

    Finally, serve the risotto immediately for the best taste, and consider garnishing with fresh herbs to enrich the presentation and flavor.

    Spicy Shrimp and Fish Risotto

    spicy seafood risotto dish

    Spicy shrimp and fish risotto is a delightful dish that combines the creamy texture of arborio rice with the vibrant flavors of seafood and spices. This recipe is perfect for seafood lovers looking to indulge in a hearty meal that's both satisfying and full of flavor. The addition of shrimp and fish creates a rich, savory base that's lifted with a hint of spice, making it an excellent choice for a cozy dinner or a special occasion.

    Ingredients:

    • 1 cup arborio rice
    • 1 pound shrimp, peeled and deveined
    • 1 cup white fish fillets, cut into bite-sized pieces (such as cod or tilapia)
    • 4 cups seafood or vegetable broth
    • 1 small onion, finely chopped
    • 2 cloves garlic, minced
    • 1/2 cup dry white wine
    • 1 cup diced tomatoes (canned or fresh)
    • 1 teaspoon paprika
    • 1/2 teaspoon red pepper flakes (adjust to taste)
    • 2 tablespoons olive oil
    • 1 tablespoon butter
    • Salt and pepper to taste
    • Fresh parsley, chopped (for garnish)
    • Lemon wedges (for serving)

    Instructions:

    In a large saucepan, heat the olive oil over medium heat and sauté the chopped onion and minced garlic until they're translucent.

    Stir in the arborio rice and cook for an additional 2 minutes until the rice is lightly toasted.

    Pour in the white wine and allow it to evaporate, stirring continuously.

    Gradually add the broth, one ladle at a time, stirring constantly until the liquid is absorbed before adding more.

    After about 10 minutes, add the diced tomatoes, paprika, and red pepper flakes.

    Continue to cook for another 5 minutes, then add the shrimp and fish pieces.

    Cook until the seafood is opaque and cooked through, about 5-7 minutes.

    Stir in the butter and season with salt and pepper to taste.

    Serve hot, garnished with fresh parsley and lemon wedges.

    Extra Tips:

    For an extra layer of flavor, consider adding a splash of lemon juice or a sprinkle of lemon zest at the end of cooking.

    You can also customize the spice level by adjusting the amount of red pepper flakes or adding a dash of hot sauce.

    To improve the creaminess of the risotto, you might add a little grated Parmesan cheese.

    Always remember to keep your broth warm on a separate burner, as this helps the rice cook evenly and guarantees a creamy texture.

    Enjoy your delicious spicy shrimp and fish risotto!

    Mediterranean Fish Risotto With Olives and Capers

    mediterranean fish risotto recipe

    Mediterranean Fish Risotto with Olives and Capers is a delightful dish that combines the creamy texture of risotto with the fresh flavors of the Mediterranean. This recipe highlights the savory notes of fish, briny olives, and tangy capers, all simmered to perfection.

    It's a comforting, satisfying meal that can be enjoyed on any occasion, bringing a taste of the Mediterranean right to your kitchen.

    Ingredients:

    • 1 cup Arborio rice
    • 4 cups fish stock
    • 1 pound white fish fillets (such as cod or halibut), cut into bite-sized pieces
    • 1 small onion, finely chopped
    • 2 cloves garlic, minced
    • 1/2 cup dry white wine
    • 1/2 cup pitted Kalamata olives, sliced
    • 2 tablespoons capers, rinsed and drained
    • 1/4 cup fresh parsley, chopped
    • 2 tablespoons olive oil
    • Salt and pepper to taste
    • Lemon wedges for serving

    Instructions:

    In a large saucepan, heat the olive oil over medium heat and sauté the onion until translucent, about 5 minutes.

    Add the garlic and cook for an additional minute. Stir in the Arborio rice and toast for 2 minutes, ensuring the grains are well-coated with oil.

    Pour in the white wine and let it simmer until mostly absorbed. Gradually add the warm fish stock, one ladle at a time, stirring continuously and allowing each addition to be absorbed before adding the next.

    After about 15 minutes, stir in the fish pieces, olives, and capers, cooking until the fish is done and the risotto is creamy and al dente, about 5 more minutes.

    Stir in fresh parsley, and season with salt and pepper to taste.

    Extra Tips:

    To boost the flavors of your Mediterranean Fish Risotto, consider adding a splash of lemon juice or zest for extra brightness.

    Using homemade fish stock will improve the depth of the dish, but store-bought can work just as well in a pinch.

    Be mindful not to overcook the fish; it should be flaky yet tender.

    For a richer flavor, you can also incorporate a tablespoon of butter at the end for added creaminess.

    Enjoy your risotto with a side of crusty bread and a fresh salad for a complete meal!

    Coconut Curry Fish Risotto

    coconut infused fish risotto

    Coconut Curry Fish Risotto is a delightful fusion dish that combines the creamy texture of traditional risotto with the aromatic flavors of coconut milk and curry. This recipe is perfect for those looking to enjoy a comforting bowl of risotto while also indulging in the vibrant spices of Southeast Asian cuisine. The addition of tender fish fillets makes this dish not only hearty but also nutritious, making it an excellent choice for a satisfying dinner.

    Ingredients:

    • 1 cup Arborio rice
    • 1 tablespoon olive oil
    • 1 onion, finely chopped
    • 2 cloves garlic, minced
    • 1 tablespoon curry powder
    • 1 can (14 oz) coconut milk
    • 4 cups fish stock (or vegetable stock)
    • 1 pound white fish fillets (such as cod or tilapia), cut into bite-sized pieces
    • 1 cup frozen peas
    • Salt and pepper to taste
    • Fresh cilantro or basil for garnish
    • Lime wedges for serving

    Instructions:

    In a large saucepan, heat the olive oil over medium heat. Add the chopped onion and minced garlic, sautéing until the onion becomes translucent.

    Stir in the curry powder and Arborio rice, allowing the rice to toast slightly for about 2 minutes. Gradually pour in the fish stock, one ladle at a time, stirring continuously until the liquid is absorbed before adding more.

    Once the rice is creamy and al dente, stir in the coconut milk and fish pieces. Cook for an additional 5-7 minutes, until the fish is cooked through and the risotto reaches a creamy consistency.

    Finally, fold in the frozen peas and season with salt and pepper to taste.

    Extra Tips:

    For the best results, use freshly made fish stock for a deeper flavor, but store-bought stock will work in a pinch.

    Be sure to stir the risotto frequently to prevent it from sticking to the bottom of the pan. If you prefer a spicier kick, consider adding a pinch of red pepper flakes or a dash of hot sauce.

    Ultimately, don't forget to garnish with fresh herbs and serve with lime wedges for a revitalizing brightness that complements the richness of the dish. Enjoy your Coconut Curry Fish Risotto!

    Garlic Butter Fish Risotto

    garlic butter fish risotto

    Garlic Butter Fish Risotto is a delightful and creamy dish that combines the richness of risotto with the delicate flavors of fish, all improved by the savory goodness of garlic butter. This recipe is perfect for a cozy dinner or an impressive dish to serve guests.

    The combination of Arborio rice and fresh fish creates a satisfying meal that's both comforting and flavorful, while the garlic butter adds an aromatic touch that raises the dish to a whole new level.

    Ingredients:

    • 1 cup Arborio rice
    • 4 cups fish stock (or vegetable stock)
    • 1 pound white fish fillets (such as cod or haddock), cut into bite-sized pieces
    • 4 tablespoons unsalted butter
    • 3 cloves garlic, minced
    • 1 small onion, finely chopped
    • 1/2 cup dry white wine
    • 1/2 cup grated Parmesan cheese
    • Salt and pepper to taste
    • Fresh parsley, chopped (for garnish)
    • Lemon wedges (for serving)

    Cooking Instructions:

    In a large saucepan, melt 2 tablespoons of butter over medium heat and add the chopped onion, cooking until translucent.

    Stir in the minced garlic and cook for an additional minute, being careful not to burn it.

    Add the Arborio rice to the pan, stirring to coat the rice with the butter, and toast for about 2-3 minutes.

    Pour in the white wine and cook until it's mostly absorbed.

    Gradually add the fish stock one ladle at a time, stirring frequently, and allowing each addition to be absorbed before adding the next.

    After about 15 minutes, when the rice is creamy but still al dente, gently fold in the fish pieces and cook for another 5 minutes until the fish is cooked through.

    Finish by stirring in the remaining butter and Parmesan cheese, and season with salt and pepper to taste.

    Extra Tips:

    For the best results, use homemade fish stock if possible, as it improves the flavor of the risotto considerably.

    Be mindful not to overcook the fish; it should be tender and flaky when added to the risotto.

    You can add a splash of lemon juice or a sprinkle of lemon zest at the end for a revitalizing brightness.

    Additionally, feel free to mix in seasonal vegetables like peas or asparagus for added texture and nutrition.

    Serve your Garlic Butter Fish Risotto hot, garnished with fresh parsley and lemon wedges for a bright finish.

    Pea and Mint Fish Risotto

    minty pea fish risotto

    Pea and Mint Fish Risotto is a delightful and invigorating dish that brings together the sweetness of peas, the freshness of mint, and tender, flaky fish, all enveloped in creamy Arborio rice. This risotto is perfect for a light dinner or a special occasion, as it combines vibrant flavors and textures, making each bite a celebration of spring.

    The addition of fish not only raises the protein content but also adds a lovely depth of flavor, ensuring that this dish is both satisfying and nourishing.

    Ingredients:

    • 1 cup Arborio rice
    • 1 tablespoon olive oil
    • 1 small onion, finely chopped
    • 2 cloves garlic, minced
    • 4 cups vegetable or fish stock
    • 1 cup frozen peas
    • 1 cup fresh fish fillets (such as cod or haddock), cut into bite-sized pieces
    • 1/2 cup dry white wine
    • 1/4 cup fresh mint leaves, chopped
    • 1/2 cup grated Parmesan cheese
    • Salt and pepper to taste
    • Lemon wedges for serving

    Cooking Instructions:

    In a large saucepan, heat the olive oil over medium heat and sauté the chopped onion until it becomes translucent.

    Add the minced garlic and cook for another minute until fragrant. Stir in the Arborio rice, ensuring each grain is coated in oil, and cook for a couple of minutes until slightly toasted.

    Pour in the white wine and let it simmer until absorbed. Gradually add the warm stock, one ladle at a time, stirring frequently until the liquid is mostly absorbed before adding more.

    After about 15 minutes of cooking, add the frozen peas and fish pieces, stirring gently until the fish is cooked through and the rice is creamy, about 5 more minutes.

    Remove from heat and stir in the chopped mint and Parmesan cheese, seasoning with salt and pepper to taste.

    Extra Tips:

    For the best flavor, make sure to use a quality stock, as it will greatly improve the risotto.

    You can also experiment with different types of fish, such as salmon or prawns, depending on your preference.

    If you find the risotto too thick, simply add a bit more stock or water to reach your desired consistency.

    Serve the dish hot with a squeeze of fresh lemon juice for a zesty finish and garnish with extra mint leaves for a pop of color and freshness.

    Enjoy your meal!

  • 10 Best Tuna Recipes

    10 Best Tuna Recipes

    Tuna's got this incredible versatility that makes it a superstar in the kitchen. Whether you're whipping up a classic tuna salad or trying something new like spicy tuna poke bowls, there's a recipe for every taste. Want to impress your friends with grilled tuna skewers or brighten up dinner with tuna tacos? You'll love how simple and delicious these meals can be. Let's explore the top ten tuna recipes that'll inspire your next meal!

    Classic Tuna Salad

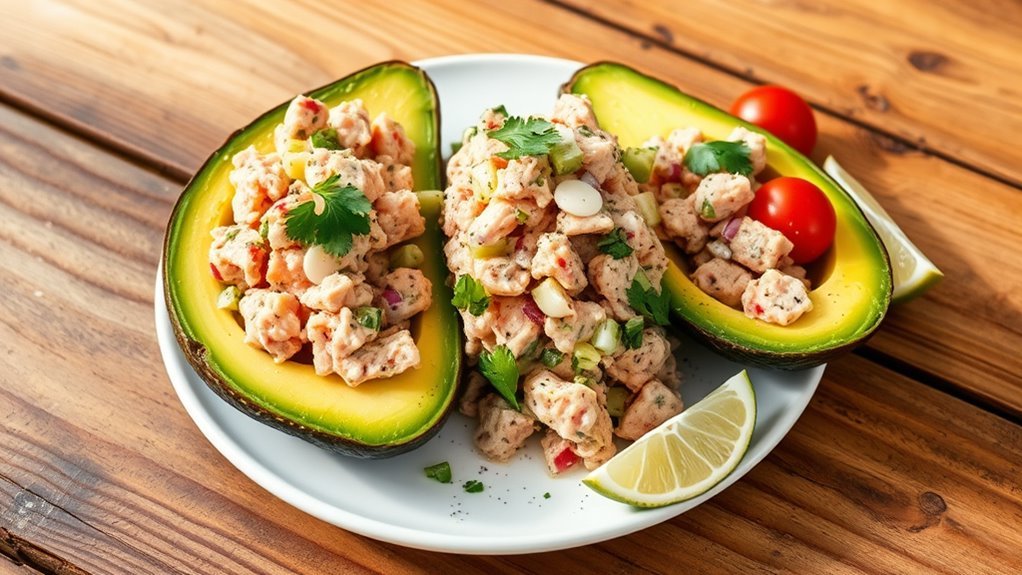
    Classic Tuna Salad is a simple yet delicious dish that's perfect for lunch or as a light dinner option. This recipe combines flaky tuna with crisp vegetables, creamy mayonnaise, and zesty seasonings to create a revitalizing salad that can be enjoyed on its own, in a sandwich, or served on a bed of greens.

    Whether you're packing it for a picnic or enjoying it at home, this classic tuna salad is sure to satisfy.

    Ingredients:

    • 2 cans (5 oz each) tuna in water, drained
    • 1/4 cup mayonnaise
    • 1 tablespoon Dijon mustard
    • 1/4 cup celery, finely chopped
    • 1/4 cup red onion, finely chopped
    • 1 tablespoon dill pickles, finely chopped (optional)
    • Salt and pepper to taste
    • Fresh parsley, chopped (for garnish)
    • Lettuce leaves or bread (for serving)

    Instructions:

    In a mixing bowl, combine the drained tuna, mayonnaise, and Dijon mustard, stirring until well blended.

    Add the finely chopped celery, red onion, and dill pickles (if using), then mix everything together until evenly distributed.

    Season the mixture with salt and pepper to taste.

    Once the salad is well combined, serve it on a bed of lettuce leaves or spread it between slices of bread to make a sandwich.

    Garnish with freshly chopped parsley for an added touch.

    Extra Tips:

    For a healthier twist, you can substitute Greek yogurt for mayonnaise, which adds creaminess while reducing calories.

    Feel free to customize the salad by adding other ingredients like chopped bell peppers, hard-boiled eggs, or even a squeeze of lemon juice for an extra zing.

    Tuna salad can be made ahead of time and stored in the refrigerator for up to two days, making it a convenient option for meal prep.

    Tuna Casserole

    creamy tuna noodle dish

    Tuna casserole is a comforting and easy-to-make dish that brings together the delightful flavors of tuna, pasta, and creamy sauce, creating a satisfying meal perfect for any night of the week. This dish isn't only quick to prepare but also offers a great way to use pantry staples, making it a go-to recipe for busy families.

    With its cheesy goodness and crunch from the topping, it's sure to become a favorite in your household.

    Ingredients:

    • 2 cups egg noodles (uncooked)
    • 1 can (15 oz) tuna, drained
    • 1 can (10.5 oz) cream of mushroom soup
    • 1/2 cup milk
    • 1 cup frozen peas
    • 1 cup shredded cheddar cheese
    • 1/2 cup breadcrumbs
    • 1 tablespoon olive oil
    • Salt and pepper to taste

    To prepare the tuna casserole, start by preheating your oven to 350°F (175°C). Cook the egg noodles according to the package instructions until al dente, then drain and set aside.

    In a large mixing bowl, combine the drained tuna, cream of mushroom soup, milk, frozen peas, and half of the shredded cheddar cheese, mixing well. Gently fold in the cooked egg noodles, and season with salt and pepper.

    Transfer the mixture into a greased 9×13 inch baking dish. In a separate bowl, mix the breadcrumbs with olive oil and sprinkle the mixture evenly over the casserole. Top with the remaining cheddar cheese, then bake in the preheated oven for 25-30 minutes, or until the cheese is melted and bubbly.

    When making tuna casserole, feel free to customize it according to your preferences. You can add sautéed onions, bell peppers, or even corn for extra flavor and nutrition.

    If you prefer a fresher taste, consider using fresh herbs like parsley or dill. Additionally, for a creamier texture, you can substitute the cream of mushroom soup with a homemade cheese sauce.

    Finally, this dish can be made ahead of time and stored in the fridge, making it a fantastic option for meal prep. Just make sure to cover it well and adjust the baking time if baking from cold.

    Spicy Tuna Poke Bowl

    A Spicy Tuna Poke Bowl is a delightful, vibrant dish that combines fresh sushi-grade tuna with a variety of toppings, creating a perfect balance of flavors and textures.

    This dish isn't only visually appealing but also versatile, allowing you to customize it according to your taste preferences. With a spicy sauce that adds a kick and a medley of fresh vegetables, this poke bowl is ideal for a light lunch or dinner, satisfying your cravings while keeping it healthy.

    Ingredients:

    • 1 lb sushi-grade tuna, diced
    • 2 cups cooked sushi rice
    • 1 avocado, sliced
    • 1 cucumber, thinly sliced
    • 1 carrot, julienned
    • 2 green onions, sliced
    • 1 tablespoon sesame seeds
    • 2 tablespoons soy sauce
    • 1 tablespoon sesame oil
    • 1 tablespoon Sriracha (or to taste)
    • 1 teaspoon rice vinegar
    • Seaweed salad (optional)

    Instructions:

    In a mixing bowl, combine the diced tuna, soy sauce, sesame oil, Sriracha, and rice vinegar, adjusting the spice level to your preference.

    Let the tuna marinate for about 10-15 minutes to absorb the flavors. While the tuna is marinating, prepare your sushi rice according to package instructions and let it cool slightly.

    Once ready, assemble your poke bowl by placing a scoop of sushi rice at the bottom, followed by the marinated tuna, avocado slices, cucumber, carrot, and green onions.

    Sprinkle sesame seeds on top for added crunch and garnish with seaweed salad if desired.

    Extra Tips:

    When selecting tuna for your poke bowl, confirm it's sushi-grade to guarantee safety and quality.

    You can also experiment with other toppings such as radishes, edamame, or pickled vegetables to add more variety.

    For an extra flavor boost, consider drizzling a little more Sriracha or a spicy mayo on top before serving.

    Serve the poke bowl immediately for the freshest taste, and enjoy the vibrant combination of ingredients!

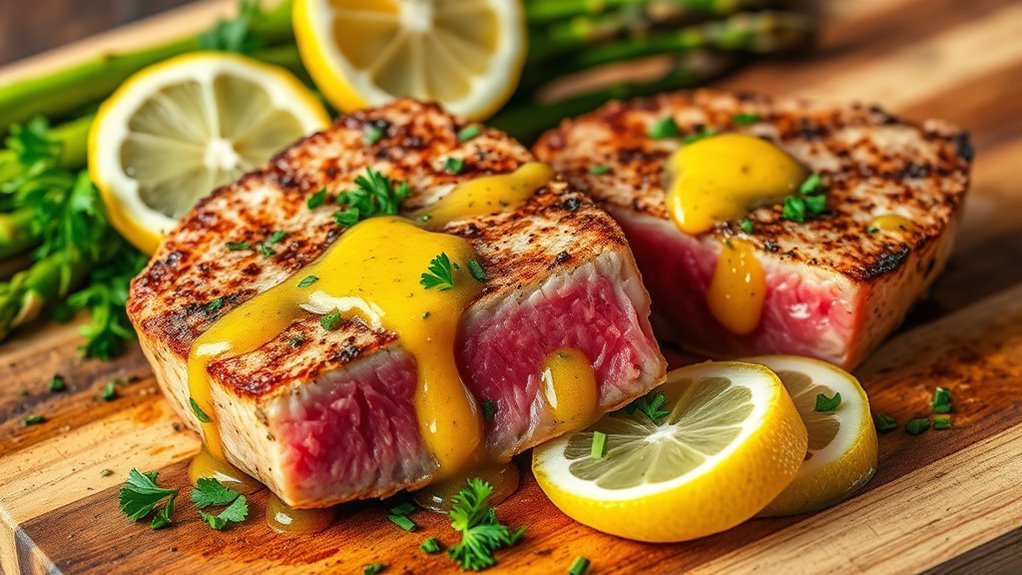
    Lemon Garlic Tuna Steaks

    lemon garlic infused tuna

    Lemon Garlic Tuna Steaks are a delicious and healthy seafood option that brings together the zesty flavors of lemon and the aromatic essence of garlic. This dish is perfect for a quick weeknight dinner or a special gathering with friends and family.

    The combination of marinated tuna steaks and a hot grill or skillet creates a delightful crust while keeping the inside tender and flaky. Serve with a side of steamed vegetables or a fresh salad for a complete meal that's sure to impress.

    Ingredients:

    • 2 tuna steaks (about 6 oz each)
    • 2 tablespoons olive oil
    • 2 tablespoons fresh lemon juice
    • 3 cloves garlic, minced
    • Salt and pepper to taste
    • Lemon wedges for serving
    • Fresh parsley, chopped (optional for garnish)

    Instructions:

    In a small bowl, whisk together the olive oil, lemon juice, minced garlic, salt, and pepper to create a marinade.

    Place the tuna steaks in a shallow dish and pour the marinade over them, making sure to coat both sides. Allow the tuna to marinate for at least 30 minutes at room temperature.

    Preheat a grill or skillet over medium-high heat. Once hot, place the marinated tuna steaks on the grill or skillet, cooking for about 2-3 minutes on each side for medium-rare, or longer if you prefer a more well-done steak.

    Remove from heat and let rest for a few minutes before serving with lemon wedges and sprinkling with fresh parsley if desired.

    Extra Tips:

    When cooking tuna steaks, it's important not to overcook them, as they can become dry and tough. Aim for a nice sear on the outside while keeping the center slightly pink for ideal flavor and texture.

    If you don't have fresh lemon juice, bottled juice can work in a pinch, but fresh is always best. Additionally, consider adding a pinch of red pepper flakes to the marinade for a bit of heat, or substitute lime juice for a different citrus twist.

    Enjoy your Lemon Garlic Tuna Steaks with your favorite sides for a satisfying meal!

    Mediterranean Tuna Pasta

    Mediterranean Tuna Pasta is a delightful and quick dish that brings together the fresh flavors of the Mediterranean. This recipe combines al dente pasta with tuna, olives, capers, and a medley of vibrant vegetables, all tossed in a light olive oil and lemon dressing. Perfect for a weeknight dinner or a lunch that transports you to sunny shores, this dish is both satisfying and healthy.

    Ingredients:

    • 8 oz pasta (spaghetti or penne)
    • 1 can (5 oz) tuna in olive oil, drained
    • 1 cup cherry tomatoes, halved
    • 1/2 cup black olives, pitted and sliced
    • 2 tablespoons capers, rinsed
    • 2 cloves garlic, minced
    • 1/4 cup fresh parsley, chopped
    • Juice of 1 lemon
    • 1/4 cup olive oil
    • Salt and pepper to taste
    • Grated Parmesan cheese (optional)

    To prepare the Mediterranean Tuna Pasta, start by cooking the pasta according to package instructions until al dente. In a large skillet, heat the olive oil over medium heat and sauté the minced garlic until fragrant, about 1 minute.

    Add the cherry tomatoes, olives, and capers, cooking until the tomatoes soften slightly. Once the pasta is cooked, drain it and add it to the skillet along with the drained tuna. Toss everything together gently to combine, then add lemon juice, parsley, salt, and pepper.

    Stir until well mixed, allowing the flavors to meld for a couple of minutes before serving.

    When cooking this dish, feel free to customize it by adding other Mediterranean ingredients such as artichoke hearts, bell peppers, or spinach for added nutrition and flavor. If you prefer a creamier texture, consider adding a splash of cream or a dollop of Greek yogurt.

    Always taste before serving to adjust the seasoning, and serve it warm or at room temperature for a versatile meal option. Enjoy with a sprinkle of Parmesan cheese for an extra touch of richness!

    Tuna Melt Sandwich

    delicious tuna melt sandwich

    Tuna melt sandwiches are a classic comfort food that marry the rich flavors of tuna salad with the gooey goodness of melted cheese, all nestled between two slices of crispy bread. This dish isn't only quick and easy to prepare but also versatile, allowing you to incorporate your favorite ingredients to customize it to your liking. Perfect for lunch or a quick dinner, a tuna melt is sure to satisfy your cravings.

    Ingredients:

    • 1 can of tuna, drained
    • 2 tablespoons mayonnaise
    • 1 tablespoon Dijon mustard
    • 1 tablespoon chopped red onion
    • 1 tablespoon chopped celery
    • Salt and pepper, to taste
    • 4 slices of bread (your choice)
    • 4 slices of cheese (cheddar or American work well)
    • Butter, for spreading

    Cooking Instructions:

    In a medium bowl, combine the drained tuna, mayonnaise, Dijon mustard, chopped red onion, and chopped celery. Mix well and season with salt and pepper to taste.

    Heat a skillet over medium heat and butter one side of each slice of bread. On the unbuttered side, place a slice of cheese, followed by a generous scoop of the tuna mixture, and top with another slice of cheese before placing another slice of bread on top (buttered side facing out).

    Cook in the skillet for about 3-4 minutes, or until the bread is golden brown and crispy, then carefully flip and cook for another 3-4 minutes on the other side until the cheese is melted and the bread is golden.

    Extra Tips:

    For an extra flavor boost, try adding a splash of lemon juice or a sprinkle of dill to the tuna mixture. You can also experiment with different types of cheese or add sliced tomatoes or pickles for additional texture and taste.

    If you're looking for a healthier option, use whole grain bread and Greek yogurt instead of mayonnaise. Remember to keep an eye on the sandwich while it cooks to prevent burning, and feel free to cover the skillet with a lid for a minute or two to help the cheese melt evenly.

    Enjoy your delicious tuna melt!

    Tuna Niçoise Salad

    tuna salad with vegetables

    Tuna Niçoise Salad is a classic French dish that beautifully combines fresh ingredients with the robust flavor of tuna, making it a perfect meal for lunch or a light dinner. This vibrant salad typically features a variety of vegetables, olives, and hard-boiled eggs, all dressed in a zesty vinaigrette.

    The beauty of this dish lies in its versatility, allowing you to use fresh or canned tuna and to adjust the vegetables according to the season or your personal preference.

    Ingredients:

    • 2 cups mixed salad greens
    • 1 cup green beans, trimmed
    • 2 medium tomatoes, quartered
    • 1 medium cucumber, sliced
    • 1/2 cup black olives, pitted and halved
    • 2 hard-boiled eggs, quartered
    • 1 can (5 oz) tuna in olive oil, drained
    • 3 tablespoons extra virgin olive oil
    • 1 tablespoon red wine vinegar
    • 1 teaspoon Dijon mustard
    • Salt and pepper to taste

    Instructions:

    Start by blanching the green beans in boiling salted water for about 3-4 minutes until they're bright green and tender-crisp, then immediately transfer them to an ice bath to stop the cooking process.

    In a large salad bowl, combine the mixed greens, tomatoes, cucumber, olives, and green beans. Gently flake the drained tuna and add it to the salad, along with the quartered hard-boiled eggs.

    In a small bowl, whisk together the olive oil, red wine vinegar, Dijon mustard, salt, and pepper. Drizzle the dressing over the salad, toss gently to combine, and serve immediately.

    Extra Tips:

    For the best flavor, use high-quality olive oil and fresh vegetables. You can also experiment with adding ingredients like roasted red peppers or artichoke hearts for extra flavor.

    If you prefer, substitute fresh tuna steak for canned tuna, searing it briefly on both sides to keep it tender and juicy. This salad can be made in advance; just keep the dressing separate until serving to prevent the greens from wilting.

    Tuna Tacos With Mango Salsa

    tuna tacos with mango salsa

    Tuna tacos with mango salsa are a vibrant and invigorating twist on traditional tacos, perfect for a quick weeknight dinner or a fun weekend gathering. The combination of seared tuna, crunchy cabbage, and sweet mango salsa wrapped in soft tortillas creates a delightful explosion of flavors and textures.

    This dish not only highlights the deliciousness of fresh tuna but also incorporates the tropical sweetness of mango, making it a favorite for seafood lovers and taco enthusiasts alike.

    Ingredients:

    • 2 fresh tuna steaks (about 6 oz each)
    • 1 tbsp olive oil
    • 1 tsp chili powder
    • 1 tsp cumin
    • Salt and pepper to taste
    • 4 small corn or flour tortillas
    • 1 cup shredded cabbage
    • 1 ripe mango, diced
    • 1/2 red onion, finely chopped
    • 1 jalapeño, seeded and minced
    • Juice of 1 lime
    • Fresh cilantro, chopped (for garnish)

    Cooking Instructions:

    Start by heating the olive oil in a skillet over medium-high heat.

    Season the tuna steaks with chili powder, cumin, salt, and pepper. Once the skillet is hot, sear the tuna steaks for about 2-3 minutes on each side for medium-rare, or longer if you prefer them cooked through.

    Remove from heat and let them rest for a few minutes before slicing thinly.

    Meanwhile, in a mixing bowl, combine diced mango, red onion, jalapeño, lime juice, and a pinch of salt to create the salsa.

    Warm the tortillas in a dry skillet or microwave until pliable.

    To assemble the tacos, place a portion of shredded cabbage on each tortilla, top with sliced tuna, and finish with a generous spoonful of mango salsa.

    Garnish with fresh cilantro before serving.

    Extra Tips:

    For the best flavor, opt for sushi-grade tuna and make sure not to overcook it; a sear on the outside while keeping the inside rare elevates the dish's freshness.

    You can customize the salsa by adding ingredients like avocado or diced bell pepper for extra crunch and flavor.

    If you want a spicy kick, leave some seeds in the jalapeño or add a dash of hot sauce to the salsa.

    Enjoy these tacos with a side of tortilla chips and your favorite dipping sauce for a complete meal!

    Tuna Stuffed Avocado

    avocado filled with tuna

    Tuna stuffed avocado is a delicious and nutritious dish that combines the rich creaminess of avocado with the protein-packed goodness of tuna. This simple yet satisfying recipe is perfect for a light lunch, a healthy snack, or even a party appetizer.

    With minimal prep time and a handful of ingredients, you can whip up this dish in no time, making it an excellent choice for busy days or when you want something quick and healthy.

    Ingredients:

    • 2 ripe avocados
    • 1 can (5 oz) tuna, drained
    • 2 tablespoons mayonnaise
    • 1 tablespoon Dijon mustard
    • 1 tablespoon lemon juice
    • 1/4 cup diced celery
    • 1/4 cup diced red onion
    • Salt and pepper to taste
    • Fresh parsley or cilantro for garnish (optional)

    Instructions:

    Begin by cutting the avocados in half and removing the pits. Scoop out a small portion of the flesh to create enough space for the tuna filling, and set the scooped avocado aside for later use.

    In a mixing bowl, combine the drained tuna, mayonnaise, Dijon mustard, lemon juice, diced celery, diced red onion, and the reserved avocado flesh. Mix well until all ingredients are thoroughly combined and season with salt and pepper to taste.

    Spoon the tuna mixture into the hollowed-out avocado halves, and garnish with fresh parsley or cilantro if desired.

    Extra Tips:

    For added flavor, consider incorporating ingredients like chopped pickles, capers, or even a dash of hot sauce into the tuna mixture.

    If you prefer a healthier option, substitute Greek yogurt for mayonnaise. Make sure to choose ripe avocados for the best texture and taste, and if you have leftovers, store the filling separately from the avocado halves to keep them fresh longer.

    Enjoy your tuna stuffed avocado as a rejuvenating meal that's both flavorful and wholesome!

    Grilled Tuna Skewers

    tasty grilled tuna skewers

    Grilled tuna skewers are a delicious and easy way to enjoy this flavorful fish, perfect for summer barbecues or a quick weeknight dinner. Marinated in a zesty mixture of herbs and spices, these skewers bring out the natural sweetness of the tuna while adding a smoky char from the grill.

    Pair them with a fresh salad or some grilled vegetables for a complete meal that's both healthy and satisfying.

    Ingredients:

    • 1 pound fresh tuna steak, cut into 1-inch cubes
    • 2 tablespoons olive oil
    • 2 tablespoons soy sauce
    • 1 tablespoon lemon juice
    • 2 cloves garlic, minced
    • 1 teaspoon fresh ginger, grated
    • 1 teaspoon honey
    • Salt and pepper, to taste
    • Skewers (soaked in water if wooden)

    Cooking Instructions:

    In a mixing bowl, combine olive oil, soy sauce, lemon juice, minced garlic, grated ginger, honey, salt, and pepper to create a marinade.

    Add the tuna cubes to the marinade, making sure they're well-coated, and let them marinate in the refrigerator for at least 30 minutes.

    Preheat your grill to medium-high heat.

    Thread the marinated tuna onto the skewers, leaving a little space between each piece for even cooking.

    Place the skewers on the grill and cook for about 2-3 minutes on each side, or until the tuna is seared on the outside but still pink in the center.

    Remove from the grill and serve immediately.

    Extra Tips:

    For the best flavor, use fresh, high-quality tuna and avoid overcooking it, as tuna can become dry quickly.

    Feel free to customize the marinade by adding your favorite herbs or spices, such as cilantro or chili flakes, for an extra kick.

    Additionally, you can add vegetables like bell peppers, zucchini, or cherry tomatoes to the skewers for a colorful and nutritious addition.

    Serve these skewers with a dipping sauce, like a spicy mayo or tangy ponzu, for a delightful twist!

  • 10 Best Halibut Recipes

    10 Best Halibut Recipes

    If you're looking to whip up something delicious with halibut, you're in for a treat! This fish is super versatile, and we've got 10 incredible recipes that'll make your taste buds dance. From zesty grilled options to cozy chowders, there's something for everyone. Ever tried halibut tacos with mango salsa? Trust me, they're a game changer! Stick around to investigate these mouthwatering dishes that'll take your cooking skills to the next level.

    Grilled Halibut With Lemon-Dill Sauce

    Grilled halibut with lemon-dill sauce is a delicious and healthy dish that's perfect for a summer cookout or a cozy dinner at home. The firm, flaky texture of halibut pairs beautifully with the zesty and aromatic flavors of lemon and fresh dill, making it a delightful meal for seafood lovers.

    This recipe is simple and quick, allowing you to enjoy a gourmet experience without spending hours in the kitchen.

    Ingredients:

    • 4 halibut fillets (6 ounces each)
    • 2 tablespoons olive oil
    • Salt and pepper to taste
    • 1 lemon (juiced and zested)
    • 1/4 cup fresh dill, chopped
    • 2 tablespoons Dijon mustard
    • 2 tablespoons honey
    • 1 garlic clove, minced

    Cooking Instructions:

    Begin by preheating your grill to medium-high heat.

    In a small bowl, whisk together the olive oil, lemon juice, lemon zest, dill, Dijon mustard, honey, and minced garlic to create the lemon-dill sauce.

    Season the halibut fillets with salt and pepper, then brush both sides with a bit of the prepared sauce.

    Place the fillets on the grill and cook for about 4-5 minutes on each side, or until the fish is opaque and flakes easily with a fork.

    Once done, remove the halibut from the grill and drizzle with the remaining lemon-dill sauce before serving.

    Extra Tips:

    When grilling halibut, it's essential to keep an eye on the cooking time, as overcooking can lead to a dry texture.

    Make sure your grill grates are well-oiled to prevent sticking, and consider using a fish basket or foil if you're worried about the fillets breaking apart.

    For added flavor, you can marinate the halibut in the lemon-dill sauce for 30 minutes before grilling.

    Serve the grilled halibut with a side of roasted vegetables or a fresh salad for a complete meal.

    Baked Halibut With Parmesan Crust

    parmesan crusted baked halibut

    Baked halibut with a parmesan crust is a delicious and elegant dish that's perfect for any occasion. The flaky texture of the halibut pairs beautifully with the rich, golden crust, creating a delightful contrast in flavors.

    This simple yet impressive recipe is quick to prepare and can be served with a side of vegetables or a fresh salad for a complete meal that will impress your family or guests.

    Ingredients:

    • 4 halibut fillets (about 6 ounces each)
    • 1 cup grated Parmesan cheese
    • 1 cup breadcrumbs (preferably panko)
    • 2 tablespoons melted butter
    • 2 tablespoons olive oil
    • 2 cloves garlic, minced
    • 1 teaspoon dried thyme
    • Salt and pepper to taste
    • Fresh lemon wedges for serving
    • Fresh parsley, chopped for garnish (optional)

    Instructions:

    Preheat your oven to 400°F (200°C) and lightly grease a baking dish.

    In a mixing bowl, combine the grated Parmesan cheese, breadcrumbs, melted butter, olive oil, minced garlic, dried thyme, salt, and pepper, mixing until well combined.

    Place the halibut fillets in the prepared baking dish and evenly distribute the breadcrumb mixture over the top of each fillet, pressing down lightly to secure.

    Bake in the preheated oven for 15-20 minutes, or until the halibut is cooked through and the crust is golden brown.

    Serve immediately with lemon wedges and a sprinkle of fresh parsley if desired.

    Extra Tips:

    To guarantee the halibut stays moist during baking, you can marinate it in lemon juice, olive oil, and herbs for about 30 minutes before cooking. This will elevate the flavor and keep the fish tender.

    Keep an eye on the baking time, as halibut can dry out if overcooked. If you want to add more flavor, consider incorporating different herbs or spices into the breadcrumb mixture, such as dill or paprika.

    Enjoy your meal with a light white wine for a perfect pairing!

    Pan-Seared Halibut With Garlic Butter

    Pan-seared halibut with garlic butter is a delightful dish that showcases the delicate flavors of this premium fish, while the garlic butter adds a rich and aromatic touch. Perfect for a weeknight dinner or a special occasion, this recipe is simple yet elegant.

    With a crispy sear on the outside and a tender, flaky interior, this halibut dish is sure to impress your family and guests alike.

    Ingredients:

    • 2 halibut fillets (about 6 ounces each)
    • Salt and freshly ground black pepper
    • 2 tablespoons olive oil
    • 4 tablespoons unsalted butter
    • 4 cloves garlic, minced
    • 1 tablespoon fresh lemon juice
    • Fresh parsley, chopped (for garnish)
    • Lemon wedges (for serving)

    Instructions:

    Season the halibut fillets generously with salt and pepper on both sides.

    In a large skillet, heat the olive oil over medium-high heat until shimmering. Carefully place the halibut fillets in the skillet and cook for about 4-5 minutes without moving them, until they develop a golden-brown crust.

    Flip the fillets and add the butter and minced garlic to the pan. As the butter melts, spoon it over the fish, allowing the garlic to infuse the butter.

    Continue cooking for another 3-4 minutes or until the fish is opaque and flakes easily with a fork. Finish with a squeeze of fresh lemon juice and remove from heat.

    Extra Tips:

    To achieve the perfect sear on your halibut, make sure your skillet is hot enough before adding the fish; this helps create a nice crust.

    Additionally, use a fish spatula for flipping, which is gentle enough to handle the delicate fillets without breaking them apart.

    If you prefer a bit of heat, consider adding a pinch of red pepper flakes to the garlic butter for an extra kick.

    Serve your halibut with a side of steamed vegetables or a light salad to complete the meal.

    Halibut Tacos With Mango Salsa

    halibut tacos with salsa

    Halibut tacos with mango salsa are a delicious and vibrant dish that perfectly combines the flavors of the ocean with the sweet and tangy notes of tropical fruit. This recipe isn't only easy to prepare but also offers a healthy and satisfying meal option.

    With flaky halibut, zesty seasonings, and an invigorating mango salsa, these tacos are sure to impress your family and friends at any gathering.

    Ingredients:

    • 1 pound halibut fillets
    • 2 tablespoons olive oil
    • 1 teaspoon cumin
    • 1 teaspoon chili powder
    • Salt and pepper to taste
    • 8 small corn tortillas
    • 1 ripe mango, diced
    • 1/4 red onion, finely chopped
    • 1 jalapeño, seeded and minced
    • Juice of 1 lime
    • Fresh cilantro, chopped (for garnish)

    Cooking Instructions:

    Preheat your grill or a skillet over medium-high heat. While it heats up, pat the halibut fillets dry and brush both sides with olive oil. Season the fillets with cumin, chili powder, salt, and pepper.

    Once the grill is hot, place the halibut on it and cook for about 4-5 minutes on each side, or until the fish flakes easily with a fork.

    While the fish is cooking, prepare the mango salsa by combining the diced mango, red onion, jalapeño, lime juice, and a pinch of salt in a bowl.

    Warm the corn tortillas on the grill or in a dry skillet for about 30 seconds on each side. To assemble the tacos, place a piece of halibut in each tortilla, top with mango salsa, and garnish with fresh cilantro.

    Extra Tips:

    For added flavor, marinate the halibut in olive oil, lime juice, and spices for at least 30 minutes before grilling.

    If you prefer a spicier kick, leave some seeds in the jalapeño or add a dash of hot sauce to the mango salsa.

    You can also substitute the halibut with other white fish like cod or tilapia if desired. Serve the tacos with a side of lime wedges and enjoy!

    Halibut Chowder With Corn and Potatoes

    Halibut chowder with corn and potatoes is a comforting and hearty dish that bursts with flavor and texture. It combines the delicate taste of halibut with sweet corn and tender potatoes, creating a deliciously creamy soup perfect for any occasion.

    This chowder isn't only satisfying but also easy to prepare, making it an ideal choice for weeknight dinners or gatherings with family and friends.

    Ingredients:

    • 1 lb halibut fillets, skin removed and cut into bite-sized pieces
    • 2 cups fresh corn kernels (or frozen)
    • 2 medium potatoes, peeled and diced
    • 1 medium onion, diced
    • 2 cloves garlic, minced
    • 4 cups vegetable or fish stock
    • 1 cup heavy cream
    • 2 tbsp butter
    • 1 tsp dried thyme
    • Salt and pepper to taste
    • Fresh parsley for garnish

    Cooking Instructions:

    In a large pot, melt the butter over medium heat and sauté the onion until translucent, about 5 minutes.

    Add the garlic and cook for an additional minute, then stir in the diced potatoes and thyme, cooking for another 3-4 minutes.

    Pour in the stock and bring to a boil, then reduce heat and simmer for about 10 minutes, or until the potatoes are fork-tender.

    Add the corn and halibut pieces, then pour in the heavy cream. Allow the chowder to simmer for another 5-7 minutes until the halibut is cooked through and flaky.

    Season with salt and pepper to taste, and garnish with fresh parsley before serving.

    Extra Tips:

    For a richer flavor, consider adding a splash of white wine when sautéing the onions and garlic.

    If you prefer a thicker chowder, you can mash some of the potatoes in the pot before adding the halibut and cream.

    Additionally, feel free to experiment with other vegetables like carrots or celery for added depth, and adjust the seasoning according to your taste.

    Serve with crusty bread for a complete meal that everyone will enjoy!

    Teriyaki Glazed Halibut

    teriyaki glazed fish dish

    Teriyaki glazed halibut is a delightful dish that combines the rich, buttery flavor of halibut with the sweet and savory notes of teriyaki sauce. This recipe is simple yet elegant, making it perfect for a weeknight dinner or a special occasion.

    With just a few ingredients and minimal preparation, you can have a delicious meal on the table in no time. Serve it with steamed rice and vegetables for a complete and satisfying meal.

    Ingredients:

    • 4 halibut fillets (6 oz each)
    • 1/2 cup teriyaki sauce
    • 2 tablespoons honey
    • 1 tablespoon sesame oil
    • 2 cloves garlic, minced
    • 1 teaspoon fresh ginger, grated
    • 1 tablespoon sesame seeds
    • 2 green onions, sliced (for garnish)

    Cooking Instructions:

    In a small bowl, combine the teriyaki sauce, honey, sesame oil, minced garlic, and grated ginger to create the marinade.

    Place the halibut fillets in a shallow dish and pour the marinade over them, ensuring they're well coated. Allow the fish to marinate for at least 30 minutes, preferably in the refrigerator.

    Preheat your grill or skillet over medium-high heat. Cook the halibut for about 4-5 minutes on each side, brushing with additional marinade while cooking, until the fish is opaque and flakes easily with a fork.

    Once cooked, sprinkle with sesame seeds and garnish with sliced green onions before serving.

    Extra Tips:

    For the best flavor, let the halibut marinate for at least an hour, or even overnight if time allows.

    If you don't have a grill, you can also bake the halibut in a preheated oven at 400°F for 12-15 minutes. Be cautious not to overcook the fish, as halibut can become dry quickly.

    Adjust the sweetness of the teriyaki sauce by adding more honey if you prefer a sweeter glaze. Serve with a side of steamed broccoli or sautéed bok choy for a deliciously balanced meal.

    Halibut Ceviche With Avocado

    halibut ceviche with avocado

    Halibut ceviche with avocado is a revitalizing and vibrant dish that highlights the delicate flavor of fresh halibut, perfectly balanced with the creamy texture of ripe avocados. This dish is ideal for warm weather and makes a fantastic appetizer or light meal.

    The acidity from the citrus juices "cooks" the fish, while the addition of fresh herbs and crunchy vegetables brings a delightful mix of flavors and textures to each bite. Serve it chilled for a truly satisfying dish that will impress your guests.

    Ingredients:

    • 1 pound fresh halibut, skinless and diced into small cubes
    • 1 cup fresh lime juice
    • 1 cup diced ripe avocado
    • 1/2 cup diced red onion
    • 1/2 cup diced cucumber
    • 1/2 cup chopped fresh cilantro
    • 1-2 jalapeño peppers, seeded and finely chopped (optional)
    • Salt and pepper to taste
    • Tortilla chips or lettuce leaves for serving

    Instructions:

    In a medium bowl, combine the diced halibut with the lime juice, guaranteeing the fish is fully submerged. Cover and refrigerate for about 30 minutes, or until the fish appears opaque and "cooked."

    Once the halibut is ready, gently fold in the diced avocado, red onion, cucumber, cilantro, and jalapeño if using. Season with salt and pepper to taste, mixing carefully to avoid mashing the avocado. Serve immediately with tortilla chips or on lettuce leaves for a revitalizing bite.

    Extra Tips:

    When selecting halibut for this ceviche, make sure it's the freshest possible; look for fish that's firm, moist, and has a clean smell.

    If you prefer a milder flavor, you can adjust the amount of lime juice or jalapeño to suit your taste. For an added twist, consider incorporating other ingredients like mango or tomatoes for a fruity variation.

    Remember to serve your ceviche immediately after preparation to maintain the best texture and flavor. Enjoy!

    Mediterranean Halibut With Olives and Tomatoes

    mediterranean halibut dish recipe

    Mediterranean Halibut with Olives and Tomatoes is a delightful dish that brings vibrant flavors and a touch of the Mediterranean to your dinner table. The combination of fresh halibut, briny olives, and juicy tomatoes creates a harmonious blend that's both healthy and satisfying.

    This dish isn't only quick to prepare but also visually appealing, making it perfect for a weeknight meal or a special occasion. Serve it alongside some crusty bread or over a bed of couscous for a complete meal.

    Ingredients:

    • 4 halibut fillets
    • 1 cup cherry tomatoes, halved
    • 1/2 cup Kalamata olives, pitted and sliced
    • 3 cloves garlic, minced
    • 1/4 cup fresh parsley, chopped
    • 1/4 cup olive oil
    • 1 teaspoon dried oregano
    • Salt and pepper, to taste
    • Lemon wedges, for serving

    Instructions:

    Preheat your oven to 400°F (200°C). In a large mixing bowl, combine the cherry tomatoes, olives, garlic, parsley, olive oil, oregano, salt, and pepper, tossing everything together until well coated.

    Place the halibut fillets in a baking dish and spread the tomato and olive mixture evenly over the top. Bake in the preheated oven for about 15-20 minutes, or until the halibut flakes easily with a fork and reaches an internal temperature of 145°F (63°C).

    Serve hot with lemon wedges on the side.

    Extra Tips:

    For peak flavor, consider marinating the halibut in olive oil, lemon juice, and herbs for 30 minutes before cooking. If you prefer a slight char, you can broil the dish for the last few minutes of cooking.

    Feel free to customize the recipe by adding other Mediterranean ingredients such as capers or artichokes. Pair this dish with a side salad or roasted vegetables for a well-rounded meal. Enjoy your culinary journey to the Mediterranean!

    Halibut En Papillote With Herbs

    halibut baked in parchment

    Halibut en Papillote with Herbs is a delightful and elegant dish that captures the essence of fresh seafood while allowing for beautiful presentation. Cooking halibut in parchment paper (en papillote) steams the fish gently, preserving its moisture and enhancing its flavor. This method isn't only healthy but also allows for endless variations with herbs and vegetables, making it a versatile choice for any dinner occasion.

    Ingredients:

    • 2 halibut fillets
    • 1 lemon, thinly sliced
    • 2 tablespoons olive oil
    • 1 teaspoon fresh thyme leaves
    • 1 teaspoon fresh dill, chopped
    • Salt and pepper, to taste
    • 1 cup cherry tomatoes, halved
    • 1 zucchini, thinly sliced
    • Parchment paper

    Cooking Instructions:

    Preheat your oven to 400°F (200°C). Cut two large pieces of parchment paper, each large enough to hold a fillet and its accompaniments.

    Place a halibut fillet in the center of each parchment piece and drizzle with olive oil. Season with salt, pepper, thyme, and dill, then layer the lemon slices, cherry tomatoes, and zucchini over the fish.

    Fold the parchment paper tightly to form a sealed packet, making sure there are no openings for steam to escape. Place the packets on a baking sheet and bake for 12-15 minutes, or until the fish is cooked through and flakes easily with a fork.

    Extra Tips:

    When making halibut en papillote, feel free to customize the vegetables and herbs based on your preferences or what you have on hand. Other great additions include asparagus, bell peppers, or even a splash of white wine for added flavor.

    Confirm the packets are sealed well to create steam; any leaks will result in a less moist dish. Serve the halibut directly in the packets for an impressive presentation, and be cautious when opening them, as the steam can be very hot.

    Enjoy your healthy and flavorful meal!

    Spicy Halibut Stir-Fry With Vegetables

    halibut vegetable stir fry recipe

    Spicy halibut stir-fry with vegetables is a vibrant and flavorful dish that brings together the tender, flaky texture of halibut with a medley of colorful vegetables and a kick of heat. This dish is quick to prepare, making it perfect for a weeknight dinner or a special occasion. The combination of spices and fresh ingredients enhances the halibut, creating an enticing meal that's both healthy and satisfying.

    Ingredients:

    • 1 pound halibut fillets, cut into bite-sized pieces
    • 2 tablespoons vegetable oil
    • 1 bell pepper, sliced
    • 1 cup broccoli florets
    • 1 carrot, julienned
    • 2 cloves garlic, minced
    • 1 tablespoon ginger, grated
    • 2 tablespoons soy sauce
    • 1 tablespoon oyster sauce
    • 1 tablespoon sriracha (adjust to taste)
    • 1 teaspoon sesame oil
    • Cooked rice or noodles, for serving
    • Green onions, sliced, for garnish

    Cooking instructions: In a large skillet or wok, heat the vegetable oil over medium-high heat. Add the minced garlic and grated ginger, stirring for about 30 seconds until fragrant.

    Then, add the halibut pieces and cook for about 3-4 minutes, turning occasionally until they're lightly browned and cooked through. Next, add the bell pepper, broccoli, and carrot to the skillet, stirring frequently for another 3-4 minutes until the vegetables are tender yet crisp.

    Pour in the soy sauce, oyster sauce, sriracha, and sesame oil, tossing everything to coat evenly. Cook for an additional minute to heat through before removing from heat.

    Extra tips: When cooking halibut, be careful not to overcook it, as it can become dry. Aim for just until the fish flakes easily with a fork.

    Feel free to customize the vegetables based on your preference or what you have on hand; snap peas, zucchini, or mushrooms all work well in this stir-fry. For an extra layer of flavor, consider marinating the halibut in the soy sauce and sriracha mixture for about 15 minutes before cooking.

    Enjoy your spicy halibut stir-fry with a side of rice or noodles for a complete meal!