Tag: dinner ideas

  • 10 Best Shrimp Dinner Recipes

    10 Best Shrimp Dinner Recipes

    If you're in the mood to whip up something delicious, you've come to the right place. Shrimp dinners are a fantastic way to impress your family or friends, and they can be super quick to make too! From zesty pasta to spicy tacos, there's a world of flavors waiting for you. Ready to investigate some mouth-watering recipes that'll have everyone asking for seconds? Let's plunge into!

    Spicy Garlic Shrimp Pasta

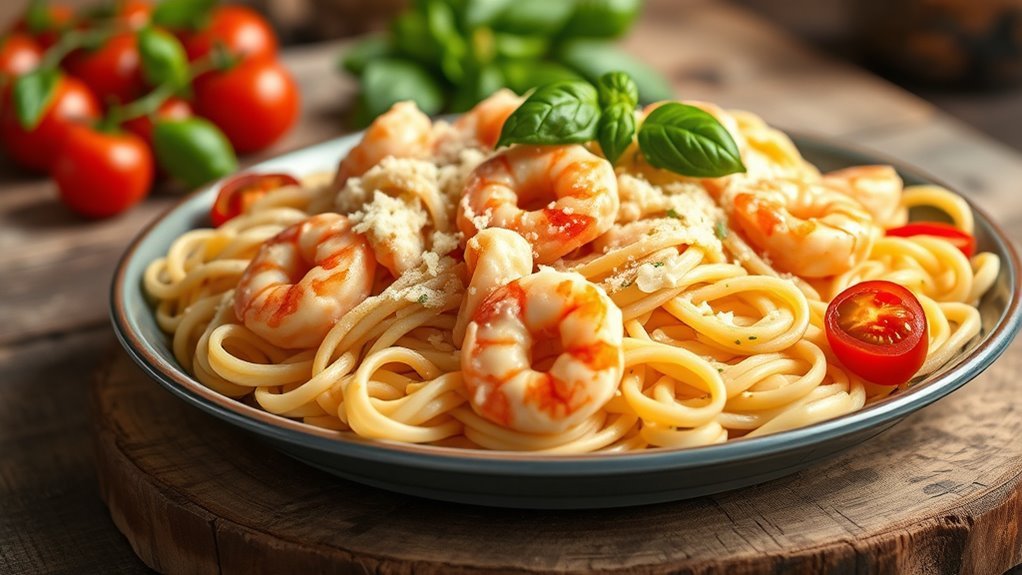
    Indulge in a delightful Spicy Garlic Shrimp Pasta that combines the rich flavors of succulent shrimp with the heat of red pepper flakes and the aromatic essence of garlic. This dish isn't only quick to prepare but also a perfect choice for a romantic dinner or a family meal.

    The al dente pasta, tossed in a savory garlic sauce, beautifully complements the shrimp, making it a satisfying and flavorful experience that will leave everyone asking for seconds.

    Ingredients:

    • 8 oz spaghetti or linguine
    • 1 lb large shrimp, peeled and deveined
    • 4 tablespoons olive oil
    • 4 cloves garlic, minced
    • 1 teaspoon red pepper flakes (adjust to taste)
    • 1/2 cup white wine (optional)
    • 1 lemon, juiced
    • Salt and pepper to taste
    • Fresh parsley, chopped (for garnish)
    • Grated Parmesan cheese (for serving)

    Cooking Instructions:

    Begin by cooking the spaghetti or linguine according to package instructions until al dente.

    While the pasta is cooking, heat the olive oil in a large skillet over medium heat. Add the minced garlic and red pepper flakes, sautéing until fragrant, about 1 minute. Toss in the shrimp and cook until they turn pink and opaque, roughly 3-4 minutes.

    If using, pour in the white wine and let it simmer for a couple of minutes. Drain the pasta, reserving a bit of the cooking water, and add it to the skillet with the shrimp.

    Squeeze in the lemon juice and toss everything together, adding reserved pasta water as needed to create a light sauce. Season with salt and pepper to taste, and garnish with fresh parsley before serving.

    Extra Tips:

    To improve the flavor of your Spicy Garlic Shrimp Pasta, consider marinating the shrimp in a mixture of olive oil, garlic, and lemon juice for about 15-20 minutes before cooking. This will infuse them with even more flavor.

    Additionally, feel free to customize the heat level by adjusting the amount of red pepper flakes. For a heartier meal, you can add vegetables such as spinach or cherry tomatoes to the dish during the last few minutes of cooking.

    Pair this pasta with a side salad and a glass of white wine for a complete dining experience!

    Shrimp Tacos With Mango Salsa

    shrimp tacos with mango

    Shrimp tacos with mango salsa are a vibrant and delicious way to enjoy a coastal-inspired meal. The combination of succulent shrimp seasoned with spices, paired with a revitalizing mango salsa, creates a perfect balance of flavors that will transport your taste buds to a sunny beach.

    These tacos are easy to prepare and can be served as a casual dinner or a festive gathering with friends and family.

    Ingredients:

    • 1 pound of shrimp, peeled and deveined
    • 2 tablespoons olive oil
    • 1 teaspoon chili powder
    • 1 teaspoon cumin
    • 1 teaspoon garlic powder
    • Salt and pepper to taste
    • 8 small corn or flour tortillas
    • 1 ripe mango, diced
    • 1/2 red onion, finely chopped
    • 1 jalapeño, seeded and minced
    • 1/4 cup fresh cilantro, chopped
    • Juice of 1 lime
    • Optional toppings: avocado, sour cream, lime wedges

    Cooking Instructions:

    In a medium bowl, toss the shrimp with olive oil, chili powder, cumin, garlic powder, salt, and pepper until well coated.

    Heat a skillet over medium-high heat and add the shrimp, cooking for about 2-3 minutes on each side, or until they turn pink and opaque.

    While the shrimp cooks, prepare the mango salsa by combining the diced mango, red onion, jalapeño, cilantro, and lime juice in a separate bowl.

    Mix well and season with salt to taste.

    Once the shrimp are cooked, warm the tortillas in the same skillet for about 30 seconds on each side.

    Assemble the tacos by placing a generous portion of shrimp on each tortilla, topping with mango salsa, and adding any optional toppings.

    Extra Tips:

    For the best flavor, allow the shrimp to marinate in the seasoning for at least 15 minutes before cooking.

    If you prefer a spicier kick, leave some seeds in the jalapeño or add a dash of hot sauce to the mango salsa.

    Fresh mango is ideal for this recipe, but if it's not in season, you can use canned mango in syrup (just drain it before use).

    Finally, don't hesitate to customize your tacos with additional toppings like shredded cabbage for crunch or a squeeze of extra lime for added zest.

    Enjoy your tropical feast!

    Lemon Butter Shrimp and Asparagus

    Lemon Butter Shrimp and Asparagus is a delightful and quick dish that perfectly balances the savory flavor of shrimp with the fresh zest of lemon and the crispness of asparagus. This recipe is ideal for a weeknight dinner or a special occasion, as it comes together in just under 30 minutes.

    The combination of garlic, butter, and lemon creates a luxurious sauce that coats the shrimp and asparagus beautifully, making every bite a burst of flavor.

    Ingredients:

    • 1 pound large shrimp, peeled and deveined
    • 1 bunch asparagus, trimmed and cut into 2-inch pieces
    • 4 tablespoons unsalted butter
    • 4 cloves garlic, minced
    • Juice and zest of 1 lemon
    • Salt and pepper, to taste
    • Fresh parsley, chopped (for garnish)

    Cooking Instructions:

    In a large skillet over medium heat, melt the butter and add the minced garlic, sautéing until fragrant (about 1 minute).

    Add the asparagus to the skillet and cook for about 3-4 minutes, or until they start to become tender. Then, add the shrimp to the skillet, cooking until they turn pink and opaque (about 3-4 minutes).

    Squeeze the lemon juice over the shrimp and asparagus, add the lemon zest, and season with salt and pepper to taste. Stir well to combine and cook for an additional minute before removing from heat.

    Extra Tips:

    To improve the flavor of this dish, consider marinating the shrimp in lemon juice, garlic, and a pinch of salt for about 15 minutes before cooking.

    Additionally, make sure that the shrimp aren't overcooked, as they can become rubbery. For a bit of heat, you can add a pinch of red pepper flakes when sautéing the garlic.

    Serve this dish over a bed of rice or with crusty bread to soak up the delicious lemon butter sauce!

    Shrimp Scampi With Linguine

    shrimp scampi over linguine

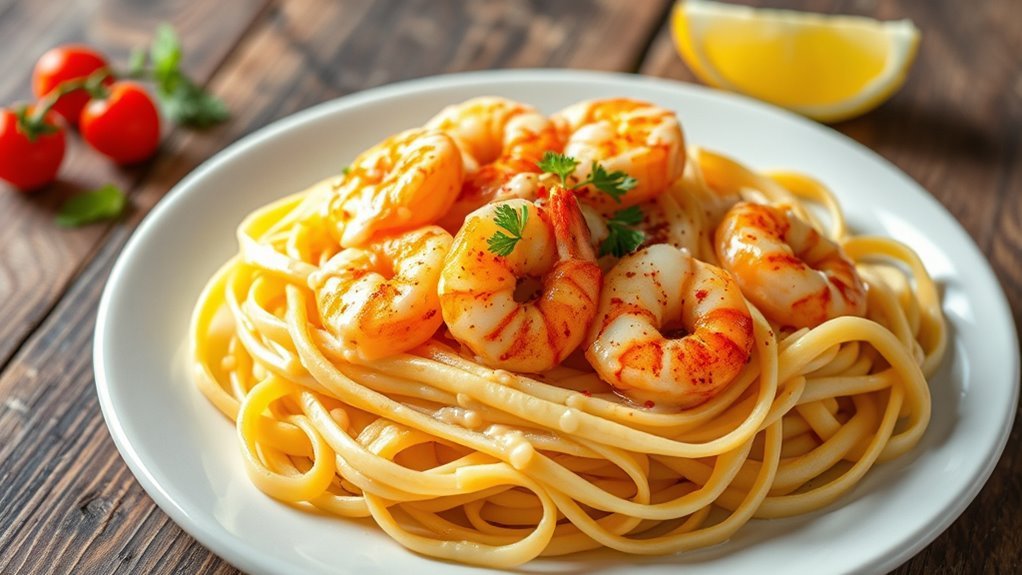
    Shrimp Scampi with Linguine is a delightful dish that brings together succulent shrimp, garlic, and a hint of lemon, all tossed with al dente linguine. This classic Italian-American recipe is simple yet packed with flavor, making it perfect for a weeknight dinner or a special occasion.

    The combination of buttery sauce and aromatic herbs complements the shrimp beautifully, creating a dish that's sure to impress your family and friends.

    Ingredients:

    • 8 ounces linguine
    • 1 pound large shrimp, peeled and deveined
    • 4 tablespoons unsalted butter
    • 4 tablespoons olive oil
    • 4 cloves garlic, minced
    • 1/4 teaspoon red pepper flakes
    • 1/2 cup dry white wine
    • Juice of 1 lemon
    • Salt and pepper, to taste
    • Fresh parsley, chopped (for garnish)

    Instructions:

    Begin by cooking the linguine according to package instructions until al dente; drain and set aside.

    In a large skillet over medium heat, melt the butter and olive oil together. Add the minced garlic and red pepper flakes, cooking until fragrant, about 1 minute.

    Add the shrimp to the skillet, seasoning with salt and pepper, and sauté until they turn pink, approximately 3-4 minutes. Pour in the white wine and lemon juice, bringing to a simmer.

    Once the alcohol has evaporated, toss in the cooked linguine, mixing well to coat the pasta with the sauce. Cook for an additional 1-2 minutes to heat everything through. Serve hot, garnished with fresh parsley.

    Extra Tips:

    For the best flavor, use fresh shrimp rather than frozen, as they'll have a sweeter and more vibrant taste.

    Don't be afraid to adjust the amount of garlic or red pepper flakes according to your preferences; a little extra garlic can improve the dish's aroma, while more heat can excite the palate.

    If you prefer a creamier sauce, consider adding a splash of heavy cream just before serving.

    Finally, pairing this dish with a crisp salad or crusty bread will round out your meal perfectly!

    Coconut Curry Shrimp

    Coconut Curry Shrimp is a delightful dish that combines the sweetness of coconut milk with the rich, aromatic spices of curry, creating a deliciously balanced meal that's sure to impress. This easy-to-make recipe highlights the natural flavors of shrimp while infusing them with a creamy, fragrant sauce. Perfect for a weeknight dinner or a special occasion, this dish pairs well with steamed rice or naan to soak up all the delicious sauce.

    Ingredients:

    • 1 pound large shrimp, peeled and deveined
    • 1 tablespoon vegetable oil
    • 1 medium onion, finely chopped
    • 2 cloves garlic, minced
    • 1 tablespoon fresh ginger, grated
    • 2 tablespoons red curry paste
    • 1 can (14 oz) coconut milk
    • 1 tablespoon fish sauce
    • 1 tablespoon brown sugar
    • 1 cup bell peppers, sliced (red and green)
    • Fresh cilantro, for garnish
    • Lime wedges, for serving
    • Salt and pepper, to taste

    In a large skillet, heat the vegetable oil over medium heat. Add the chopped onions and sauté until they become translucent, about 3-4 minutes. Stir in the minced garlic and grated ginger, cooking for an additional minute until fragrant.

    Next, add the red curry paste and cook for 1-2 minutes, stirring to combine. Pour in the coconut milk, fish sauce, and brown sugar, and bring the mixture to a simmer. Add the sliced bell peppers and shrimp, cooking until the shrimp are pink and cooked through, about 5-7 minutes. Adjust seasoning with salt and pepper, if needed.

    Serve the curry hot, garnished with fresh cilantro and lime wedges.

    For the best results, choose fresh shrimp for a sweet and succulent flavor, and be careful not to overcook them as they can become rubbery. If you prefer a spicier dish, consider adding a sliced chili pepper or a dash of cayenne pepper to the curry.

    This dish can also be customized by adding your favorite vegetables such as spinach or snap peas. Leftovers can be stored in an airtight container in the refrigerator for up to two days and can be reheated gently on the stove or in the microwave, making it a great option for meal prep.

    Shrimp Fried Rice

    delicious shrimp fried rice

    Shrimp fried rice is a delicious and satisfying dish that combines the savory flavors of shrimp with colorful vegetables and the comforting texture of rice.

    It's a perfect way to use leftover rice, making it not only quick to prepare but also a fantastic option for a weeknight dinner or a special occasion. The beauty of this dish lies in its versatility, allowing you to customize the ingredients based on what you have on hand.

    Ingredients:

    • 2 cups cooked jasmine rice (preferably day-old)
    • 1 pound shrimp, peeled and deveined
    • 2 tablespoons vegetable oil
    • 1 cup mixed vegetables (peas, carrots, and corn)
    • 3 green onions, chopped
    • 2 cloves garlic, minced
    • 2 tablespoons soy sauce
    • 1 tablespoon oyster sauce (optional)
    • 1 teaspoon sesame oil
    • Salt and pepper to taste
    • 2 eggs, lightly beaten

    Cooking Instructions:

    Begin by heating the vegetable oil in a large skillet or wok over medium-high heat.

    Add the minced garlic and sauté for about 30 seconds until fragrant. Next, add the shrimp and cook until they turn pink and opaque, roughly 2-3 minutes.

    Push the shrimp to one side of the pan, then pour in the beaten eggs, scrambling them until fully cooked. Incorporate the mixed vegetables and cooked rice, stirring them together as you add the soy sauce, oyster sauce, and sesame oil.

    Mix everything well, making sure the rice is heated through and evenly coated with the sauces. Finally, fold in the chopped green onions and season with salt and pepper to taste before serving hot.

    Extra Tips:

    For the best texture, use day-old rice as it dries out slightly, preventing the dish from becoming mushy.

    If you don't have shrimp, chicken, or tofu can be great substitutes. Feel free to experiment with different vegetables or add spice with chili paste for a kick.

    For an even richer flavor, consider marinating the shrimp in a bit of soy sauce and garlic before cooking. Ultimately, verify your pan is hot enough before adding the rice to achieve that desirable slight crispiness.

    Grilled Shrimp Skewers

    shrimp skewers cooked grilled

    Grilled shrimp skewers are a delightful and easy-to-make dish that brings a burst of flavor to your dinner table. Perfect for summer barbecues or cozy family dinners, these skewers are marinated in a zesty blend of garlic, lemon, and herbs, then grilled to perfection for a smoky finish. Serve them alongside a fresh salad or grilled vegetables for a delicious meal that everyone will love.

    Ingredients:

    • 1 pound large shrimp, peeled and deveined
    • 2 tablespoons olive oil
    • 3 cloves garlic, minced
    • 1 lemon, juiced
    • 1 teaspoon paprika
    • 1 teaspoon dried oregano
    • Salt and pepper to taste
    • Skewers (wooden or metal)
    • Fresh parsley for garnish (optional)

    To prepare the grilled shrimp skewers, start by soaking wooden skewers in water for about 30 minutes to prevent them from burning on the grill.

    In a bowl, combine the olive oil, minced garlic, lemon juice, paprika, oregano, salt, and pepper. Add the shrimp to the marinade and toss until well coated. Allow the shrimp to marinate for at least 15 minutes to absorb the flavors.

    Preheat your grill to medium-high heat. Thread the marinated shrimp onto the skewers, making sure to leave a little space between each piece for even cooking. Grill the skewers for about 2-3 minutes on each side, or until the shrimp are pink and opaque.

    For best results, make certain to not overcook the shrimp, as they can become tough and chewy. Keep an eye on them while grilling, and feel free to experiment with additional flavors by adding your favorite spices or herbs to the marinade.

    If you're using wooden skewers, confirm they're fully soaked to prevent burning, and consider using a grill basket for easier handling. Serve the skewers immediately with a sprinkle of fresh parsley for a pop of color and extra flavor. Enjoy your delicious grilled shrimp skewers!

    Shrimp and Grits

    savory seafood and corn

    Shrimp and Grits is a classic Southern dish that combines the savory flavors of shrimp with creamy, buttery grits. This comforting meal is perfect for a cozy dinner or a special occasion. The key to a great Shrimp and Grits dish is in the balance of flavors and textures, from the spiced shrimp to the rich, smooth grits. With a few simple ingredients and steps, you can create a delightful plate that's both hearty and satisfying.

    Ingredients:

    • 1 cup grits (stone-ground preferred)
    • 4 cups water or chicken broth
    • 1 pound shrimp, peeled and deveined
    • 4 slices bacon, chopped
    • 3 cloves garlic, minced
    • 1 cup heavy cream
    • 1 tablespoon lemon juice
    • 1 teaspoon Cajun seasoning
    • Salt and pepper to taste
    • 2 green onions, sliced (for garnish)
    • Fresh parsley, chopped (for garnish)

    Cooking Instructions:

    Begin by bringing the water or chicken broth to a boil in a medium saucepan. Slowly whisk in the grits, reduce the heat to low, and cook for about 20-25 minutes, stirring occasionally until thickened.

    In a separate skillet, cook the chopped bacon over medium heat until crispy. Remove the bacon and set aside, leaving the drippings in the pan. Add the minced garlic to the skillet and sauté for about 1 minute, then add the shrimp. Sprinkle with Cajun seasoning, salt, and pepper, and cook for 3-4 minutes until the shrimp are pink and opaque.

    Stir in the heavy cream and lemon juice, cooking for an additional 2 minutes. Serve the shrimp mixture over a generous scoop of grits, topped with the crispy bacon, green onions, and parsley.

    Extra Tips:

    For an added depth of flavor, consider using smoked paprika in addition to Cajun seasoning. You can also substitute the heavy cream with half-and-half for a lighter version.

    If you prefer a spicier kick, add a dash of hot sauce or red pepper flakes to the shrimp mixture. Remember to taste and adjust the seasoning of the grits and shrimp before serving to guarantee a perfectly balanced dish. Enjoy your delicious Shrimp and Grits!

    Shrimp Enchiladas With Cilantro Sauce

    delicious shrimp enchiladas recipe

    Shrimp enchiladas with cilantro sauce are a delightful twist on traditional enchiladas, combining tender shrimp with a vibrant cilantro sauce that adds a fresh and zesty flavor.

    These enchiladas are perfect for any occasion, whether it's a weeknight dinner or a special gathering. With their creamy filling and the punch of the cilantro sauce, they're sure to impress your family and friends.

    Ingredients:

    • 1 pound shrimp, peeled and deveined
    • 8 corn tortillas
    • 1 cup shredded cheese (cheddar or Monterey Jack)
    • 1 cup sour cream
    • ½ cup fresh cilantro, chopped
    • 2 cloves garlic, minced
    • 1 tablespoon olive oil
    • 1 teaspoon cumin
    • 1 teaspoon chili powder
    • Salt and pepper, to taste
    • 1 cup salsa verde

    Cooking Instructions:

    In a skillet, heat the olive oil over medium heat, then add the minced garlic and sauté for about a minute until fragrant.

    Add the shrimp, cumin, chili powder, salt, and pepper, cooking until the shrimp are pink and opaque, about 3-4 minutes.

    In a separate bowl, mix the chopped cilantro with the sour cream to create your cilantro sauce.

    Preheat your oven to 350°F (175°C).

    To assemble the enchiladas, fill each tortilla with a spoonful of the shrimp mixture and a sprinkle of cheese, then roll them up and place them seam-side down in a baking dish.

    Pour the salsa verde over the top, then drizzle with the cilantro sauce and sprinkle remaining cheese.

    Bake for about 20 minutes, until heated through and the cheese is bubbly.

    Extra Tips:

    For added flavor, consider marinating the shrimp in lime juice and spices for 15-30 minutes before cooking.

    You can also customize the filling by adding sautéed onions or bell peppers for extra texture.

    If you prefer a spicier kick, try adding jalapeños to the filling or topping the enchiladas with slices before baking.

    Finally, for a vegetarian version, substitute the shrimp with black beans or sautéed vegetables.

    Shrimp Stir-Fry With Vegetables

    shrimp and vegetable stir fry

    Shrimp stir-fry with vegetables is a quick and delicious meal that's perfect for busy weeknights. Packed with colorful veggies and succulent shrimp, this dish isn't only nutritious but also bursting with flavor. In just a matter of minutes, you'll have a satisfying meal that can be served over rice or noodles.

    The combination of soy sauce, garlic, and ginger adds a delightful Asian flair that will leave your taste buds wanting more.

    Ingredients:

    • 1 pound shrimp, peeled and deveined
    • 2 cups mixed vegetables (bell peppers, broccoli, snap peas, carrots)
    • 2 tablespoons vegetable oil
    • 3 cloves garlic, minced
    • 1 tablespoon fresh ginger, minced
    • 1/4 cup soy sauce
    • 1 tablespoon honey or brown sugar
    • 1 teaspoon sesame oil
    • Cooked rice or noodles for serving
    • Sesame seeds and green onions for garnish (optional)

    Instructions:

    In a large skillet or wok, heat the vegetable oil over medium-high heat. Add the minced garlic and ginger, stirring for about 30 seconds until fragrant.

    Add the shrimp and cook for 2-3 minutes until they turn pink and opaque. Next, toss in the mixed vegetables and stir-fry for another 3-4 minutes until they're tender-crisp.

    Pour in the soy sauce and honey or brown sugar, stirring well to combine and let the sauce coat the shrimp and vegetables. Drizzle with sesame oil and remove from heat.

    Serve immediately over cooked rice or noodles and garnish with sesame seeds and sliced green onions, if desired.

    Extra Tips:

    When making shrimp stir-fry, make sure that your shrimp aren't overcooked; they should be just opaque and tender.

    You can customize the vegetables based on what's in season or what you have on hand, such as zucchini or bok choy. For extra flavor, consider adding a splash of rice vinegar or a pinch of red pepper flakes for heat.

    If you want a thicker sauce, mix a teaspoon of cornstarch with a tablespoon of water and add it to the pan during the last minute of cooking.

    Always have your ingredients prepped and ready to go, as stir-frying is a quick cooking method that requires your full attention.

  • 10 Best Shrimp Fried Rice Recipes

    10 Best Shrimp Fried Rice Recipes

    Are you ready to level up your dinner game? Shrimp fried rice is the perfect dish—quick, easy, and oh-so-delicious! Whether you're craving a classic version or something with a kick, there's a recipe here for everyone. Picture vibrant veggies mingling with tender shrimp, or maybe a sweet pineapple twist that'll surprise your taste buds. Trust me, you won't want to miss out on these fantastic ideas that'll make your weeknight meals exciting!

    Classic Shrimp Fried Rice

    Classic Shrimp Fried Rice is a delicious and satisfying dish that combines tender shrimp with perfectly cooked rice and a medley of vegetables, all sautéed together in a savory sauce. Ideal for a quick weeknight dinner or a fun way to use up leftover rice, this dish is both easy to make and packed with flavor.

    The key to a great shrimp fried rice is to use day-old rice, which helps achieve the perfect texture and prevents the dish from becoming mushy.

    Ingredients:

    • 2 cups cooked and cooled jasmine rice
    • 1 pound shrimp, peeled and deveined
    • 2 tablespoons vegetable oil
    • 2 eggs, beaten
    • 1 cup mixed vegetables (peas, carrots, corn)
    • 3 green onions, chopped
    • 3 cloves garlic, minced
    • 2 tablespoons soy sauce
    • 1 tablespoon oyster sauce
    • Salt and pepper to taste

    Instructions:

    In a large skillet or wok, heat the vegetable oil over medium-high heat. Add the minced garlic and sauté for about 30 seconds until fragrant.

    Then, add the shrimp and cook until they turn pink, about 2-3 minutes. Push the shrimp to one side of the pan, and pour in the beaten eggs, scrambling them until fully cooked.

    Next, add the mixed vegetables, cooked rice, soy sauce, and oyster sauce, stirring everything together until well combined and heated through. Toss in the chopped green onions and season with salt and pepper to taste.

    Cook for an additional minute, then remove from heat and serve hot.

    Extra Tips:

    For the best results, use cold, day-old rice, as freshly cooked rice can be too moist and sticky. If you don't have leftover rice, spread freshly cooked rice on a baking sheet to cool and dry out for about 30 minutes before using it.

    Feel free to customize your fried rice by adding other ingredients like bell peppers, broccoli, or even pineapple for a sweet twist. Additionally, verify your pan is hot enough before adding the ingredients to create a nice sear and improve the general flavor.

    Spicy Thai Shrimp Fried Rice

    spicy shrimp fried rice

    Spicy Thai Shrimp Fried Rice is a tantalizing dish that combines the bold flavors of Thai cuisine with the comforting essence of fried rice. This vibrant recipe features succulent shrimp, aromatic spices, and fresh vegetables, all stir-fried together to create a quick and satisfying meal that's perfect for any occasion.

    Whether you're craving a spicy kick or looking to impress your family and friends, this dish is sure to deliver.

    Ingredients:

    • 2 cups cooked jasmine rice (preferably day-old)
    • 1 pound shrimp, peeled and deveined
    • 2 tablespoons vegetable oil
    • 1 onion, diced
    • 3 cloves garlic, minced
    • 1 red bell pepper, diced
    • 1 cup snap peas, trimmed
    • 2 eggs, beaten
    • 3 tablespoons soy sauce
    • 1 tablespoon fish sauce
    • 1 tablespoon chili paste (adjust to taste)
    • 2 green onions, chopped
    • Fresh cilantro, for garnish
    • Lime wedges, for serving

    Cooking Instructions:

    In a large skillet or wok, heat the vegetable oil over medium-high heat. Add the diced onion and garlic, sautéing until fragrant and translucent.

    Next, toss in the shrimp and cook until they turn pink and opaque. Push the shrimp and vegetables to one side of the skillet, and pour the beaten eggs into the empty space, scrambling them until fully cooked.

    Mix everything together, then add the cooked jasmine rice, soy sauce, fish sauce, and chili paste. Stir-fry everything for a few minutes until heated through, and the rice is well coated with the sauces.

    Finally, fold in the diced bell pepper, snap peas, and green onions and cook for another minute before removing from heat.

    Extra Tips:

    For the best flavor and texture, use day-old rice, as it's drier and less sticky, making it perfect for frying.

    Feel free to customize the heat level by adjusting the amount of chili paste you use. Fresh vegetables like peas, carrots, or bok choy can be added for extra color and crunch.

    Garnishing with cilantro and serving with lime wedges will enhance the dish further, adding a revitalizing burst of flavor. Enjoy your spicy culinary adventure!

    Pineapple Shrimp Fried Rice

    Pineapple Shrimp Fried Rice is a delightful fusion dish that combines the savory flavors of shrimp and vegetables with the sweetness of pineapple. This vibrant dish is perfect for a quick weeknight dinner or a festive gathering, and it can easily be customized with your favorite ingredients. The combination of fresh ingredients and the tropical essence of pineapple makes this fried rice a revitalizing treat that's sure to impress.

    Ingredients:

    • 2 cups cooked jasmine rice (preferably day-old)
    • 1 pound shrimp, peeled and deveined
    • 1 cup fresh pineapple, diced
    • 1/2 cup frozen peas and carrots
    • 1/4 cup green onions, chopped
    • 2 cloves garlic, minced
    • 2 tablespoons soy sauce
    • 1 tablespoon oyster sauce (optional)
    • 2 tablespoons vegetable oil
    • Salt and pepper to taste
    • Lime wedges for serving (optional)

    To prepare the Pineapple Shrimp Fried Rice, start by heating the vegetable oil in a large skillet or wok over medium-high heat. Add the minced garlic and sauté for about 30 seconds until fragrant.

    Then, add the shrimp and cook until they turn pink, about 2-3 minutes. Stir in the frozen peas and carrots, and then add the cooked rice, breaking up any clumps. Pour in the soy sauce and oyster sauce, mixing everything well.

    Finally, fold in the diced pineapple and chopped green onions, cooking for another 2-3 minutes until everything is heated through. Season with salt and pepper to taste, and serve with lime wedges if desired.

    When making Pineapple Shrimp Fried Rice, using day-old rice is recommended as it helps achieve the perfect texture without becoming mushy. For an extra burst of flavor, consider marinating the shrimp in a bit of soy sauce and lime juice before cooking.

    You can also customize the dish by adding other vegetables like bell peppers or snap peas, or even incorporating scrambled eggs for added protein. Enjoy experimenting with flavors and textures to make this dish your own!

    Garlic Butter Shrimp Fried Rice

    garlic butter shrimp dish

    Garlic Butter Shrimp Fried Rice is a delectable and satisfying dish that combines tender shrimp with the rich flavors of garlic and butter, all tossed with fluffy rice. This recipe is perfect for a weeknight dinner or a special occasion, as it comes together quickly and is packed with delicious flavors.

    The combination of savory shrimp, aromatic garlic, and buttery rice creates a comforting meal that's sure to please everyone at the table.

    Ingredients:

    • 1 pound shrimp, peeled and deveined
    • 2 cups cooked jasmine rice (preferably day-old)
    • 4 tablespoons unsalted butter
    • 4 cloves garlic, minced
    • 1 cup frozen peas and carrots
    • 3 green onions, chopped
    • 2 tablespoons soy sauce
    • 1 tablespoon oyster sauce (optional)
    • Salt and pepper to taste
    • Fresh parsley for garnish (optional)

    Cooking Instructions:

    In a large skillet or wok, melt 2 tablespoons of butter over medium heat. Add the minced garlic and sauté for about 30 seconds until fragrant.

    Then, add the shrimp and cook until they turn pink and opaque, about 3-4 minutes. Remove the shrimp from the skillet and set aside.

    In the same skillet, add the remaining butter and the cooked rice, stirring to combine. Toss in the frozen peas and carrots, cooked shrimp, soy sauce, and oyster sauce, if using.

    Stir everything together for a few minutes until heated through and well mixed. Finish by adding chopped green onions and season with salt and pepper to taste.

    Extra Tips:

    For the best flavor, use day-old rice as it's drier and will fry better, preventing the dish from becoming mushy.

    Feel free to customize this recipe by adding other vegetables like bell peppers or broccoli for more color and nutrition. Additionally, you can adjust the amount of garlic based on your preference or even add a dash of chili flakes for some heat.

    Garnishing with fresh parsley adds a nice touch of freshness to the dish. Enjoy your cooking!

    Shrimp Fried Rice With Vegetables

    Shrimp fried rice with vegetables is a delicious and colorful dish that combines succulent shrimp with a medley of vibrant vegetables and perfectly cooked rice. This quick and easy recipe is perfect for weeknight dinners or as a delightful meal prep option. Packed with flavor and nutrients, it's a fantastic way to use leftover rice and incorporate a variety of veggies, making it both tasty and healthy.

    Ingredients:

    • 2 cups cooked jasmine rice (preferably cold)
    • 1 pound shrimp, peeled and deveined
    • 1 cup mixed vegetables (such as peas, carrots, and bell peppers)
    • 2 tablespoons soy sauce
    • 1 tablespoon oyster sauce (optional)
    • 2 tablespoons vegetable oil
    • 3 cloves garlic, minced
    • 2 green onions, chopped
    • 1 teaspoon sesame oil
    • Salt and pepper to taste
    • Optional: 2 eggs, beaten

    Cooking Instructions:

    In a large skillet or wok, heat the vegetable oil over medium-high heat. Add the minced garlic and sauté for about 30 seconds until fragrant.

    Then, add the shrimp and cook until they turn pink, about 2-3 minutes. Push the shrimp to one side of the skillet, and if using, pour the beaten eggs into the empty space, scrambling them until fully cooked.

    Next, add the mixed vegetables and stir-fry for another 2-3 minutes until they're tender-crisp. Ultimately, add the cooked rice, soy sauce, oyster sauce, sesame oil, and green onions, stirring everything together until well combined and heated through. Season with salt and pepper to taste.

    Extra Tips:

    For the best results, use leftover rice that has been chilled in the refrigerator, as this helps prevent the rice from becoming mushy.

    Feel free to customize the vegetables based on your preferences or what you have on hand. Additionally, you can add spices or herbs, like ginger or cilantro, to improve the flavor.

    Keep the heat high throughout the cooking process to achieve that signature fried rice texture. Finally, serve the dish hot and consider garnishing with additional green onions or sesame seeds for a delightful presentation!

    Coconut Shrimp Fried Rice

    coconut shrimp rice dish

    Coconut Shrimp Fried Rice is a delightful twist on the classic fried rice dish, infusing it with the rich and creamy flavor of coconut milk and the succulent taste of shrimp. This recipe isn't only easy to prepare but also brings a tropical flair to your dinner table.

    Perfect for a weeknight meal or a special occasion, this dish combines fresh vegetables, tender shrimp, and aromatic coconut to create a satisfying meal that will transport your taste buds straight to a beachside paradise.

    Ingredients:

    • 2 cups cooked jasmine rice (preferably day-old)
    • 1 cup peeled and deveined shrimp
    • 1 cup coconut milk
    • 1 tablespoon vegetable oil
    • 1 small onion, diced
    • 2 cloves garlic, minced
    • 1 cup mixed vegetables (carrots, peas, bell peppers)
    • 2 green onions, chopped
    • 2 tablespoons soy sauce
    • 1 tablespoon lime juice
    • Salt and pepper to taste
    • Fresh cilantro for garnish (optional)

    Cooking Instructions:

    In a large skillet or wok, heat the vegetable oil over medium heat. Add the diced onion and minced garlic, sautéing until the onion becomes translucent.

    Next, add the shrimp and cook for about 2-3 minutes until they turn pink. Stir in the mixed vegetables and cook for an additional 2 minutes, then pour in the coconut milk, soy sauce, and lime juice.

    Bring the mixture to a gentle simmer, then add the cooked jasmine rice, mixing everything together until the rice is heated through and well combined. Season with salt and pepper to taste, and sprinkle with chopped green onions before serving.

    Extra Tips:

    For the best texture and flavor, use day-old rice, as it's drier and less sticky, making it perfect for frying.

    Feel free to customize the dish by adding your favorite vegetables or adjusting the amount of coconut milk to your preference. If you want a bit more heat, consider adding a dash of chili flakes or sriracha.

    Finally, garnishing with fresh cilantro can enhance the dish with an extra burst of flavor and a vibrant touch. Enjoy your cooking adventure!

    Teriyaki Shrimp Fried Rice

    shrimp stir fried teriyaki rice

    Teriyaki Shrimp Fried Rice is a delightful fusion dish that combines the savory flavors of teriyaki sauce with the comforting texture of fried rice. This recipe is quick and easy to prepare, making it a perfect weeknight meal or a tasty option for entertaining guests.

    With succulent shrimp, colorful vegetables, and a rich teriyaki sauce, this dish will surely satisfy your taste buds and leave you wanting more.

    Ingredients:

    • 2 cups cooked jasmine rice (preferably day-old)
    • 1 pound shrimp, peeled and deveined
    • 2 tablespoons vegetable oil
    • 1 cup mixed vegetables (carrots, peas, and corn)
    • 3 green onions, chopped
    • 3 cloves garlic, minced
    • 1 tablespoon ginger, minced
    • 1/4 cup teriyaki sauce
    • 2 tablespoons soy sauce
    • Salt and pepper to taste
    • Sesame seeds for garnish (optional)

    Cooking Instructions:

    In a large skillet or wok, heat the vegetable oil over medium-high heat. Add the minced garlic and ginger, sautéing for about 30 seconds until fragrant.

    Next, add the shrimp and cook for 2-3 minutes until they turn pink and opaque. Stir in the mixed vegetables and cook for an additional 2 minutes.

    Then, add the cooked jasmine rice to the skillet, breaking up any clumps. Pour in the teriyaki sauce and soy sauce, mixing everything together until the rice is evenly coated and heated through.

    Finally, stir in the chopped green onions, season with salt and pepper to taste, and remove from heat.

    Extra Tips:

    To improve the flavor of your Teriyaki Shrimp Fried Rice, consider marinating the shrimp in a bit of teriyaki sauce for 10-15 minutes before cooking. This will infuse the shrimp with even more flavor.

    Additionally, using day-old rice helps prevent the grains from becoming mushy, as it's drier and firmer. Feel free to customize your dish by adding other vegetables like bell peppers or broccoli and adjusting the sauce amounts to suit your taste preferences.

    Finally, for a touch of crunch, sprinkle sesame seeds on top before serving. Enjoy your delicious creation!

    Lemon Herb Shrimp Fried Rice

    lemon herb shrimp rice

    Lemon Herb Shrimp Fried Rice is a fresh and zesty twist on a classic dish, perfect for a quick weeknight dinner or a delightful weekend meal. The combination of succulent shrimp, aromatic herbs, and vibrant lemon creates a dish that isn't only delicious but also visually appealing.

    This recipe is simple to prepare, making it a great option for both novice cooks and seasoned chefs alike. With just a few fresh ingredients, you can whip up a satisfying and flavorful meal that the whole family will love.

    Ingredients:

    • 2 cups cooked jasmine rice (preferably day-old)
    • 1 pound shrimp, peeled and deveined
    • 2 tablespoons olive oil
    • 3 cloves garlic, minced
    • 1 small onion, diced
    • 1 cup mixed vegetables (peas, carrots, bell peppers)
    • 2 tablespoons soy sauce
    • 1 tablespoon lemon juice
    • Zest of 1 lemon
    • 1 tablespoon fresh parsley, chopped
    • Salt and pepper to taste
    • Lemon wedges for serving

    Cooking Instructions:

    In a large skillet or wok, heat the olive oil over medium-high heat. Add the diced onion and minced garlic, sautéing until fragrant and the onion becomes translucent.

    Next, add the shrimp and cook until they turn pink and opaque, about 2-3 minutes. Stir in the mixed vegetables and cook for an additional 2 minutes.

    Then, add the cooked rice, soy sauce, lemon juice, lemon zest, parsley, salt, and pepper. Mix everything well and cook for another 3-4 minutes, allowing the flavors to combine and the rice to heat through.

    Extra Tips:

    For the best flavor, use day-old rice as it has a firmer texture that helps prevent it from becoming mushy during cooking.

    You can also customize the vegetables based on what you have on hand or prefer; broccoli, snap peas, or corn can all be great additions.

    If you enjoy a bit of heat, consider adding a pinch of red pepper flakes or a dash of hot sauce for an extra kick.

    Finally, garnishing the dish with additional fresh herbs or a sprinkle of sesame seeds can enhance its presentation and flavor.

    Shrimp Fried Rice With Egg

    shrimp and egg fried rice

    Shrimp fried rice with egg is a delicious and versatile dish that combines succulent shrimp, fluffy rice, and rich eggs to create a satisfying meal. This recipe is perfect for a quick weeknight dinner or as a tasty way to use leftover rice. With just a few ingredients and steps, you can whip up a flavorful dish that's sure to please the whole family.

    Ingredients:

    • 2 cups cooked rice (preferably day-old)
    • 1 cup shrimp, peeled and deveined
    • 2 large eggs
    • 2 tablespoons vegetable oil
    • 3 green onions, chopped
    • 2 cloves garlic, minced
    • 2 tablespoons soy sauce
    • Salt and pepper to taste

    Cooking Instructions:

    In a large skillet or wok, heat the vegetable oil over medium-high heat. Add the minced garlic and sauté for about 30 seconds until fragrant.

    Then, add the shrimp and cook until they turn pink, about 2-3 minutes. Push the shrimp to one side of the skillet, crack the eggs into the other side, and scramble them until fully cooked.

    Next, add the cooked rice to the skillet, breaking up any clumps, and stir everything together. Pour the soy sauce over the mixture, followed by the chopped green onions.

    Season with salt and pepper to taste, and continue to stir-fry for another 2-3 minutes until heated through.

    Extra Tips:

    For the best flavor and texture, use day-old rice, as it's drier and less sticky than freshly cooked rice. This will help prevent the fried rice from becoming mushy.

    Feel free to customize the dish by adding vegetables like peas, carrots, or bell peppers for extra nutrition and color. Additionally, you can adjust the soy sauce to your taste or even try adding a splash of sesame oil for a nutty flavor.

    Enjoy your homemade shrimp fried rice with egg!

    Cajun Shrimp Fried Rice

    spicy shrimp rice dish

    Cajun Shrimp Fried Rice is a delightful fusion dish that combines the bold flavors of Cajun cuisine with the comforting essence of fried rice. This recipe is perfect for a quick weeknight dinner or a lively gathering, as it brings together succulent shrimp, colorful vegetables, and a blend of spices that will tantalize your taste buds.

    With its vibrant colors and rich flavors, this dish is sure to impress anyone at your dining table.

    Ingredients:

    • 2 cups cooked jasmine rice (preferably day-old)
    • 1 pound shrimp, peeled and deveined
    • 2 tablespoons Cajun seasoning
    • 1 tablespoon olive oil
    • 1 bell pepper, diced
    • 1 small onion, diced
    • 2 cloves garlic, minced
    • 2 green onions, chopped
    • 2 eggs, beaten
    • 2 tablespoons soy sauce
    • Salt and pepper to taste
    • Fresh parsley, chopped (for garnish)

    Instructions:

    Start by marinating the shrimp with Cajun seasoning for about 10 minutes.

    In a large skillet or wok, heat the olive oil over medium-high heat. Add the diced onions and bell peppers, sautéing for about 3-4 minutes until they soften.

    Push the vegetables to one side of the skillet and pour in the beaten eggs, scrambling until fully cooked.

    Add the marinated shrimp to the skillet, cooking until they turn pink and opaque. Stir in the garlic and cooked rice, mixing everything thoroughly.

    Drizzle with soy sauce, adding salt and pepper to taste, and cook for an additional 2-3 minutes to allow the flavors to meld together.

    Finally, sprinkle the chopped green onions and parsley before serving.

    Extra Tips:

    For the best results, use day-old rice as it's drier and prevents the dish from becoming mushy.

    Feel free to adjust the level of Cajun seasoning according to your spice preference. You can also add other vegetables like peas or corn for additional texture and flavor.

    If you want a bit more heat, consider adding sliced jalapeños or a dash of hot sauce. Don't forget to taste and adjust the seasoning as needed before serving!

  • 10 Best Red Snapper Recipes

    10 Best Red Snapper Recipes

    If you're looking to spice up your dinner with some delicious red snapper recipes, you're in for a treat! This fish is packed with flavor and super versatile, so whether you like it grilled, baked, or even in tacos, there's a recipe just waiting for you. Imagine crispy skin, fresh herbs, and zesty toppings that'll have everyone coming back for seconds. Curious about what recipes made the cut? Let's explore these mouthwatering options!

    Grilled Red Snapper With Lemon and Herbs

    Grilled red snapper with lemon and herbs is a delightful dish that brings out the fresh flavors of the fish while adding a zesty kick. The combination of lemon, garlic, and a variety of herbs improves the natural sweetness of the snapper, making it a perfect choice for a summer barbecue or a cozy dinner at home.

    This simple yet elegant recipe requires minimal ingredients and cooking time, allowing the fish to shine in its own right.

    Ingredients:

    • 2 whole red snapper, cleaned and scaled
    • 2 lemons (one sliced, one juiced)
    • 4 cloves garlic, minced
    • 1/4 cup olive oil
    • 1/4 cup fresh parsley, chopped
    • 1/4 cup fresh basil, chopped
    • Salt and pepper to taste
    • Fresh herbs for garnish (optional)

    Instructions:

    Begin by preheating your grill to medium-high heat. In a small bowl, mix the olive oil, minced garlic, lemon juice, chopped parsley, chopped basil, salt, and pepper to create a marinade.

    Rub the marinade all over the red snapper, ensuring to coat the inside of the cavity as well. Place a few lemon slices inside the fish for added flavor.

    Once the grill is hot, place the snapper on a lightly oiled grill grate and cook for about 6-8 minutes on each side, or until the fish is opaque and flakes easily with a fork.

    Carefully remove the fish from the grill and let it rest for a few minutes before serving.

    Extra Tips:

    When grilling red snapper, it's essential to avoid overcooking, as this can lead to a dry texture. Keep an eye on the fish, and use a fish spatula to turn it gently to prevent it from breaking apart.

    If you're worried about sticking, consider using a fish basket or wrapping the fish in aluminum foil for easier handling. Additionally, feel free to experiment with different herbs such as thyme or dill to personalize the flavor profile to your liking.

    Enjoy your grilled red snapper with a side of grilled vegetables or a fresh salad for a complete meal.

    Baked Red Snapper With Garlic and Tomatoes

    garlic infused tomato snapper dish

    Baked red snapper with garlic and tomatoes is a delightful way to enjoy this flavorful fish, highlighting its natural sweetness and delicate texture. This dish isn't only simple to prepare but also brings a burst of fresh flavors that perfectly complements the fish.

    The combination of garlic, juicy tomatoes, and herbs creates a savory sauce that infuses the snapper as it bakes, resulting in a dish that's both aromatic and visually appealing.

    Ingredients:

    • 2 whole red snapper, cleaned and scaled
    • 4 cloves garlic, minced
    • 2 cups cherry tomatoes, halved
    • 1/4 cup olive oil
    • 1 lemon, sliced
    • 1/4 cup fresh parsley, chopped
    • Salt and pepper, to taste
    • Fresh thyme or oregano, for garnish (optional)

    Cooking Instructions:

    Preheat your oven to 400°F (200°C). In a large baking dish, arrange the cleaned red snapper and drizzle with olive oil, ensuring the fish is well coated.

    Spread the minced garlic and halved cherry tomatoes around the fish, then season everything generously with salt and pepper. Place lemon slices on top of the snapper and sprinkle with chopped parsley.

    Cover the baking dish with aluminum foil and bake for 25-30 minutes, or until the fish flakes easily with a fork. Remove the foil for the last 5 minutes of cooking to allow for a slightly crispy texture on top.

    Extra Tips:

    For best results, choose fresh red snapper from a reputable source. If you can, ask the fishmonger for the freshest catch available.

    Feel free to customize this recipe by adding your favorite herbs or spices to the dish, such as dill or paprika, for additional flavor. Additionally, serving the baked snapper with a side of crusty bread or over a bed of rice can help soak up the delicious juices, making for a well-rounded meal.

    Pan-Seared Red Snapper With Capers and Olives

    Pan-Seared Red Snapper with Capers and Olives is a delightful dish that combines the delicate flavor of fresh red snapper with the briny goodness of capers and olives. This simple yet sophisticated recipe is perfect for a weeknight dinner or an elegant gathering.

    The snapper is seared to perfection, resulting in a crispy skin while maintaining a moist and tender interior, improved by the tangy and savory notes from the capers and olives.

    Ingredients:

    • 2 red snapper fillets
    • Salt and pepper, to taste
    • 2 tablespoons olive oil
    • 2 tablespoons capers, rinsed and drained
    • 1/4 cup green olives, pitted and sliced
    • 2 cloves garlic, minced
    • 1 tablespoon fresh lemon juice
    • Fresh parsley, chopped (for garnish)
    • Lemon wedges (for serving)

    Instructions:

    Start by patting the red snapper fillets dry with paper towels and season both sides generously with salt and pepper.

    Heat the olive oil in a large skillet over medium-high heat. When the oil is hot, add the snapper fillets skin-side down and cook for about 4-5 minutes until the skin is crispy and golden brown.

    Carefully flip the fillets and add the minced garlic, capers, and olives to the skillet. Cook for an additional 3-4 minutes, until the fish is cooked through and flakes easily with a fork.

    Drizzle with fresh lemon juice just before serving, and garnish with chopped parsley.

    Extra Tips:

    When cooking red snapper, it's essential to verify that your skillet is adequately heated before adding the fish to achieve that crispy skin.

    Avoid moving the fillets around too much in the pan; let them sear undisturbed for the best texture.

    You can also customize this dish by adding other herbs like thyme or oregano for additional flavor.

    For a complete meal, serve the pan-seared red snapper with a side of sautéed vegetables or a fresh salad.

    Red Snapper Tacos With Mango Salsa

    tacos with mango salsa

    Red Snapper Tacos with Mango Salsa is a vibrant and flavorful dish that brings a taste of the tropics to your dinner table. The succulent fish pairs beautifully with the sweet and tangy mango salsa, creating a perfect balance of flavors that will delight your taste buds.

    This dish isn't only delicious but also quick to prepare, making it ideal for a weeknight meal or a festive gathering. Serve the tacos with your favorite toppings for an added burst of flavor and color.

    Ingredients:

    • 1 lb red snapper fillets
    • 2 tablespoons olive oil
    • 1 teaspoon chili powder
    • 1 teaspoon cumin
    • Salt and pepper to taste
    • 8 small corn tortillas
    • 1 ripe mango, diced
    • 1/4 red onion, finely chopped
    • 1 jalapeño, seeded and minced
    • Juice of 1 lime
    • Fresh cilantro, chopped (for garnish)

    Cooking Instructions:

    Begin by preheating your grill or skillet over medium heat. In a small bowl, mix the olive oil, chili powder, cumin, salt, and pepper. Brush this mixture onto the red snapper fillets.

    Cook the fillets for about 4-5 minutes per side or until the fish flakes easily with a fork. While the fish is cooking, prepare the mango salsa by combining the diced mango, red onion, jalapeño, lime juice, and a pinch of salt in a separate bowl.

    Once the snapper is cooked, warm the corn tortillas on the grill for about 30 seconds on each side. Assemble the tacos by placing a piece of red snapper on each tortilla, topped generously with mango salsa, and garnish with fresh cilantro.

    Extra Tips:

    For the best results, make sure your red snapper is fresh and of high quality, as this will greatly improve the flavor of the tacos.

    If you prefer a bit of heat, consider adding diced avocado or a drizzle of spicy sauce to your tacos. Additionally, feel free to customize your toppings with ingredients like shredded cabbage, lime wedges, or a creamy sauce to raise your dish further.

    Enjoy experimenting with different flavor combinations!

    Thai Red Snapper Curry

    Thai Red Snapper Curry is a vibrant and flavorful dish that brings together the delicate taste of red snapper with the aromatic spices and creamy coconut milk characteristic of Thai cuisine. This hearty curry isn't only easy to prepare but also packed with fresh vegetables and herbs, making it a delightful meal for any occasion.

    Serve it over jasmine rice or with rice noodles for a complete and satisfying dining experience.

    Ingredients:

    • 1 pound red snapper fillets, skin removed
    • 1 tablespoon vegetable oil
    • 1 onion, thinly sliced
    • 3 cloves garlic, minced
    • 1 tablespoon fresh ginger, grated
    • 2 tablespoons red curry paste
    • 1 can (14 oz) coconut milk
    • 1 cup vegetable broth
    • 1 red bell pepper, sliced
    • 1 cup snap peas
    • 1 tablespoon fish sauce
    • 1 tablespoon lime juice
    • Fresh basil leaves for garnish
    • Cooked jasmine rice for serving

    Instructions:

    In a large skillet or wok, heat the vegetable oil over medium heat. Add the sliced onion, garlic, and ginger, cooking until the onion becomes translucent.

    Stir in the red curry paste and cook for an additional minute until fragrant. Pour in the coconut milk and vegetable broth, bringing the mixture to a gentle simmer.

    Add the red bell pepper and snap peas, cooking for about 5 minutes until the vegetables are tender.

    Gently place the red snapper fillets into the curry sauce, cooking for another 5-7 minutes until the fish is cooked through and flakes easily.

    Finish by stirring in the fish sauce and lime juice, and remove from heat.

    Extra Tips:

    For the best flavor, consider marinating the red snapper in a bit of lime juice and salt for 15-20 minutes before cooking. This improves the fish's taste and adds a nice zing to the dish.

    If you prefer a spicier curry, feel free to increase the amount of red curry paste or add fresh chilies. Additionally, you can customize the vegetables based on your preference or what's in season, such as adding zucchini or eggplant.

    Garnish with fresh basil leaves right before serving to boost the aroma and presentation of your Thai Red Snapper Curry.

    Stuffed Red Snapper With Spinach and Feta

    stuffed fish with spinach

    Stuffed red snapper with spinach and feta is a delightful dish that combines the mild flavor of the fish with the rich, savory notes of spinach and feta cheese. This recipe not only enhances the taste of the red snapper but also makes for an impressive presentation when served.

    The combination of fresh ingredients creates a healthy and delicious meal that can be prepared in under an hour, perfect for a weeknight dinner or a special occasion.

    Ingredients:

    • 2 whole red snapper, cleaned and scaled
    • 2 cups fresh spinach, chopped
    • 1 cup feta cheese, crumbled
    • 1/2 cup breadcrumbs
    • 2 cloves garlic, minced
    • 1 tablespoon olive oil
    • 1 teaspoon lemon juice
    • Salt and pepper, to taste
    • Fresh parsley, for garnish
    • Lemon wedges, for serving

    Cooking Instructions:

    Preheat your oven to 375°F (190°C). In a skillet, heat the olive oil over medium heat and sauté the garlic until fragrant.

    Add the chopped spinach and cook until wilted, about 2-3 minutes. In a mixing bowl, combine the sautéed spinach, feta cheese, breadcrumbs, lemon juice, salt, and pepper.

    Carefully make a slit along the side of each red snapper to create a pocket and stuff each fish with the spinach and feta mixture.

    Place the stuffed snapper on a baking sheet lined with parchment paper and bake for 25-30 minutes, or until the fish is cooked through and flakes easily with a fork.

    Serve garnished with fresh parsley and lemon wedges.

    Extra Tips:

    When preparing the red snapper, make sure to rinse it thoroughly and pat it dry to guarantee the skin crisps up nicely during baking.

    Feel free to customize the stuffing by adding herbs like dill or oregano for additional flavor.

    If you don't have fresh spinach, frozen spinach can be used, but make sure to thaw and drain it well to avoid excess moisture.

    For a touch of heat, consider adding a pinch of red pepper flakes to the stuffing mixture.

    Enjoy your delicious stuffed red snapper as a healthy and satisfying meal!

    Red Snapper Ceviche With Avocado

    fresh ceviche with avocado

    Red Snapper Ceviche with Avocado is a revitalizing and vibrant dish that brings together the flavors of the ocean and the creaminess of ripe avocados. This no-cook recipe is perfect for a light appetizer or a summer meal, highlighting the delicate taste of fresh red snapper marinated in zesty lime juice.

    The addition of creamy avocado and fresh herbs adds depth and richness, making it a delightful dish for any seafood lover.

    Ingredients:

    • 1 pound fresh red snapper fillets, skinless and boneless
    • 1 cup freshly squeezed lime juice
    • 1 medium red onion, finely chopped
    • 1 medium tomato, diced
    • 1 jalapeño pepper, seeded and minced
    • 1/2 cup fresh cilantro, chopped
    • 1 ripe avocado, diced
    • Salt and pepper to taste
    • Tortilla chips or tostadas for serving

    Instructions:

    Start by cutting the red snapper fillets into small, bite-sized cubes and place them in a glass or ceramic bowl.

    Pour the lime juice over the fish, ensuring it's fully submerged, and let it marinate in the refrigerator for about 30 minutes or until the fish turns opaque.

    Once the fish is ready, add the red onion, tomato, jalapeño, and cilantro to the bowl, mixing gently to combine.

    Finally, fold in the diced avocado, season with salt and pepper to taste, and serve chilled with tortilla chips or tostadas.

    Extra Tips:

    For the best flavor, use the freshest red snapper available, as its quality greatly impacts the dish.

    If you prefer a milder ceviche, feel free to adjust the amount of jalapeño according to your spice tolerance.

    Additionally, you can experiment with other ingredients like mango or cucumber for added sweetness and crunch.

    To improve the presentation, serve the ceviche in small glasses or bowls, garnished with extra cilantro and lime wedges.

    Enjoy this dish immediately for the best texture and taste!

    Blackened Red Snapper With Cajun Seasoning

    cajun seasoned blackened snapper

    Blackened red snapper is a flavorful dish that showcases the robust flavors of Cajun seasoning while allowing the delicate texture of the fish to shine through. This cooking technique involves searing the fish in a hot skillet until the seasoning forms a beautiful crust, creating a tantalizing contrast between the spicy exterior and the tender, juicy interior.

    Perfect for a quick weeknight dinner or an impressive dish for guests, this blackened red snapper recipe is sure to become a favorite in your culinary repertoire.

    Ingredients:

    • 4 red snapper fillets
    • 2 tablespoons Cajun seasoning
    • 2 tablespoons olive oil
    • 1 tablespoon unsalted butter
    • Lemon wedges (for serving)
    • Fresh parsley, chopped (for garnish)

    Instructions:

    Begin by patting the red snapper fillets dry with paper towels to guarantee they sear properly. Sprinkle an even coat of Cajun seasoning on both sides of each fillet, pressing gently to cling.

    Heat olive oil and butter in a large skillet over medium-high heat until the butter is melted and begins to foam. Carefully place the seasoned fillets in the skillet, cooking for about 3-4 minutes on each side, or until the exterior is dark and crusty and the fish flakes easily with a fork.

    Remove from heat and serve immediately with lemon wedges and a sprinkle of fresh parsley.

    Extra Tips:

    For the best results, make sure your skillet is very hot before adding the fish; this will help achieve that signature blackened crust.

    If you prefer a milder flavor, you can adjust the amount of Cajun seasoning or make your own blend with paprika, garlic powder, onion powder, and a pinch of cayenne.

    Additionally, consider pairing the dish with sides like coleslaw or sautéed vegetables to balance the spices. Enjoy your blackened red snapper with a revitalizing beverage to complement the bold flavors!

    Mediterranean Red Snapper With Olives and Feta

    mediterranean fish dish recipe

    Mediterranean Red Snapper with Olives and Feta is a delightful dish that brings the vibrant flavors of the Mediterranean to your table. This recipe features tender red snapper fillets baked to perfection with a savory mix of olives, feta cheese, and fresh herbs.

    The combination of salty feta and briny olives pairs beautifully with the mild sweetness of the fish, creating a dish that's both simple and elegant. Perfect for a weeknight dinner or a special occasion, this Mediterranean-inspired meal is sure to impress!

    Ingredients:

    • 2 red snapper fillets
    • 1 cup Kalamata olives, pitted and halved
    • 1 cup cherry tomatoes, halved
    • 1/2 cup feta cheese, crumbled
    • 3 cloves garlic, minced
    • 2 tablespoons olive oil
    • 1 tablespoon fresh lemon juice
    • 1 teaspoon dried oregano
    • Salt and pepper to taste
    • Fresh parsley, chopped (for garnish)

    Cooking Instructions:

    Preheat your oven to 400°F (200°C).

    In a large baking dish, combine the olives, cherry tomatoes, garlic, olive oil, lemon juice, oregano, salt, and pepper, tossing them together until well mixed.

    Place the red snapper fillets on top of the olive and tomato mixture, then sprinkle the crumbled feta cheese over the fish.

    Bake in the preheated oven for 20-25 minutes, or until the fish is cooked through and flakes easily with a fork.

    Remove from the oven and garnish with fresh parsley before serving.

    Extra Tips:

    For added flavor, consider marinating the red snapper in olive oil, lemon juice, and herbs for about 30 minutes before cooking. This will elevate the taste of the fish and allow it to absorb the Mediterranean flavors more deeply.

    Additionally, feel free to customize the dish by adding other vegetables such as bell peppers or zucchini, or by using fresh herbs like basil or thyme for a different twist.

    Serve this dish with a side of crusty bread or a light salad for a complete meal.

    Sweet and Sour Red Snapper Stir-Fry

    sweet and sour stir fry

    Sweet and Sour Red Snapper Stir-Fry is a vibrant and flavorful dish that perfectly combines the delicate taste of red snapper with a tangy, sweet sauce. This quick and easy recipe is perfect for a weeknight dinner, allowing you to enjoy a delicious meal that's both nutritious and satisfying.

    The stir-fry method guarantees that the fish retains its tenderness while soaking up the delicious flavors of the sauce, making it a hit for the whole family.

    Ingredients:

    • 1 pound red snapper fillets, cut into bite-sized pieces
    • 2 tablespoons vegetable oil
    • 1 bell pepper, sliced (any color)
    • 1 cup snap peas
    • 1 small onion, sliced
    • 2 cloves garlic, minced
    • 1 tablespoon ginger, minced
    • 1/4 cup soy sauce
    • 1/4 cup rice vinegar
    • 2 tablespoons brown sugar
    • 1 tablespoon cornstarch mixed with 2 tablespoons water (slurry)
    • Cooked rice for serving
    • Sesame seeds for garnish (optional)
    • Green onions, chopped for garnish (optional)

    To prepare the Sweet and Sour Red Snapper Stir-Fry, heat the vegetable oil in a large skillet or wok over medium-high heat. Once the oil is hot, add the red snapper pieces and cook for about 3-4 minutes, or until the fish is opaque and cooked through.

    Remove the fish from the skillet and set aside. In the same skillet, add the sliced bell pepper, snap peas, onion, garlic, and ginger, and sauté for 2-3 minutes until the vegetables are tender-crisp.

    In a small bowl, mix together the soy sauce, rice vinegar, and brown sugar, then pour the mixture into the skillet. Bring to a simmer and add the cornstarch slurry to thicken the sauce.

    Return the cooked red snapper to the skillet, tossing everything together to coat the fish and vegetables in the sauce. Cook for an additional minute, then remove from heat.

    When cooking this dish, make certain not to overcook the red snapper, as it can become dry and flaky. You can also customize the vegetables based on your preferences or what you have on hand; broccoli, carrots, or zucchini would all work well.

    For added flavor, consider marinating the snapper in the soy sauce mixture for about 15 minutes before cooking. Serve the stir-fry over a bed of fluffy rice and garnish with sesame seeds and chopped green onions for a beautiful presentation.

    Enjoy your delicious Sweet and Sour Red Snapper Stir-Fry!

  • 10 Best Salmon Patty Recipes

    10 Best Salmon Patty Recipes

    If you're looking to spice up your dinner table, salmon patties are a fantastic choice. They're not just tasty, but super versatile too! You can whip up everything from classic versions with dill sauce to zesty chipotle flavors that pack a punch. Plus, these patties can be crispy or baked, depending on your mood. Curious about how to make the best ones? Let's explore some mouthwatering recipes that'll have everyone asking for seconds!

    Classic Salmon Patties With Dill Sauce

    Classic salmon patties with dill sauce are a delightful and easy dish that combines the rich flavor of salmon with the invigorating taste of dill. This recipe is perfect for a weeknight dinner or a casual gathering with friends.

    The patties are crispy on the outside and tender on the inside, while the creamy dill sauce adds a burst of flavor that complements the salmon beautifully. Serve these patties with a side salad or some roasted vegetables for a complete meal.

    Ingredients:

    • 1 can (14.75 oz) of salmon, drained and flaked
    • 1/2 cup breadcrumbs
    • 1/4 cup finely chopped onion
    • 1/4 cup mayonnaise
    • 1 egg, beaten
    • 1 tablespoon Dijon mustard
    • 1 teaspoon dried dill weed
    • Salt and pepper to taste
    • 2 tablespoons olive oil (for frying)

    Cooking Instructions:

    In a large bowl, combine the flaked salmon, breadcrumbs, chopped onion, mayonnaise, beaten egg, Dijon mustard, dill weed, salt, and pepper. Mix well until all ingredients are fully incorporated.

    Form the mixture into patties, about 2 to 3 inches in diameter. Heat olive oil in a large skillet over medium heat. Once hot, add the salmon patties and cook for about 4-5 minutes on each side, or until golden brown and crispy.

    Remove from the skillet and place on a paper towel-lined plate to drain excess oil.

    Extra Tips:

    For the best flavor, let the salmon mixture sit in the fridge for about 30 minutes before frying; this helps the patties hold together better.

    You can also customize the dill sauce by adding a squeeze of lemon juice or a bit of garlic for an extra kick. If you prefer a healthier option, bake the patties in the oven at 375°F for about 20 minutes, flipping halfway through, to achieve a nice crisp without the extra oil.

    Spicy Chipotle Salmon Patties

    savory chipotle salmon patties

    Spicy Chipotle Salmon Patties are a flavorful twist on traditional salmon cakes, perfect for a quick dinner or a protein-packed lunch. These patties combine the rich taste of salmon with the smoky heat of chipotle, creating a delectable dish that's sure to impress.

    Whether served on a bun, atop a salad, or simply with a side of your favorite dipping sauce, these spicy salmon patties are both delicious and easy to prepare.

    Ingredients:

    • 1 pound canned or cooked salmon, drained and flaked
    • 1/2 cup breadcrumbs
    • 1/4 cup green onions, chopped
    • 1/4 cup mayonnaise
    • 1 egg, beaten
    • 1 tablespoon chipotle in adobo sauce, minced
    • 1 teaspoon garlic powder
    • 1 teaspoon cumin
    • Salt and pepper to taste
    • Olive oil for frying

    Instructions:

    In a large mixing bowl, combine the flaked salmon, breadcrumbs, chopped green onions, mayonnaise, beaten egg, minced chipotle, garlic powder, cumin, salt, and pepper.

    Mix until all ingredients are well incorporated. Form the mixture into patties, about 2-3 inches in diameter.

    Heat olive oil in a skillet over medium heat, and once hot, add the patties. Cook for about 4-5 minutes on each side, or until golden brown and crispy.

    Remove from the skillet and let them drain on paper towels before serving.

    Extra Tips:

    For added flavor, consider mixing in some fresh herbs like cilantro or parsley.

    If you prefer a milder version, reduce the amount of chipotle or use a milder pepper alternative.

    These patties can also be made ahead of time and frozen; simply cook them from frozen, adding a few extra minutes to the cooking time.

    Pair these with a revitalizing avocado salsa or a tangy yogurt sauce for a delightful contrast to the spiciness.

    Lemon Herb Salmon Patties

    Lemon Herb Salmon Patties are a delightful and healthy dish that brings together the fresh flavors of lemon and herbs with the rich taste of salmon.

    These patties are perfect for a quick weeknight dinner or a light lunch and can be served with a side salad or in a sandwich. The combination of flaky salmon, zesty lemon, and fragrant herbs creates a delicious meal that's both satisfying and nutritious.

    Ingredients:

    • 1 can (14.75 oz) of salmon, drained and flaked
    • 1/2 cup breadcrumbs
    • 1/4 cup fresh parsley, chopped
    • 2 green onions, finely chopped
    • 1 large egg
    • 1 tablespoon lemon juice
    • Zest of 1 lemon
    • 1 teaspoon Dijon mustard
    • Salt and pepper to taste
    • Olive oil for frying

    Cooking Instructions:

    In a large bowl, combine the flaked salmon, breadcrumbs, parsley, green onions, egg, lemon juice, lemon zest, Dijon mustard, salt, and pepper.

    Mix well until all ingredients are thoroughly combined. Form the mixture into patties, about 2-3 inches in diameter.

    Heat a skillet over medium heat and add a drizzle of olive oil. Once the oil is hot, place the patties in the skillet and cook for about 4-5 minutes on each side, or until golden brown and cooked through.

    Remove from the skillet and let drain on paper towels.

    Extra Tips:

    For an extra burst of flavor, try adding a teaspoon of garlic powder or minced garlic to the salmon mixture.

    If you prefer a healthier option, bake the patties in a preheated oven at 375°F for about 15-20 minutes, flipping halfway through, instead of frying.

    Feel free to experiment with different herbs, such as dill or cilantro, to customize the flavor to your liking.

    Serve these salmon patties with a lemony yogurt sauce or tartar sauce for dipping for a delicious finishing touch!

    Cajun Salmon Patties With Remoulade

    cajun salmon patties recipe

    Cajun Salmon Patties with Remoulade are a delicious twist on the classic salmon patty, infused with bold Cajun spices to deliver an exciting flavor profile. These patties are perfect for a quick weeknight dinner or as a delightful appetizer for your next gathering. Served with a zesty remoulade sauce, they offer a perfect balance of spiciness and creaminess that will have your taste buds dancing.

    Ingredients:

    • 1 pound canned or cooked salmon, drained and flaked
    • 1/2 cup breadcrumbs
    • 1/4 cup green onions, chopped
    • 1/4 cup bell pepper, finely chopped
    • 2 large eggs, beaten
    • 2 tablespoons Cajun seasoning
    • 1 tablespoon Dijon mustard
    • 2 tablespoons mayonnaise
    • Salt and pepper to taste
    • Oil for frying

    Cooking Instructions:

    In a large bowl, combine the flaked salmon, breadcrumbs, chopped green onions, bell pepper, beaten eggs, Cajun seasoning, Dijon mustard, and mayonnaise. Mix well until all ingredients are thoroughly combined.

    Form the mixture into patties, approximately 2-3 inches in diameter. Heat oil in a skillet over medium heat, then carefully place the patties in the hot oil, cooking for about 4-5 minutes on each side or until golden brown and crispy.

    Remove the patties and drain on paper towels before serving.

    Extra Tips:

    For an added kick, consider mixing in some finely chopped jalapeños or a dash of hot sauce into the salmon mixture.

    If you want to make the patties ahead of time, they can be formed and refrigerated for a couple of hours before cooking.

    Verify that the oil is hot enough before adding the patties to avoid them becoming soggy.

    Serve these delicious Cajun salmon patties alongside the remoulade, which can be made with mayonnaise, mustard, capers, and spices for an extra layer of flavor.

    Mediterranean Salmon Patties With Feta

    Mediterranean Salmon Patties with Feta are a delightful twist on traditional salmon cakes, infused with vibrant flavors from the Mediterranean region. These patties combine flaky salmon with tangy feta cheese, fresh herbs, and a hint of lemon, making them a perfect option for a light lunch or dinner.

    They're easy to prepare and can be served with a side salad or in a pita for a delicious meal that's both nutritious and satisfying.

    Ingredients:

    • 1 can (14.75 oz) of salmon, drained and flaked
    • 1/2 cup feta cheese, crumbled
    • 1/4 cup fresh parsley, chopped
    • 1/4 cup green onions, chopped
    • 1/2 cup breadcrumbs
    • 1 large egg, beaten
    • 1 tablespoon lemon juice
    • 1 teaspoon dried oregano
    • Salt and pepper to taste
    • Olive oil for frying

    Cooking Instructions:

    In a large bowl, combine the flaked salmon, crumbled feta cheese, chopped parsley, green onions, breadcrumbs, beaten egg, lemon juice, oregano, salt, and pepper.

    Mix until all ingredients are well incorporated. Shape the mixture into patties, about 2-3 inches in diameter.

    Heat a skillet over medium heat and add olive oil. Once hot, carefully place the patties in the skillet and cook for about 4-5 minutes on each side, or until golden brown and cooked through.

    Remove from the skillet and place on a paper towel to absorb any excess oil.

    Extra Tips:

    For added flavor, consider incorporating other Mediterranean ingredients such as sun-dried tomatoes or olives into the mixture.

    If you prefer a spicier kick, a pinch of red pepper flakes can improve the taste.

    To guarantee the patties hold together well, let the mixture rest in the refrigerator for about 30 minutes before forming the patties. This will help them firm up.

    Additionally, serve the patties with a yogurt sauce or tzatziki for a revitalizing complement to the flavors.

    Sweet Potato and Salmon Patties

    sweet potato salmon patties

    Sweet Potato and Salmon Patties are a delightful and nutritious dish that combines the natural sweetness of sweet potatoes with the rich flavor of salmon.

    These patties are perfect for a light lunch or dinner and can be served with a fresh salad or a tangy dipping sauce. Not only are they simple to make, but they also pack a punch of protein and healthy fats, making them a wholesome choice for any meal.

    Ingredients:

    • 1 cup cooked and mashed sweet potatoes
    • 1 can (14.75 oz) salmon, drained and flaked
    • 1/2 cup breadcrumbs (or gluten-free breadcrumbs)
    • 1/4 cup finely chopped onion
    • 1/4 cup chopped fresh parsley
    • 1 egg, beaten
    • 1 teaspoon garlic powder
    • 1 teaspoon paprika
    • Salt and pepper, to taste
    • Olive oil, for frying

    Cooking Instructions:

    In a large mixing bowl, combine the mashed sweet potatoes, flaked salmon, breadcrumbs, chopped onion, parsley, beaten egg, garlic powder, paprika, salt, and pepper.

    Mix until all ingredients are well combined. Form the mixture into patties, about 2-3 inches in diameter.

    Heat a skillet over medium heat and add a drizzle of olive oil. Once the oil is hot, carefully place the patties in the skillet and cook for about 4-5 minutes on each side, or until they're golden brown and heated through.

    Remove the patties from the skillet and place them on a paper towel-lined plate to absorb any excess oil.

    Extra Tips:

    To improve the flavor of your Sweet Potato and Salmon Patties, consider adding a teaspoon of Dijon mustard or a splash of lemon juice to the mixture for extra zest.

    If you want to make the patties ahead of time, you can prepare them and refrigerate them for up to 24 hours before cooking.

    Additionally, these patties freeze well, so feel free to make a larger batch and store them in an airtight container for a quick meal option later on.

    Serve with a dollop of Greek yogurt or your favorite sauce for a delicious finishing touch!

    Asian-Inspired Salmon Patties With Soy Sauce

    asian salmon patties recipe

    Asian-Inspired Salmon Patties with Soy Sauce offer a delightful fusion of flavors that are both savory and satisfying.

    These patties are made with fresh salmon, aromatic ginger, and a touch of soy sauce, which brings out the umami essence of the fish. Perfect as an appetizer or a main dish, these patties can be served with a side of steamed vegetables or over a bed of rice for a complete meal.

    Ingredients:

    • 1 pound fresh salmon fillet, skin removed and chopped
    • 1/4 cup breadcrumbs
    • 1/4 cup green onions, finely chopped
    • 2 tablespoons soy sauce
    • 1 tablespoon fresh ginger, grated
    • 1 egg, beaten
    • 1 tablespoon sesame oil
    • Salt and pepper, to taste
    • Vegetable oil, for frying

    Instructions:

    In a large mixing bowl, combine the chopped salmon, breadcrumbs, green onions, soy sauce, grated ginger, beaten egg, sesame oil, salt, and pepper.

    Mix until all ingredients are well combined, then form the mixture into patties of your desired size.

    Heat a couple of tablespoons of vegetable oil in a skillet over medium heat.

    Once the oil is hot, carefully place the patties in the skillet and cook for about 4-5 minutes on each side, or until they're golden brown and cooked through.

    Remove the patties from the skillet and place them on a paper towel-lined plate to absorb any excess oil.

    Extra Tips:

    For a healthier twist, you can bake the salmon patties instead of frying them.

    Preheat your oven to 375°F (190°C), place the patties on a greased baking sheet, and bake for about 15-20 minutes, flipping halfway through.

    Additionally, feel free to customize the flavor by adding ingredients like minced garlic or chopped cilantro according to your preferences.

    Serve the patties with a dipping sauce made from soy sauce, rice vinegar, and a sprinkle of sesame seeds for an added flavor boost.

    Avocado and Salsa Salmon Patties

    salmon patties with avocado

    Avocado and Salsa Salmon Patties are a delicious and healthy twist on traditional salmon patties. Bursting with flavor and packed with nutritious ingredients, these patties make for a perfect lunch or dinner option.

    The creamy avocado pairs wonderfully with zesty salsa, creating a delightful taste experience that you and your family will love. Plus, they're easy to make and can be served in various ways, such as on a bun, atop a salad, or simply on their own.

    Ingredients:

    • 1 can (14.75 oz) of salmon, drained and flaked
    • 1 ripe avocado, mashed
    • 1/2 cup salsa
    • 1/4 cup breadcrumbs
    • 1/4 cup chopped green onions
    • 1 egg, beaten
    • 1 teaspoon garlic powder
    • 1 teaspoon cumin
    • Salt and pepper to taste
    • Olive oil for frying

    Instructions:

    In a large mixing bowl, combine the flaked salmon, mashed avocado, salsa, breadcrumbs, green onions, beaten egg, garlic powder, cumin, salt, and pepper.

    Mix until all ingredients are well incorporated. Form the mixture into patties, about 2-3 inches in diameter.

    Heat olive oil in a skillet over medium heat, and once hot, add the patties. Cook for about 4-5 minutes on each side, or until golden brown and heated through.

    Remove from the skillet and place on paper towels to drain any excess oil.

    Extra Tips:

    For added flavor, consider adding spices like paprika or chili powder to the mixture.

    If you prefer a firmer texture, you can refrigerate the formed patties for about 30 minutes before frying, which will help them hold their shape better.

    These patties can also be baked in the oven at 375°F for about 20 minutes, flipping halfway through, for a healthier preparation method.

    Serve with extra salsa or a dollop of sour cream for dipping!

    Pesto Salmon Patties With Sun-Dried Tomatoes

    pesto salmon patties recipe

    Pesto Salmon Patties with Sun-Dried Tomatoes are a delicious and healthy option for any meal. These flavorful patties combine the richness of salmon with the vibrant taste of pesto and the sweetness of sun-dried tomatoes, creating a perfect balance of flavors.

    They're easy to make and can be served on their own, in a sandwich, or over a salad. Whether you're looking for a quick weeknight dinner or a dish to impress guests, these salmon patties are sure to be a hit!

    Ingredients:

    • 1 can (14.75 oz) pink salmon, drained and flaked
    • 1/2 cup breadcrumbs (preferably whole wheat)
    • 1/4 cup pesto
    • 1/4 cup sun-dried tomatoes, chopped
    • 1/4 cup grated Parmesan cheese
    • 1 egg, lightly beaten
    • 1 tablespoon lemon juice
    • 1/2 teaspoon garlic powder
    • Salt and pepper to taste
    • Olive oil for frying

    Cooking Instructions:

    In a large mixing bowl, combine the flaked salmon, breadcrumbs, pesto, sun-dried tomatoes, Parmesan cheese, beaten egg, lemon juice, garlic powder, salt, and pepper.

    Mix the ingredients thoroughly until they're well combined. Form the mixture into patties, roughly 2-3 inches in diameter.

    Heat a skillet over medium heat and add a drizzle of olive oil. Once the oil is hot, add the salmon patties, cooking for about 4-5 minutes on each side or until they're golden brown and cooked through.

    Extra Tips:

    For added flavor, consider mixing in some fresh herbs like chopped parsley or dill.

    If the mixture feels too wet, you can add a little more breadcrumbs to help bind the patties.

    Make sure not to overcrowd the skillet while frying, as this can cause the patties to steam instead of crisp up.

    Additionally, these patties can be made ahead of time and stored in the refrigerator or freezer, making them a convenient option for meal prep.

    Cheesy Salmon Patties With Parmesan

    cheesy salmon patties recipe

    Cheesy Salmon Patties with Parmesan are a delightful twist on the classic salmon patty. These savory bites combine the rich flavors of fresh salmon with the nutty and creamy goodness of Parmesan cheese, resulting in a dish that's both satisfying and easy to prepare.

    Perfect for a weeknight dinner or a special occasion, these patties are sure to impress your family and friends. Serve them with a side salad or some steamed vegetables for a complete meal that's both delicious and nutritious.

    Ingredients:

    • 1 can (14.75 oz) of salmon, drained and flaked
    • 1 cup breadcrumbs
    • 1/2 cup grated Parmesan cheese
    • 1/4 cup mayonnaise
    • 1/4 cup chopped green onions
    • 1 large egg
    • 1 teaspoon garlic powder
    • 1 teaspoon onion powder
    • Salt and pepper to taste
    • Olive oil for frying

    Cooking Instructions:

    In a large mixing bowl, combine the flaked salmon, breadcrumbs, grated Parmesan cheese, mayonnaise, chopped green onions, egg, garlic powder, onion powder, salt, and pepper.

    Mix all the ingredients thoroughly until well combined. Form the mixture into patties, about 2-3 inches in diameter.

    Heat a generous amount of olive oil in a large skillet over medium heat. Once the oil is hot, add the patties to the skillet, cooking them for about 4-5 minutes on each side or until they're golden brown and crispy.

    Remove from the skillet and place on a paper towel to drain excess oil.

    Extra Tips:

    For an extra layer of flavor, consider adding some chopped fresh herbs like dill or parsley to the mixture.

    You can also experiment with different types of cheese, such as cheddar or feta, for a unique twist. If you prefer a healthier option, you can bake the patties in a preheated oven at 400°F (200°C) for about 15-20 minutes, flipping halfway through.

    Additionally, serve these patties with a zesty lemon wedge or a tangy dipping sauce to improve their flavor even more. Enjoy your cheesy salmon patties!

  • 10 Best Shrimp Alfredo Sauce Recipes

    10 Best Shrimp Alfredo Sauce Recipes

    If you think shrimp Alfredo is just a basic dish, think again! With so many tasty twists, you can transform this classic into something extraordinary. From zesty Lemon Parmesan to the spicy kick of Cajun Shrimp Alfredo, there's a flavor for everyone. Imagine pairing succulent shrimp with creamy sauce that just melts in your mouth. Ready to investigate these mouthwatering recipes that'll make your dinner unforgettable? Let's plunge into and discover what's cooking!

    Classic Shrimp Alfredo

    Classic Shrimp Alfredo is a creamy and decadent dish that brings together succulent shrimp and a rich Alfredo sauce, perfectly coating your pasta of choice.

    This dish isn't only quick and easy to prepare but also delivers an impressive meal that's perfect for a romantic dinner or a family gathering. With just a few simple ingredients, you can create a restaurant-quality experience right in your own kitchen.

    Ingredients:

    • 8 oz fettuccine pasta
    • 1 lb large shrimp, peeled and deveined
    • 2 tablespoons olive oil
    • 3 cloves garlic, minced
    • 1 cup heavy cream
    • 1 cup grated Parmesan cheese
    • Salt and pepper to taste
    • Fresh parsley, chopped (for garnish)

    Cooking Instructions:

    Begin by cooking the fettuccine pasta according to the package instructions until al dente.

    While the pasta cooks, heat olive oil in a large skillet over medium heat. Add the minced garlic and sauté for about a minute until fragrant.

    Then, add the shrimp to the skillet and cook for 2-3 minutes on each side, or until the shrimp turn pink and opaque.

    Reduce the heat to low, pour in the heavy cream, and stir to combine. Gradually add the Parmesan cheese, mixing until the sauce is smooth and creamy.

    Season with salt and pepper to taste. Drain the pasta and toss it in the skillet with the shrimp and sauce until well coated.

    Extra Tips:

    For the best flavor, use fresh shrimp if possible, as frozen shrimp can sometimes lose their texture.

    Be careful not to overcook the shrimp, as they can become rubbery. Additionally, feel free to add vegetables like spinach or broccoli for extra nutrients and color.

    If the sauce seems too thick, you can thin it out with a splash of pasta water.

    Garnish your dish with fresh parsley for a pop of color and added freshness before serving.

    Enjoy your homemade Classic Shrimp Alfredo!

    Garlic Butter Shrimp Alfredo

    garlic butter shrimp pasta

    Garlic Butter Shrimp Alfredo is a deliciously creamy pasta dish that combines succulent shrimp with a rich garlic butter sauce, perfectly enveloping fettuccine. This dish isn't only quick and easy to prepare, but it also provides a luxurious taste that makes it ideal for both weeknight dinners and special occasions.

    With just a few simple ingredients, you can whip up a comforting meal that will impress your family and friends.

    Ingredients:

    • 8 ounces fettuccine
    • 1 pound large shrimp, peeled and deveined
    • 4 tablespoons unsalted butter
    • 4 cloves garlic, minced
    • 1 cup heavy cream
    • 1 cup grated Parmesan cheese
    • Salt and pepper, to taste
    • Fresh parsley, chopped (for garnish)

    Instructions:

    Cook the fettuccine according to package instructions until al dente.

    In a large skillet, melt the butter over medium heat and add the minced garlic, sautéing until fragrant, about 1 minute.

    Add the shrimp to the skillet, cooking until they turn pink and opaque, approximately 2-3 minutes per side.

    Pour in the heavy cream, stirring to combine, then add the cooked fettuccine and Parmesan cheese. Toss everything together until well coated, and season with salt and pepper to taste.

    Remove from heat and garnish with fresh parsley before serving.

    Extra Tips:

    For a more robust flavor, consider adding a splash of white wine to the garlic butter before adding the shrimp.

    You can also customize the dish by incorporating vegetables like spinach or broccoli for added nutrition and color.

    Make sure to use freshly grated Parmesan cheese for the best flavor, and adjust the seasoning according to your preference.

    Enjoy your Garlic Butter Shrimp Alfredo with a side of garlic bread or a simple salad for a complete meal!

    Cajun Shrimp Alfredo

    Cajun Shrimp Alfredo is a delightful fusion of creamy Italian flavors with a spicy Cajun twist, perfect for those who crave a little heat in their pasta dishes. This recipe features succulent shrimp coated in a zesty Cajun seasoning, paired with a rich and creamy Alfredo sauce that clings to your favorite pasta.

    Quick to make and bursting with flavor, Cajun Shrimp Alfredo is sure to impress your family or guests at any dinner gathering.

    Ingredients:

    • 12 oz fettuccine pasta
    • 1 lb large shrimp, peeled and deveined
    • 2 tablespoons Cajun seasoning
    • 2 tablespoons olive oil
    • 3 cloves garlic, minced
    • 1 cup heavy cream
    • 1 cup grated Parmesan cheese
    • 1 tablespoon butter
    • Salt and pepper to taste
    • Fresh parsley, chopped (for garnish)

    Instructions:

    Begin by cooking the fettuccine pasta according to the package instructions until al dente; drain and set aside.

    In a large skillet, heat the olive oil over medium heat, then add the shrimp and sprinkle with Cajun seasoning. Cook the shrimp for about 2-3 minutes on each side until they're pink and opaque. Remove the shrimp from the skillet and set aside.

    In the same skillet, melt the butter and sauté the minced garlic for about 30 seconds. Pour in the heavy cream and bring to a gentle simmer, then stir in the Parmesan cheese until melted and smooth.

    Add the cooked fettuccine and shrimp to the sauce, tossing everything together to combine and heat through. Season with salt and pepper to taste, and garnish with fresh parsley before serving.

    Extra Tips:

    For an authentic Cajun flavor, feel free to adjust the amount of Cajun seasoning based on your heat preference.

    You can also add vegetables such as bell peppers or spinach to the dish for added nutrition and flavor.

    Make sure to use freshly grated Parmesan cheese for the best creamy texture, and if you find the sauce too thick, add a splash of pasta water to reach your desired consistency.

    Enjoy your meal with a side of garlic bread for a complete dining experience!

    Lemon Parmesan Shrimp Alfredo

    creamy lemon shrimp pasta

    Lemon Parmesan Shrimp Alfredo is a creamy, delicious dish that boosts traditional Alfredo sauce with the bright, zesty flavor of lemon. This dish combines succulent shrimp with a rich, velvety sauce that clings to fettuccine or your favorite pasta.

    Perfect for a quick weeknight meal or an impressive dinner party entrée, this recipe is sure to please seafood lovers and pasta enthusiasts alike.

    Ingredients:

    • 8 oz fettuccine or pasta of choice
    • 1 lb large shrimp, peeled and deveined
    • 2 tbsp olive oil
    • 3 cloves garlic, minced
    • 1 cup heavy cream
    • 1 cup freshly grated Parmesan cheese
    • 1 lemon, zested and juiced
    • Salt and pepper to taste
    • Fresh parsley, chopped (for garnish)

    Cooking Instructions:

    Start by cooking the fettuccine according to package instructions until al dente; drain and set aside.

    In a large skillet, heat the olive oil over medium heat. Add the minced garlic and sauté for about 1 minute until fragrant. Then, add the shrimp, cooking until they turn pink and opaque, about 3-4 minutes.

    Lower the heat and pour in the heavy cream, stirring to combine. Gradually whisk in the Parmesan cheese, lemon zest, and lemon juice, allowing the sauce to thicken slightly.

    Season with salt and pepper to taste, then toss the cooked pasta with the shrimp and sauce until evenly coated.

    Extra Tips:

    To boost the lemon flavor, consider adding a little more lemon zest or juice based on your preference.

    For a bit of heat, you could sprinkle in some red pepper flakes while cooking the shrimp.

    Using freshly grated Parmesan cheese will give you the best flavor and texture compared to pre-grated options.

    If you want to make the dish lighter, you can substitute half-and-half for the heavy cream, or for a richer taste, consider adding a bit of cream cheese to the sauce.

    Garnish with freshly chopped parsley right before serving for a pop of color and freshness!

    Spinach and Shrimp Alfredo

    Spinach and Shrimp Alfredo is a delightful twist on the classic Alfredo sauce, combining the rich creaminess of the sauce with the fresh, vibrant flavors of spinach and succulent shrimp. This dish isn't only quick to prepare but also packed with nutrients, making it a perfect meal for busy weeknights or a special occasion.

    The combination of garlic, Parmesan cheese, and cream creates a luscious sauce that beautifully coats the pasta, while the shrimp adds a satisfying protein boost and the spinach provides a pop of color and health benefits.

    Ingredients:

    • 8 ounces fettuccine pasta
    • 1 tablespoon olive oil
    • 1 pound large shrimp, peeled and deveined
    • 3 cloves garlic, minced
    • 4 cups fresh spinach
    • 1 cup heavy cream
    • 1 cup grated Parmesan cheese
    • Salt and pepper to taste
    • Red pepper flakes (optional)
    • Fresh parsley for garnish (optional)

    Cooking Instructions:

    Cook the fettuccine pasta according to package instructions until al dente, then drain and set aside.

    In a large skillet, heat the olive oil over medium heat, then add the shrimp and cook for about 2-3 minutes on each side until they turn pink and opaque. Remove the shrimp from the skillet and set aside.

    In the same skillet, add the minced garlic and sauté for about 30 seconds until fragrant. Add the fresh spinach and cook until wilted.

    Pour in the heavy cream and bring to a simmer, then stir in the Parmesan cheese until melted and smooth. Season the sauce with salt, pepper, and red pepper flakes if desired.

    Finally, return the shrimp to the skillet, add the cooked fettuccine, and toss everything together until well-combined and heated through.

    Extra Tips:

    For a richer flavor, consider adding a splash of white wine to the garlic before adding the cream for a slightly tangy kick.

    You can also experiment with different types of pasta, such as penne or linguine, depending on your preference.

    If you like a thicker sauce, let it simmer a bit longer to reduce, or add more cheese to reach your desired consistency.

    Don't forget to garnish with fresh parsley to add a touch of freshness and color to your dish!

    Tomato Basil Shrimp Alfredo

    shrimp alfredo with tomato basil

    Tomato Basil Shrimp Alfredo is a delicious twist on the classic Alfredo sauce, combining the rich creaminess of the sauce with fresh tomatoes and fragrant basil. This dish is perfect for a cozy dinner or a special occasion.

    The succulent shrimp paired with a vibrant sauce creates a delightful flavor profile that will impress your family and friends. With a few simple ingredients and easy steps, you can bring a taste of Italy right to your kitchen.

    Ingredients:

    • 8 oz fettuccine pasta
    • 1 lb large shrimp, peeled and deveined
    • 2 tbsp olive oil
    • 3 cloves garlic, minced
    • 1 cup heavy cream
    • 1 cup grated Parmesan cheese
    • 1 cup cherry tomatoes, halved
    • 1/2 cup fresh basil, chopped
    • Salt and pepper to taste

    Cooking Instructions:

    Begin by cooking the fettuccine pasta according to the package instructions until al dente.

    In a large skillet, heat the olive oil over medium heat and add the minced garlic, cooking for about 1 minute until fragrant. Next, add the shrimp and sauté until they turn pink, approximately 3-4 minutes.

    Pour in the heavy cream and bring it to a gentle simmer. Stir in the grated Parmesan cheese until melted and combined, then add the halved cherry tomatoes and fresh basil. Season with salt and pepper, and mix well.

    Finally, toss the cooked fettuccine into the skillet, ensuring the pasta is well coated with the sauce.

    Extra Tips:

    For an even more flavorful dish, consider marinating the shrimp in lemon juice, garlic, and herbs for about 30 minutes before cooking. This adds an extra layer of taste to the shrimp.

    Additionally, feel free to customize the recipe by adding vegetables like spinach or mushrooms for added nutrition. To achieve a thicker sauce, allow it to simmer a bit longer, stirring occasionally.

    Serve your Tomato Basil Shrimp Alfredo with extra Parmesan on the side and a sprinkle of fresh basil for a beautiful presentation. Enjoy your culinary creation!

    Creamy Pesto Shrimp Alfredo

    shrimp alfredo with pesto

    Creamy Pesto Shrimp Alfredo is a delightful twist on the classic Alfredo sauce, combining the rich flavors of garlic, cream, and Parmesan with the fresh, herbaceous notes of pesto.

    This dish isn't only quick to prepare but also delivers a burst of flavor that will impress your family and friends. Perfectly cooked shrimp are tossed with fettuccine and enveloped in a creamy sauce, making it a comforting and satisfying meal that's great for any occasion.

    Ingredients:

    • 8 oz fettuccine pasta
    • 1 lb large shrimp, peeled and deveined
    • 2 tablespoons olive oil
    • 3 cloves garlic, minced
    • 1 cup heavy cream
    • 1 cup freshly grated Parmesan cheese
    • 1/2 cup basil pesto
    • Salt and pepper to taste
    • Fresh basil leaves for garnish (optional)

    Cooking Instructions:

    Begin by cooking the fettuccine according to package instructions until al dente.

    While the pasta is cooking, heat the olive oil in a large skillet over medium heat. Add the minced garlic and sauté for about 1 minute until fragrant, being careful not to burn it.

    Next, add the shrimp to the skillet and season with salt and pepper. Cook the shrimp for about 2-3 minutes on each side or until they turn pink and opaque.

    Once the shrimp are cooked, lower the heat and stir in the heavy cream, allowing it to simmer for a minute before adding the Parmesan cheese and pesto.

    Stir until the sauce is smooth and creamy, then toss in the drained fettuccine until it's well coated with the sauce.

    Extra Tips:

    For the best flavor, use high-quality ingredients, particularly fresh shrimp and homemade or gourmet pesto.

    If you prefer a bit of heat, consider adding a pinch of red pepper flakes to the sauce for an extra kick.

    To make the dish even more vibrant, you can toss in some cherry tomatoes or spinach along with the shrimp.

    Finally, serve the Creamy Pesto Shrimp Alfredo immediately for the best texture and flavor, garnished with fresh basil leaves and an extra sprinkle of Parmesan cheese.

    Spicy Shrimp Alfredo

    creamy spicy shrimp pasta

    Spicy Shrimp Alfredo is a delicious twist on the classic creamy pasta dish that adds a kick of heat to the rich flavors of Alfredo sauce. This recipe combines succulent shrimp with a zesty blend of spices, creamy Parmesan cheese, and fettuccine pasta to create a satisfying meal that's sure to impress.

    Perfect for a cozy dinner or a special occasion, this dish is both flavorful and easy to prepare.

    Ingredients:

    • 8 oz fettuccine pasta
    • 1 lb large shrimp, peeled and deveined
    • 2 tablespoons olive oil
    • 4 cloves garlic, minced
    • 1 teaspoon crushed red pepper flakes (or to taste)
    • 1 cup heavy cream
    • 1 cup grated Parmesan cheese
    • Salt and pepper to taste
    • Fresh parsley, chopped (for garnish)

    Cooking Instructions:

    Begin by cooking the fettuccine pasta according to package instructions until al dente, then drain and set aside.

    In a large skillet, heat the olive oil over medium heat and add the minced garlic and crushed red pepper flakes, sautéing until fragrant (about 1 minute).

    Add the shrimp to the skillet, cooking until they turn pink and are cooked through (about 3-4 minutes).

    Pour in the heavy cream and bring to a gentle simmer, then stir in the Parmesan cheese until melted and the sauce thickens slightly.

    Season with salt and pepper to taste. Toss the cooked fettuccine in the sauce until well coated, then serve hot, garnished with fresh parsley.

    Extra Tips:

    For an extra layer of flavor, consider marinating the shrimp in a mixture of lime juice, garlic, and spices for about 30 minutes before cooking.

    Adjust the level of spiciness by varying the amount of crushed red pepper flakes, and feel free to add additional vegetables like spinach or bell peppers for added nutrition and color.

    If you want a lighter version, substitute half-and-half for the heavy cream or use whole wheat pasta for a healthier alternative.

    Enjoy your Spicy Shrimp Alfredo!

    Shrimp Alfredo With Asparagus

    creamy shrimp pasta dish

    Shrimp Alfredo with Asparagus is a delightful and creamy pasta dish that combines succulent shrimp and tender asparagus in a rich Alfredo sauce. This dish is perfect for a weeknight dinner or a special occasion, as it brings together fresh flavors and a satisfying texture. The combination of shrimp, asparagus, and a velvety sauce over fettuccine pasta creates a well-rounded meal that's both indulgent and comforting.

    Ingredients:

    • 8 oz fettuccine pasta
    • 1 lb large shrimp, peeled and deveined
    • 1 cup asparagus, cut into 1-inch pieces
    • 2 tablespoons olive oil
    • 3 cloves garlic, minced
    • 1 cup heavy cream
    • 1 cup grated Parmesan cheese
    • Salt and pepper, to taste
    • Fresh parsley, chopped (for garnish)

    Instructions:

    Begin by cooking the fettuccine pasta according to the package instructions until al dente, then drain and set aside.

    In a large skillet, heat the olive oil over medium heat, then add the minced garlic and sauté for about 30 seconds until fragrant. Add the shrimp and asparagus to the skillet, cooking until the shrimp turns pink and the asparagus is tender, about 3-4 minutes.

    Reduce the heat to low and pour in the heavy cream, stirring well. Gradually add the Parmesan cheese, mixing until the sauce is smooth and creamy.

    Finally, toss the cooked fettuccine into the skillet, combining everything thoroughly, and season with salt and pepper to taste.

    Extra Tips:

    To improve the flavors of your Shrimp Alfredo with Asparagus, consider adding a splash of white wine to the skillet after cooking the shrimp and asparagus for a touch of acidity.

    If you prefer a thicker sauce, let it simmer for a few extra minutes before adding the pasta. For a little kick, you can sprinkle in some red pepper flakes.

    Always taste and adjust the seasoning before serving, and don't forget to garnish with fresh parsley for a pop of color and freshness!

    Alfredo Shrimp Pasta Bake

    creamy shrimp pasta casserole

    Alfredo Shrimp Pasta Bake is a comforting and delicious dish that combines creamy Alfredo sauce, succulent shrimp, and pasta, all baked to perfection. This recipe is perfect for a family dinner or a gathering with friends, as it's both satisfying and easy to prepare.

    With just a few simple ingredients and steps, you can create a delightful meal that everyone will love.

    Ingredients:

    • 8 ounces of pasta (penne or rigatoni works well)
    • 1 pound of shrimp, peeled and deveined
    • 2 cups of Alfredo sauce
    • 1 cup of shredded mozzarella cheese
    • 1/2 cup of grated Parmesan cheese
    • 1 cup of frozen peas (optional)
    • 2 tablespoons of olive oil
    • 2 cloves of garlic, minced
    • Salt and pepper to taste
    • Fresh parsley, chopped for garnish

    Instructions:

    Preheat your oven to 350°F (175°C).

    Cook the pasta according to package instructions until al dente, then drain and set aside.

    In a large skillet, heat the olive oil over medium heat and sauté the minced garlic until fragrant.

    Add the shrimp, seasoning with salt and pepper, and cook until they turn pink and opaque, about 3-4 minutes.

    In a large mixing bowl, combine the cooked pasta, shrimp, Alfredo sauce, and peas if using, then transfer the mixture to a greased baking dish.

    Top with shredded mozzarella and Parmesan cheese, then bake in the preheated oven for 25-30 minutes, or until the cheese is bubbly and golden.

    Garnish with fresh parsley before serving.

    Extra Tips:

    To enhance the flavor of your Alfredo Shrimp Pasta Bake, consider adding a splash of white wine to the skillet when cooking the shrimp for a subtle depth of flavor.

    You can also customize this dish by adding your favorite vegetables, such as spinach or bell peppers, for added nutrition.

    For a spicier kick, sprinkle some red pepper flakes into the Alfredo sauce.

    Finally, make sure not to overcook the shrimp, as they can become tough; they should be just cooked through when added to the pasta mix.

  • 10 Best Fish Recipes

    10 Best Fish Recipes

    If you're looking to spice up your dinner routine, you've come to the right place! Fish dishes not only taste fantastic, but they're super healthy too. Imagine sinking your teeth into grilled salmon with zesty lemon, or savoring a honey-glazed mahi mahi. Whether you prefer classic fish and chips or something adventurous like spicy tuna tacos, there's a recipe here for everyone. Get ready to impress your family and friends with these delicious meals!

    Grilled Salmon With Lemon and Herbs

    Grilled salmon with lemon and herbs is a delicious and healthy dish that showcases the natural flavors of the fish while adding a rejuvenating zing from the citrus and aromatic herbs. This recipe is perfect for a summer barbecue or a cozy dinner at home, and it's incredibly easy to prepare.

    The combination of lemon juice, fresh herbs, and garlic amplifies the salmon's rich flavor, making it a dish that will impress family and friends alike.

    Ingredients:

    • 4 salmon fillets
    • 2 tablespoons olive oil
    • 2 lemons (1 juiced, 1 sliced)
    • 3 cloves garlic, minced
    • 2 tablespoons fresh parsley, chopped
    • 2 tablespoons fresh dill, chopped
    • Salt and pepper to taste

    Instructions:

    Start by preheating your grill to medium-high heat.

    In a small bowl, mix the olive oil, lemon juice, minced garlic, chopped parsley, chopped dill, salt, and pepper to create a marinade.

    Place the salmon fillets in a shallow dish and pour the marinade over them, making sure they're well coated.

    Let the salmon marinate for about 15-30 minutes.

    Once marinated, place the salmon fillets skin-side down on the grill.

    Cook for about 6-8 minutes on each side, or until the salmon flakes easily with a fork.

    Add lemon slices on the grill for the last few minutes for added flavor.

    Extra Tips:

    To achieve a perfect grill, make certain your grill grates are clean and well-oiled to prevent sticking.

    If you're using skin-on salmon, grilling skin-side down first helps to keep the fish moist.

    For added flavor, consider using a cedar plank on the grill, which infuses the salmon with a smoky aroma.

    To check for doneness, look for a temperature of 145°F (63°C) in the thickest part of the fillet.

    Finally, serving your grilled salmon with a side of fresh vegetables or a salad can complement the dish beautifully. Enjoy!

    Baked Cod With Garlic and Parmesan

    garlic parmesan baked cod

    Baked Cod with Garlic and Parmesan is a delightful and easy dish that brings out the best flavors of the fish while adding a crispy, cheesy topping. The combination of garlic, Parmesan cheese, and a hint of lemon creates a savory crust that perfectly complements the tender, flaky cod.

    This recipe isn't only quick to prepare but also makes for an impressive meal for family dinners or entertaining guests. Enjoy this delicious dish with a side of vegetables or a light salad for a complete and satisfying meal.

    Ingredients:

    • 4 cod fillets
    • 2 tablespoons olive oil
    • 3 cloves garlic, minced
    • 1/2 cup grated Parmesan cheese
    • 1/2 teaspoon salt
    • 1/4 teaspoon black pepper
    • 1 teaspoon lemon juice
    • 1 tablespoon fresh parsley, chopped (for garnish)
    • Lemon wedges (for serving)

    Instructions:

    Preheat your oven to 400°F (200°C).

    In a small bowl, mix together the olive oil, minced garlic, Parmesan cheese, salt, pepper, and lemon juice until well combined.

    Place the cod fillets in a greased baking dish and evenly spread the garlic and Parmesan mixture over the top of each fillet.

    Bake in the preheated oven for 12-15 minutes, or until the fish flakes easily with a fork and the topping is golden brown.

    Garnish with fresh parsley and serve with lemon wedges on the side.

    Extra Tips:

    For the best results, choose fresh cod fillets that are bright and firm to the touch.

    If using frozen cod, make sure to thaw it completely and pat it dry with paper towels before seasoning.

    To add an extra layer of flavor, consider marinating the fish in olive oil and lemon juice for about 30 minutes before baking.

    Additionally, you can customize the topping by adding breadcrumbs for more crunch or incorporating herbs like thyme or oregano for added depth.

    Enjoy your baked cod with a side of steamed vegetables or a revitalizing salad to balance the richness of the cheese.

    Spicy Tuna Tacos With Avocado Crema

    Spicy tuna tacos with avocado crema are a delightful way to enjoy fresh fish with a kick of flavor. This recipe combines the richness of spicy tuna with the creaminess of avocado, all wrapped up in a warm tortilla. Perfect for a casual dinner or a fun gathering with friends, these tacos aren't only delicious but also quick and easy to prepare.

    Ingredients:

    • 1 lb sushi-grade tuna, diced
    • 2 tablespoons sriracha
    • 1 tablespoon soy sauce
    • 1 teaspoon sesame oil
    • 1 teaspoon lime juice
    • 1 ripe avocado
    • 1/4 cup sour cream
    • 1 tablespoon fresh cilantro, chopped
    • 1 teaspoon garlic powder
    • Salt and pepper to taste
    • Corn or flour tortillas
    • Shredded cabbage (for topping)
    • Lime wedges (for serving)

    Instructions:

    In a medium bowl, combine the diced tuna, sriracha, soy sauce, sesame oil, lime juice, and a pinch of salt and pepper, mixing well to coat the tuna evenly.

    In a separate bowl, mash the avocado and stir in the sour cream, chopped cilantro, garlic powder, and a pinch of salt until smooth and creamy.

    To assemble the tacos, warm the tortillas in a dry skillet over medium heat, then place a generous spoonful of the spicy tuna mixture onto each tortilla. Top with shredded cabbage and a drizzle of the avocado crema before folding the tortillas and serving with lime wedges on the side.

    Extra Tips:

    For the best flavor, allow the tuna to marinate in the spicy mixture for about 15 minutes before assembling the tacos. This will help improve the flavors and give the tuna a more robust taste.

    Additionally, feel free to customize your toppings; adding sliced radishes, jalapeños, or a sprinkle of sesame seeds can raise the dish even further. If you prefer a milder version, reduce the amount of sriracha or substitute it with a less spicy sauce.

    Enjoy your delicious spicy tuna tacos!

    Honey Glazed Mahi Mahi

    sweet and savory fish

    Honey glazed mahi mahi is a delightful dish that brings together the sweet and savory flavors of honey and soy sauce, perfectly complementing the mild taste of the mahi mahi fish. This recipe isn't only easy to prepare but also makes for an impressive meal when entertaining guests or simply enjoying a cozy dinner at home.

    The glaze caramelizes beautifully in the oven or on the grill, creating a delicious crust that amplifies the fish's natural flavors.

    Ingredients:

    • 4 mahi mahi fillets
    • 1/4 cup honey
    • 1/4 cup soy sauce
    • 2 tablespoons olive oil
    • 2 cloves garlic, minced
    • 1 tablespoon fresh ginger, grated
    • 1 tablespoon lime juice
    • Salt and pepper to taste
    • Chopped green onions for garnish (optional)
    • Lime wedges for serving (optional)

    To prepare the honey glazed mahi mahi, start by preheating your grill or oven to 400°F (200°C). In a small bowl, whisk together the honey, soy sauce, olive oil, minced garlic, grated ginger, and lime juice until well combined.

    Season the mahi mahi fillets with salt and pepper, then place them in a shallow dish and pour the honey glaze over the fish, making certain they're well coated. Let the fish marinate for about 15-30 minutes for the best flavor.

    If grilling, place the fillets directly on the grill and cook for about 4-5 minutes on each side, or until the fish flakes easily with a fork. If baking, place the fillets on a lined baking sheet and bake for 12-15 minutes, basting with additional glaze halfway through.

    For the best results when cooking honey glazed mahi mahi, be certain not to overcook the fish, as it can become dry. Keep an eye on it while grilling or baking, and consider using a meat thermometer to confirm it reaches an internal temperature of 145°F (63°C).

    Feel free to experiment with additional spices or herbs to customize the flavor to your liking. Pair this dish with a side of steamed vegetables or a fresh salad, and don't forget to garnish with chopped green onions and lime wedges for an extra burst of flavor!

    Classic Fish and Chips

    Classic Fish and Chips is a beloved dish that hails from the UK, known for its crispy battered fish served alongside golden, chunky fries. This comforting meal is perfect for a family dinner or a casual gathering with friends. The key to achieving that perfect crunch lies in the batter and the technique used for frying. With a few simple ingredients and steps, you can recreate this iconic dish right in your own kitchen.

    Ingredients:

    • 4 large potatoes (for chips)
    • 2 cups all-purpose flour
    • 1 teaspoon baking powder
    • 1 teaspoon salt
    • 1 cup cold sparkling water
    • 4 pieces of white fish fillets (such as cod or haddock)
    • Oil for frying (vegetable or peanut oil)
    • Malt vinegar (for serving)

    Instructions:

    Start by peeling the potatoes and cutting them into thick chips, then soak them in cold water for about 30 minutes to remove excess starch.

    While the chips soak, prepare the batter by whisking together the flour, baking powder, and salt in a bowl, then gradually add the cold sparkling water until you reach a smooth consistency.

    Heat the oil in a deep fryer or a large pot to 350°F (175°C).

    Drain and dry the potatoes, then fry them in the hot oil until golden brown and crispy, about 5-7 minutes. Remove and drain on paper towels.

    Next, dip the fish fillets into the batter, allowing any excess to drip off, and carefully place them in the hot oil. Fry until the fish is golden and cooked through, about 4-6 minutes.

    Serve the fish hot alongside the chips, drizzled with malt vinegar.

    Extra Tips:

    For the best results, verify your oil is at the correct temperature before frying; too cool, and your food will absorb excess oil and become greasy, while too hot can burn the batter.

    If you prefer thicker chips, you may need to adjust the frying time accordingly.

    Additionally, feel free to experiment with seasonings in the batter or serve your fish and chips with tartar sauce, mushy peas, or a squeeze of lemon for extra flavor.

    Enjoy your homemade classic fish and chips!

    Mediterranean Baked Trout

    baked trout with mediterranean flavors

    Mediterranean Baked Trout is a delightful and healthy dish that brings the vibrant flavors of the Mediterranean right to your dining table. This recipe features fresh trout seasoned with aromatic herbs, zesty lemon, and a medley of vegetables, all baked to perfection. Not only is it simple to make, but it's also a great way to impress your family and friends with a wholesome meal that highlights the natural flavors of the fish.

    Ingredients:

    • 2 whole trout, cleaned and scaled
    • 2 tablespoons olive oil
    • 2 lemons (one sliced, one juiced)
    • 3 cloves garlic, minced
    • 1 teaspoon dried oregano
    • 1 teaspoon dried thyme
    • Salt and pepper to taste
    • Fresh parsley, chopped (for garnish)
    • 1 cup cherry tomatoes, halved
    • 1 red onion, sliced
    • 1 bell pepper, sliced

    Instructions:

    Preheat your oven to 400°F (200°C). In a baking dish, arrange the sliced red onion and bell pepper at the bottom, followed by the cherry tomatoes. Drizzle the vegetables with olive oil and season with salt, pepper, oregano, and thyme.

    Next, place the cleaned trout on top of the vegetables. Squeeze fresh lemon juice over the fish and stuff the cavity with minced garlic and lemon slices. Drizzle a little more olive oil on top of the trout, then cover the dish with aluminum foil.

    Bake in the preheated oven for about 25-30 minutes, or until the trout is cooked through and flakes easily with a fork.

    Extra Tips:

    For the best flavor, try to use the freshest trout you can find. If you can't find whole trout, you can also use fillets, but make sure to adjust the cooking time accordingly.

    Feel free to customize the vegetables based on your preference or what you have on hand, as zucchini or asparagus would also pair beautifully with the dish. Garnishing with fresh parsley just before serving will add a touch of color and freshness.

    Enjoy your Mediterranean culinary journey!

    Teriyaki Salmon Bowls

    savory salmon teriyaki bowls

    Teriyaki Salmon Bowls are a delicious and healthy dish that combines the rich flavors of marinated salmon with fresh vegetables and fluffy rice. This simple yet satisfying recipe is perfect for a weeknight dinner or a special occasion. The sweet and savory teriyaki sauce enhances the salmon while the vegetables add a crisp revitalization. Serve it in a bowl for a cozy meal that everyone will love.

    Ingredients:

    • 2 salmon fillets
    • 1/4 cup teriyaki sauce
    • 1 cup cooked rice (white or brown)
    • 1 cup broccoli florets
    • 1 carrot, sliced thinly
    • 1/2 cup snap peas
    • 2 green onions, chopped
    • Sesame seeds for garnish
    • Olive oil

    Instructions:

    Begin by marinating the salmon fillets in the teriyaki sauce for at least 15 minutes.

    While the salmon is marinating, prepare the vegetables by steaming the broccoli, carrot slices, and snap peas until tender, about 5-7 minutes.

    In a skillet, heat a drizzle of olive oil over medium heat and cook the marinated salmon for about 4-5 minutes per side, or until it flakes easily with a fork.

    Once cooked, remove the salmon from the skillet and let it rest for a minute.

    To assemble the bowls, place a scoop of cooked rice at the bottom, top it with the steamed vegetables, and then flake the salmon over the top.

    Drizzle any remaining teriyaki sauce from the skillet over the dish and garnish with chopped green onions and sesame seeds.

    Extra Tips:

    For added flavor, consider marinating the salmon longer if time allows, up to an hour.

    You can also customize the vegetables based on your preference or what you have on hand; bell peppers, zucchini, or spinach work well in this dish.

    If you're looking for a lighter option, serve the salmon over a bed of mixed greens instead of rice.

    Remember to keep an eye on the salmon while cooking to avoid overcooking, as this can dry it out.

    Enjoy your Teriyaki Salmon Bowls!

    Blackened Snapper With Mango Salsa

    spicy fish with fruit

    Blackened Snapper with Mango Salsa is a vibrant and flavorful dish that combines the spice and smokiness of blackened fish with the invigorating sweetness of mango salsa. This recipe highlights the delicate taste of snapper, making it a perfect choice for a summer dinner or any occasion where you want to impress your guests with a delicious seafood option.

    The crispy blackened exterior pairs beautifully with the bright, fruity salsa, creating a delightful contrast that will tantalize your taste buds.

    Ingredients:

    • 2 snapper fillets
    • 2 tablespoons paprika
    • 1 tablespoon cayenne pepper
    • 1 tablespoon garlic powder
    • 1 tablespoon onion powder
    • 1 tablespoon dried thyme
    • 1 teaspoon salt
    • 1 teaspoon black pepper
    • 2 tablespoons olive oil
    • 1 ripe mango, diced
    • 1/2 red onion, finely chopped
    • 1 jalapeño, seeded and minced
    • Juice of 1 lime
    • Fresh cilantro, chopped (for garnish)

    Cooking Instructions:

    Begin by preparing the blackening spice mix by combining paprika, cayenne pepper, garlic powder, onion powder, thyme, salt, and black pepper in a small bowl.

    Pat the snapper fillets dry with a paper towel and rub the spice mix generously on both sides of the fish.

    Heat a cast-iron skillet over medium-high heat and add olive oil. Once the oil is hot, carefully place the snapper fillets in the skillet and cook for 3-4 minutes on each side, or until the fish is blackened and cooked through.

    While the fish is cooking, prepare the mango salsa by mixing the diced mango, red onion, jalapeño, lime juice, and cilantro in a bowl.

    Once the snapper is done, serve it hot topped with the mango salsa.

    Extra Tips:

    For the best results, make sure your skillet is smoking hot before adding the snapper; this will help achieve that perfect blackened crust.

    If you prefer a milder salsa, you can adjust or omit the jalapeño.

    Additionally, you can substitute snapper with other firm white fish like catfish or tilapia, but keep in mind that cooking times may vary slightly.

    Serve with a side of rice or a fresh salad for a complete meal, and enjoy the delightful combination of flavors!

    Lemon Butter Sole

    sole with lemon butter

    Lemon Butter Sole is a delightful and elegant dish that showcases the delicate flavor of sole fish, improved by the richness of butter and the zesty brightness of lemon. This recipe isn't only simple to prepare but also perfect for a quick weeknight dinner or an impressive meal for guests. The combination of buttery sauce and fresh lemon complements the mild taste of the sole, making it a favorite among seafood lovers.

    Ingredients:

    • 4 sole fillets
    • Salt and pepper, to taste
    • 1/4 cup all-purpose flour
    • 4 tablespoons unsalted butter
    • 2 tablespoons olive oil
    • Juice of 1 lemon
    • 1 tablespoon fresh parsley, chopped (for garnish)
    • Lemon wedges (for serving)

    Instructions:

    Begin by seasoning the sole fillets with salt and pepper on both sides, then lightly dredge them in flour, shaking off any excess.

    In a large skillet, heat the olive oil and 2 tablespoons of butter over medium heat until the butter is melted and bubbling.

    Add the sole fillets to the skillet and cook for about 2-3 minutes on each side, or until they're golden brown and cooked through.

    Once cooked, carefully remove the fillets from the skillet and set them aside on a plate.

    In the same skillet, add the remaining butter and lemon juice, stirring to combine and scraping up any browned bits.

    Pour the lemon butter sauce over the cooked sole fillets and garnish with fresh parsley.

    Extra Tips:

    For the best results, make certain your sole fillets are fresh and properly thawed if frozen.

    Avoid overcrowding the skillet; cook the fish in batches if necessary to guarantee even cooking and browning.

    You can also experiment with different herbs, like dill or thyme, for added flavor.

    Serve with a side of vegetables or a light salad to complement the dish, and don't forget the lemon wedges for extra zest!

    Fish Curry With Coconut Milk

    coconut milk fish curry

    Fish curry with coconut milk is a delightful and aromatic dish that brings together the rich flavors of fresh fish and the creamy texture of coconut milk. This recipe is perfect for those who enjoy a hint of spice combined with the soothing taste of coconut.

    It's an easy-to-make dish that can be served with rice or bread, making it a versatile option for any meal. Whether you're looking to impress guests or simply enjoy a comforting dinner at home, this fish curry is sure to satisfy.

    Ingredients:

    • 500g fresh fish fillets (such as salmon or cod)
    • 1 can (400ml) coconut milk
    • 2 tablespoons vegetable oil
    • 1 large onion, finely chopped
    • 3 cloves garlic, minced
    • 1-inch piece ginger, grated
    • 2 green chilies, slit (adjust to taste)
    • 1 tablespoon curry powder
    • 1 teaspoon turmeric powder
    • Salt to taste
    • Fresh cilantro, chopped (for garnish)
    • Juice of 1 lime

    Cooking Instructions:

    In a large skillet or saucepan, heat the vegetable oil over medium heat and add the chopped onions. Sauté until the onions are translucent, then add the minced garlic, grated ginger, and green chilies, cooking for another couple of minutes until fragrant.

    Stir in the curry powder and turmeric, followed by the coconut milk, stirring well to combine. Allow the mixture to simmer for a few minutes before gently adding the fish fillets. Cook for about 10-15 minutes, or until the fish is cooked through and flakes easily with a fork.

    Season with salt and lime juice, then remove from heat and garnish with fresh cilantro.

    Extra Tips:

    When cooking fish curry, it's important not to overcook the fish, as it can become tough. To guarantee the fish remains tender, keep an eye on it while it simmers and remove it from heat as soon as it's just cooked through.

    You can customize the level of spiciness by adjusting the number of green chilies or adding red chili powder if you like it hotter. Adding vegetables such as bell peppers or spinach can improve the dish's nutrition and flavor.

    Serve it with steamed rice or warm naan for a complete meal!

  • 10 Best Cod Recipes

    10 Best Cod Recipes

    If you're looking to spice up your dinner routine, you've come to the right place! Cod is a fantastic fish that's super versatile, and there are tons of delicious ways to prepare it. From zesty Baked Lemon Garlic Cod to the classic British Cod Fish and Chips, there's a recipe for everyone. So, whether you're in the mood for something fresh and vibrant or cozy and comforting, keep your apron handy—you're going to want to try these mouthwatering dishes!

    Baked Lemon Garlic Cod

    Baked Lemon Garlic Cod is a delightful and easy-to-make dish that highlights the mild flavors of cod with the brightness of lemon and the aromatic qualities of garlic. This recipe makes for a perfect weeknight dinner that's both healthy and satisfying.

    The combination of fresh herbs and zesty lemon juice adds a revitalizing touch while ensuring the fish remains moist and flavorful throughout the cooking process.

    Ingredients:

    • 4 cod fillets
    • 2 tablespoons olive oil
    • 3 cloves garlic, minced
    • Juice of 1 lemon
    • Zest of 1 lemon
    • 1 teaspoon dried oregano
    • Salt and pepper to taste
    • Fresh parsley, chopped (for garnish)
    • Lemon slices (for garnish)

    Cooking Instructions:

    Preheat your oven to 400°F (200°C). In a small bowl, mix together the olive oil, minced garlic, lemon juice, lemon zest, oregano, salt, and pepper.

    Place the cod fillets in a baking dish and pour the lemon garlic mixture over the top, ensuring the fillets are well-coated. Bake in the preheated oven for about 15-20 minutes, or until the cod flakes easily with a fork and is cooked through.

    Remove from the oven and garnish with freshly chopped parsley and lemon slices before serving.

    Extra Tips:

    To improve the flavor of your Baked Lemon Garlic Cod, consider marinating the fish in the lemon garlic mixture for 30 minutes to an hour before baking. This allows the fish to absorb more of the flavors.

    Additionally, feel free to experiment with other herbs such as thyme or dill for a different twist. If you prefer a crispy top, you can broil the cod for the last 2-3 minutes of cooking, but be sure to keep an eye on it to prevent burning.

    Enjoy your delicious and healthy meal!

    Pan-Seared Cod With Herb Butter

    herb butter cod recipe

    Pan-Seared Cod With Herb Butter is a delightful and straightforward dish that highlights the delicate flavor of cod while adding a rich, buttery herb sauce. This recipe is perfect for a weeknight dinner or a special occasion, offering a satisfying meal that comes together in just a matter of minutes.

    The combination of crispy, golden-brown fish and the aromatic herb butter enhances the dish, making it a true crowd-pleaser.

    Ingredients:

    • 2 cod fillets (6 oz each)
    • Salt and pepper, to taste
    • 2 tablespoons olive oil
    • 4 tablespoons unsalted butter
    • 2 cloves garlic, minced
    • 1 tablespoon fresh parsley, chopped
    • 1 tablespoon fresh dill, chopped
    • 1 tablespoon fresh chives, chopped
    • Lemon wedges, for serving

    Instructions:

    Start by seasoning the cod fillets generously with salt and pepper on both sides.

    In a large skillet, heat the olive oil over medium-high heat until shimmering. Carefully place the seasoned cod fillets in the skillet and cook for about 3-4 minutes on each side, or until the fish is golden brown and flakes easily with a fork.

    While the fish is cooking, melt the butter in a small saucepan, then add the minced garlic and cook for about a minute until fragrant. Stir in the chopped herbs and remove from heat.

    Once the cod is cooked, drizzle the herb butter over the fillets and serve with lemon wedges on the side.

    Extra Tips:

    For the best results, make sure your skillet is hot before adding the fish; this helps to achieve a perfect sear.

    Avoid overcrowding the pan; if necessary, cook the cod in batches to maintain the heat. You can customize the herb butter by using your favorite herbs or adding a splash of lemon juice for extra brightness.

    Serve this dish with a side of steamed vegetables or a fresh salad to complete the meal.

    Cod Tacos With Mango Salsa

    Cod tacos with mango salsa are a delightful and invigorating dish that brings together the mild flavor of cod with the vibrant sweetness of mango. This recipe is perfect for a quick weeknight dinner or a fun weekend gathering. The combination of crispy cod, soft tortillas, and zesty salsa creates a mouthwatering experience that your family and friends will love.

    Ingredients:

    • 1 lb cod fillets
    • 1 cup all-purpose flour
    • 1 tsp paprika
    • 1 tsp garlic powder
    • 1 tsp cumin
    • Salt and pepper, to taste
    • 2 eggs, beaten
    • 1 cup panko breadcrumbs
    • 8 small corn or flour tortillas
    • 1 ripe mango, diced
    • 1/4 red onion, finely chopped
    • 1/2 red bell pepper, diced
    • 1 jalapeño, seeded and minced
    • Juice of 1 lime
    • Fresh cilantro, chopped (optional)

    Instructions:

    Begin by preparing the mango salsa. In a bowl, combine the diced mango, red onion, red bell pepper, jalapeño, lime juice, and cilantro, mixing well. Set aside to let the flavors meld.

    Next, preheat your oven to 400°F (200°C). Season the cod fillets with salt and pepper. In one bowl, mix the flour, paprika, garlic powder, cumin, salt, and pepper. In another bowl, place the beaten eggs, and in a third bowl, add the panko breadcrumbs.

    Dredge each cod fillet in the flour mixture, dip it in the egg, and then coat it with panko. Place the coated fillets on a baking sheet and bake for about 12-15 minutes, or until golden brown and flaky.

    While the fish is baking, warm the tortillas in a skillet until soft and pliable. To serve, place a piece of cod on each tortilla and top with the mango salsa.

    Extra Tips:

    For the best texture, verify the cod is patted dry before seasoning and breading. You can also customize the salsa by adding ingredients like diced avocado or a pinch of salt for extra flavor.

    If you prefer a spicier kick, leave some seeds in the jalapeño or add a dash of hot sauce to the finished tacos. To make this dish even quicker, consider using frozen cod fillets; just adjust the baking time according to the package instructions.

    Enjoy your cod tacos with a side of lime wedges for an added zesty touch!

    Creamy Cod and Spinach Casserole

    delicious cod and spinach casserole

    Creamy Cod and Spinach Casserole is a comforting dish that combines tender cod fillets with a rich and creamy spinach sauce, all baked to perfection. This dish isn't only delicious but also packed with nutrients, making it a great option for a family dinner or meal prep.

    The blend of flavors from the cod, spinach, and creamy sauce creates a delightful and satisfying meal that will please even the pickiest eaters.

    Ingredients:

    • 4 cod fillets
    • 2 cups fresh spinach, chopped
    • 1 cup heavy cream
    • 1 cup shredded mozzarella cheese
    • 1 cup grated Parmesan cheese
    • 1 tablespoon olive oil
    • 2 cloves garlic, minced
    • 1 teaspoon onion powder
    • 1 teaspoon salt
    • ½ teaspoon black pepper
    • ½ teaspoon paprika
    • ½ teaspoon dried thyme
    • 1 cup breadcrumbs (optional for topping)

    Cooking Instructions:

    Preheat your oven to 375°F (190°C). In a large skillet, heat the olive oil over medium heat and sauté the minced garlic until fragrant, about 1 minute.

    Add the chopped spinach and cook until wilted. In a mixing bowl, combine the heavy cream, mozzarella cheese, Parmesan cheese, onion powder, salt, black pepper, paprika, and thyme.

    Stir in the sautéed spinach mixture until well combined. Place the cod fillets in a greased baking dish and pour the creamy spinach mixture over them.

    If desired, sprinkle breadcrumbs on top for added crunch. Bake in the preheated oven for 25-30 minutes, or until the cod is cooked through and flakes easily with a fork.

    Extra Tips:

    For a deeper flavor, consider marinating the cod fillets in lemon juice and herbs for 30 minutes before cooking.

    You can also substitute the fresh spinach with frozen spinach; just confirm it's well-drained before adding to the mixture.

    For a healthier twist, replace heavy cream with Greek yogurt or a low-fat cream alternative. Pair this casserole with a side of brown rice or a fresh salad for a complete meal.

    Enjoy your delicious and creamy cod and spinach casserole!

    Grilled Cod With Chimichurri Sauce

    Grilled cod with chimichurri sauce is a delightful and vibrant dish that combines the mild, flaky texture of cod with the zesty, herbaceous flavors of chimichurri. This recipe is perfect for a summer evening, as the grilling process improves the fish's natural flavors while the chimichurri adds a revitalizing kick.

    It's a simple yet elegant meal that can be served alongside a fresh salad or grilled vegetables for a complete dining experience.

    Ingredients:

    • 4 cod fillets (approximately 6 ounces each)
    • 2 tablespoons olive oil
    • Salt and pepper, to taste
    • 1 cup fresh parsley, finely chopped
    • 1/4 cup fresh oregano, finely chopped
    • 3 cloves garlic, minced
    • 1/2 teaspoon red pepper flakes (optional)
    • 1/2 cup olive oil (for chimichurri)
    • 3 tablespoons red wine vinegar
    • Juice of 1 lemon
    • Salt, to taste

    Cooking Instructions:

    Preheat your grill to medium-high heat. While the grill is heating, prepare the chimichurri sauce by combining the parsley, oregano, garlic, red pepper flakes, olive oil, red wine vinegar, lemon juice, and salt in a bowl; mix well and set aside.

    Pat the cod fillets dry with paper towels and brush them with olive oil, then season with salt and pepper. Once the grill is hot, place the cod fillets on the grill and cook for about 4-5 minutes per side, or until the fish is opaque and flakes easily with a fork.

    Remove the cod from the grill and let it rest for a minute before serving.

    Extra Tips:

    For the best results, choose fresh cod fillets from a reputable source, as freshness greatly improves the flavor.

    If you prefer a slightly smoky flavor, consider adding some wood chips to the grill during cooking. You can also prepare the chimichurri sauce a day in advance to allow the flavors to meld together.

    This dish pairs beautifully with grilled vegetables or a light quinoa salad for a healthy meal. Enjoy your grilled cod with a generous drizzle of chimichurri sauce for a burst of flavor!

    Cod Chowder With Potatoes and Corn

    cod chowder with corn

    Cod chowder with potatoes and corn is a hearty and comforting dish that combines the delicate flavors of cod with the sweetness of corn and the creaminess of potatoes. This chowder is perfect for chilly days and can be served as a filling meal on its own.

    The combination of ingredients creates a rich and flavorful broth that's sure to satisfy your taste buds.

    Ingredients:

    • 1 lb fresh cod fillets, cut into chunks
    • 2 cups diced potatoes
    • 1 cup corn kernels (fresh or frozen)
    • 1 medium onion, chopped
    • 2 cloves garlic, minced
    • 4 cups fish or vegetable broth
    • 1 cup heavy cream
    • 2 tablespoons butter
    • 1 teaspoon dried thyme
    • Salt and pepper to taste
    • Fresh parsley, chopped (for garnish)

    Instructions:

    In a large pot, melt the butter over medium heat and sauté the onions and garlic until soft and translucent.

    Add the diced potatoes and corn, followed by the broth and thyme. Bring the mixture to a boil, then reduce the heat and simmer for about 15 minutes or until the potatoes are tender.

    Gently stir in the cod chunks and heavy cream, allowing the chowder to simmer for another 5-7 minutes until the fish is cooked through.

    Season with salt and pepper to taste, and garnish with freshly chopped parsley before serving.

    Extra Tips:

    For an extra layer of flavor, consider adding a splash of white wine when sautéing the onions and garlic.

    If you prefer a thicker chowder, you can mash some of the potatoes against the pot to create a creamier texture.

    Additionally, feel free to customize the chowder by incorporating other vegetables such as carrots or celery, or by using different seafood for variety.

    Enjoy your homemade cod chowder!

    Spicy Cod Stir-Fry With Vegetables

    spicy vegetable cod stir fry

    Spicy cod stir-fry with vegetables is a vibrant and flavorful dish that brings together tender pieces of cod and a medley of fresh vegetables, all tossed in a spicy sauce that tantalizes the taste buds.

    This quick and easy recipe is perfect for busy weeknights when you want something healthy yet satisfying. With its bold flavors and colorful presentation, this stir-fry is sure to impress your family or guests.

    Ingredients:

    • 1 pound cod fillets, cut into cubes
    • 2 tablespoons vegetable oil
    • 1 bell pepper, sliced
    • 1 cup snap peas
    • 1 carrot, julienned
    • 3 green onions, chopped
    • 2 garlic cloves, minced
    • 1 inch ginger, minced
    • 2 tablespoons soy sauce
    • 1 tablespoon sriracha (or more to taste)
    • 1 tablespoon honey
    • Salt and pepper to taste
    • Cooked rice or noodles for serving

    Cooking Instructions:

    Heat the vegetable oil in a large skillet or wok over medium-high heat.

    Once hot, add the garlic and ginger, stirring quickly for about 30 seconds until fragrant.

    Add the cod cubes and cook for about 3-4 minutes, or until the fish is opaque and cooked through.

    Remove the cod from the pan and set aside.

    In the same skillet, add the bell pepper, snap peas, and carrot, stirring until they begin to soften, about 3-5 minutes.

    Return the cod to the skillet, then stir in the soy sauce, sriracha, and honey.

    Cook for an additional 2 minutes, ensuring everything is well-coated and heated through.

    Finally, stir in the green onions and season with salt and pepper.

    Extra Tips:

    For an even spicier kick, feel free to add more sriracha or a pinch of red pepper flakes to the stir-fry.

    You can also customize the vegetables based on what you have on hand—broccoli, zucchini, or baby corn work great as substitutes.

    Serve this stir-fry over a bed of fluffy rice or toss it with noodles for a more filling meal.

    To save time, prep your ingredients ahead of time and have everything ready to go before you start cooking, as stir-frying is a quick process.

    Enjoy your delicious, homemade spicy cod stir-fry!

    Cod Fish and Chips

    crispy cod with fries

    Cod Fish and Chips is a classic British dish that combines crispy battered fish with golden, fluffy chips. This hearty meal is perfect for a cozy evening at home or when entertaining friends. The secret to achieving that perfect crunch lies in the batter and the right cooking technique. Pair it with tartar sauce and a slice of lemon for a delightful touch!

    Ingredients:

    • 4 pieces of cod fillets (about 6 ounces each)
    • 1 cup all-purpose flour
    • 1 teaspoon baking powder
    • 1 cup cold sparkling water or beer
    • Salt and pepper to taste
    • 4 large potatoes (for chips)
    • Vegetable oil (for frying)
    • Lemon wedges (for serving)
    • Tartar sauce (optional)

    Cooking Instructions:

    Start by preparing your chips: peel the potatoes and cut them into thick strips. Rinse under cold water and then pat dry.

    Heat vegetable oil in a deep fryer or a heavy pot to 350°F (175°C). Blanch the chips in the hot oil for about 5 minutes until they're slightly softened but not browned. Remove and drain on paper towels.

    For the batter, whisk together the flour, baking powder, and a pinch of salt and pepper in a bowl. Gradually add the cold sparkling water or beer, stirring until smooth.

    Dip each cod fillet into the batter, allowing excess to drip off, and carefully place them in the hot oil. Fry for about 4-5 minutes, or until golden brown and crispy. Remove the fish and let it drain on paper towels.

    Increase the oil temperature to 375°F (190°C) and return the chips to the oil, frying until golden and crispy, about another 2-3 minutes. Serve hot with lemon wedges and tartar sauce.

    Extra Tips:

    To improve the flavor of your fish and chips, let your batter rest for about 30 minutes before frying. This allows the gluten to relax, resulting in a lighter texture.

    For extra crispy chips, try soaking the cut potatoes in cold water for at least 30 minutes before frying to remove excess starch.

    Also, if you want to make the dish healthier, you can bake the fish and chips in the oven instead of frying, although the classic fried version is hard to beat!

    Mediterranean Cod With Olives and Tomatoes

    mediterranean cod dish recipe

    Mediterranean Cod with Olives and Tomatoes is a vibrant and flavorful dish that showcases the best of Mediterranean cuisine. The combination of succulent cod fillets, briny olives, and juicy tomatoes creates a delightful symphony of flavors that's both healthy and satisfying.

    This dish is perfect for a weeknight dinner or a special occasion, and it pairs wonderfully with a side of crusty bread or a light salad.

    Ingredients:

    • 4 cod fillets (6 ounces each)
    • 1 cup cherry tomatoes, halved
    • 1/2 cup Kalamata olives, pitted and sliced
    • 1/4 cup red onion, thinly sliced
    • 3 cloves garlic, minced
    • 1/4 cup fresh parsley, chopped
    • 1 tablespoon olive oil
    • 1 teaspoon dried oregano
    • Salt and pepper to taste
    • Lemon wedges for serving

    Instructions:

    Preheat your oven to 400°F (200°C). In a large baking dish, combine the cherry tomatoes, olives, red onion, garlic, parsley, olive oil, oregano, salt, and pepper. Toss the mixture to combine.

    Nestle the cod fillets into the vegetable mixture, ensuring they're surrounded by the tomatoes and olives. Drizzle a little extra olive oil over the fish, and bake in the preheated oven for 20-25 minutes, or until the cod is cooked through and flakes easily with a fork.

    Serve hot with lemon wedges on the side.

    Extra Tips:

    To improve the flavor of your Mediterranean Cod, consider marinating the cod fillets in lemon juice and olive oil for about 30 minutes before cooking. This will infuse the fish with a zesty brightness.

    Additionally, feel free to customize the dish by adding other Mediterranean vegetables such as bell peppers or zucchini. For a heartier meal, serve the cod over a bed of couscous or quinoa, which will soak up the delicious juices from the dish.

    Cod En Papillote With Seasonal Vegetables

    cod wrapped with vegetables

    Cod en Papillote with Seasonal Vegetables is a delightful and healthy dish that showcases the delicate flavor of cod while allowing the natural aromas of fresh vegetables to infuse the fish.

    Cooking en papillote, or "in parchment," creates a steam pocket that preserves moisture and improves the general taste. This method not only results in a tender and flaky piece of fish but also makes for an elegant presentation when served directly from the parchment.

    Ingredients:

    • 2 cod fillets
    • 1 zucchini, sliced
    • 1 bell pepper, sliced
    • 1 carrot, julienned
    • 1 cup cherry tomatoes, halved
    • 2 cloves garlic, minced
    • 2 tablespoons olive oil
    • 1 lemon, sliced
    • Fresh herbs (such as thyme or parsley), for garnish
    • Salt and pepper, to taste
    • Parchment paper

    Instructions:

    Preheat your oven to 400°F (200°C). Cut two large pieces of parchment paper, about 12×16 inches each.

    In a bowl, toss the zucchini, bell pepper, carrot, cherry tomatoes, and minced garlic with olive oil, salt, and pepper.

    Place one cod fillet in the center of each piece of parchment paper, then top with the seasoned vegetables. Add a couple of lemon slices on top of each fillet and sprinkle with fresh herbs.

    Fold the parchment over the fish and vegetables, crimping the edges to seal tightly. Place the packets on a baking sheet and bake for 15-20 minutes, until the fish is cooked through and flakes easily with a fork.

    Extra Tips:

    For added flavor, consider marinating the cod in lemon juice and herbs for about 30 minutes before assembling the packets.

    You can also customize the vegetables based on seasonal selections or personal preference; asparagus, green beans, or even spinach work beautifully.

    Remember to handle the parchment carefully when opening the packets, as steam will escape.

    Serve the cod en papillote with a side of rice or crusty bread to soak up the delicious juices.