Tag: dinner recipes

  • 10 Best Sockeye Salmon Recipes

    10 Best Sockeye Salmon Recipes

    If you're looking to spice up your dinner routine, sockeye salmon is a fantastic choice. It's not just tasty; it's packed with nutrients too! From grilled salmon with zesty lemon-dill butter to savory teriyaki salmon bowls, these recipes bring the best out of this delicious fish. And let's not forget those hearty chowders and light salads that make any meal special. Get ready to discover some exciting new favorites that'll have everyone asking for seconds!

    Grilled Sockeye Salmon With Lemon-Dill Butter

    Grilled Sockeye Salmon with Lemon-Dill Butter is a delightful and vibrant dish that brings out the natural flavors of the fish while adding an invigorating twist. The combination of zesty lemon and aromatic dill in the butter amplifies the rich, buttery taste of the sockeye salmon, making it a perfect meal for summer barbecues or a cozy dinner at home.

    With a few simple ingredients and straightforward cooking instructions, you can create this mouthwatering dish that will impress your family and friends.

    Ingredients:

    • 4 sockeye salmon fillets
    • 1/4 cup unsalted butter, softened
    • 2 tablespoons fresh lemon juice
    • 1 tablespoon fresh dill, chopped
    • 1 teaspoon garlic, minced
    • Salt and pepper to taste
    • Lemon wedges, for serving

    Cooking Instructions:

    Preheat your grill to medium-high heat and lightly oil the grates to prevent sticking.

    In a small bowl, combine the softened butter, lemon juice, chopped dill, minced garlic, salt, and pepper to create the lemon-dill butter.

    Place the sockeye salmon fillets skin-side down on a piece of aluminum foil or a lightly greased grill basket. Spread a generous amount of the lemon-dill butter over the top of each fillet.

    Grill the salmon for about 6-8 minutes, or until the fish flakes easily with a fork and has grill marks. Carefully remove the salmon from the grill and serve with lemon wedges.

    Extra Tips:

    To amplify the flavor of your grilled sockeye salmon, consider marinating the fillets in a mixture of olive oil, lemon juice, and herbs for 30 minutes before grilling. This not only adds depth to the taste but also helps keep the fish moist.

    Additionally, be mindful of the cooking time, as sockeye salmon cooks quickly; overcooking can lead to a dry texture.

    Pair this dish with a fresh salad or grilled vegetables for a complete meal, and don't forget to save any leftover lemon-dill butter for future use, as it's great on other seafood or vegetables!

    Baked Sockeye Salmon With Garlic and Herbs

    garlic herb baked sockeye salmon

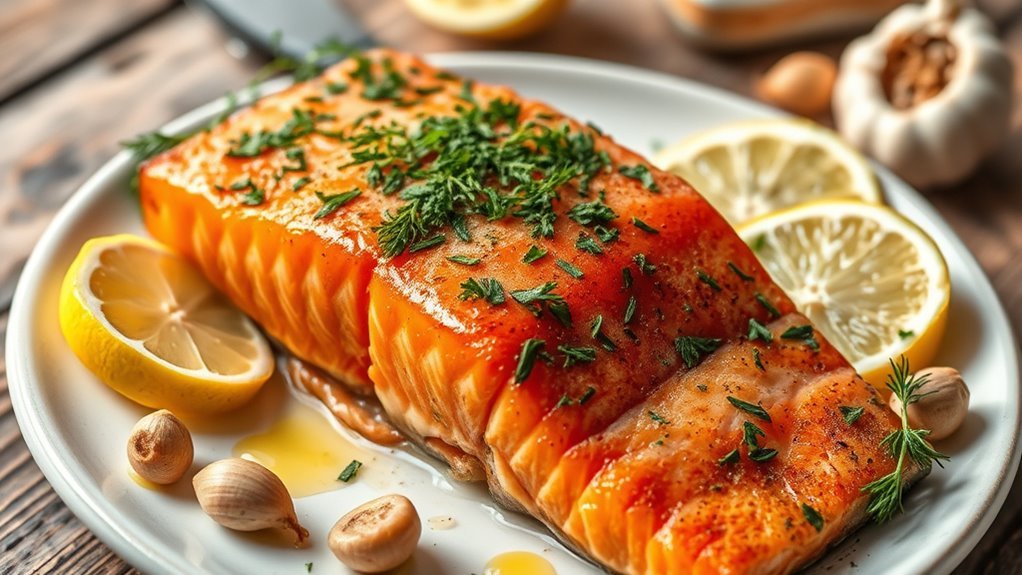
    Baked Sockeye Salmon with Garlic and Herbs is a flavorful and nutritious dish that showcases the rich taste of this vibrant fish. This simple recipe highlights the salmon's natural flavors while infusing it with aromatic garlic and fresh herbs, making it a perfect choice for a weeknight dinner or special occasion.

    With minimal preparation and cooking time, you'll have a delicious meal on the table that's sure to impress family and friends.

    Ingredients:

    • 4 sockeye salmon fillets
    • 4 cloves garlic, minced
    • 2 tablespoons olive oil
    • 1 tablespoon fresh lemon juice
    • 1 teaspoon dried oregano
    • 1 teaspoon dried thyme
    • Salt and pepper, to taste
    • Fresh parsley, chopped (for garnish)
    • Lemon wedges (for serving)

    Instructions:

    Preheat your oven to 400°F (200°C) and line a baking sheet with parchment paper.

    In a small bowl, combine the minced garlic, olive oil, lemon juice, oregano, thyme, salt, and pepper to create a marinade.

    Place the sockeye salmon fillets on the prepared baking sheet and brush the marinade generously over the top of each fillet.

    Bake in the preheated oven for 12-15 minutes or until the salmon flakes easily with a fork and is cooked through.

    Remove from the oven and garnish with fresh parsley and lemon wedges before serving.

    Extra Tips:

    For the best results, choose sockeye salmon fillets that are skin-on, as the skin helps to keep the fish moist during baking.

    If you prefer a little extra crunch, you can broil the salmon for the last 2-3 minutes of cooking.

    Additionally, feel free to experiment with different herbs or add a sprinkle of red pepper flakes for a hint of spice.

    To improve the meal, serve the salmon with a side of roasted vegetables or a fresh salad.

    Pan-Seared Sockeye Salmon With Mango Salsa

    Pan-Seared Sockeye Salmon with Mango Salsa is a vibrant and flavorful dish that combines the rich taste of salmon with the sweetness of fresh mango. This easy-to-make recipe is perfect for a weeknight dinner or a special occasion.

    The crispy skin and tender, flaky flesh of the sockeye salmon are beautifully complemented by the zesty mango salsa, making every bite a delightful experience.

    Ingredients:

    • 4 sockeye salmon fillets
    • Salt and pepper, to taste
    • 2 tablespoons olive oil
    • 1 ripe mango, diced
    • 1/2 red onion, finely chopped
    • 1 jalapeño, seeded and minced
    • Juice of 1 lime
    • 1/4 cup fresh cilantro, chopped

    Instructions:

    Heat the olive oil in a large skillet over medium-high heat. Season the sockeye salmon fillets with salt and pepper on both sides.

    Once the oil is hot, add the salmon fillets skin-side down and sear for about 4-5 minutes until the skin is crispy. Carefully flip the fillets and cook for an additional 3-4 minutes, or until the salmon is cooked through and flakes easily with a fork.

    While the salmon is cooking, prepare the mango salsa by combining the diced mango, red onion, jalapeño, lime juice, and cilantro in a bowl. Mix well and season with salt to taste.

    Extra Tips:

    For the best results, choose sockeye salmon fillets that are fresh and vibrant in color. If you're concerned about overcooking the salmon, use a meat thermometer; it should reach an internal temperature of 145°F.

    Feel free to customize the mango salsa by adding other ingredients like diced bell peppers or avocado for added flavor and texture. Serve the dish with a side of rice or a fresh green salad for a complete meal.

    Sockeye Salmon Tacos With Avocado Crema

    salmon tacos with crema

    Sockeye salmon tacos with avocado crema are a delicious and healthy way to enjoy this flavorful fish. The vibrant combination of tender, flaky salmon wrapped in warm tortillas and topped with a creamy avocado sauce creates a delightful meal that's perfect for any occasion.

    These tacos aren't only quick to prepare but also packed with nutrients, making them a great choice for a weeknight dinner or a weekend gathering with friends.

    Ingredients:

    • 1 pound sockeye salmon fillets
    • 1 tablespoon olive oil
    • 1 teaspoon chili powder
    • 1 teaspoon cumin
    • Salt and pepper, to taste
    • 8 small corn or flour tortillas
    • 1 avocado
    • 1/4 cup Greek yogurt or sour cream
    • 1 lime, juiced
    • Fresh cilantro, for garnish
    • Optional toppings: diced tomatoes, shredded cabbage, or sliced jalapeños

    Instructions:

    Preheat your grill or a skillet over medium-high heat. In a small bowl, mix together the olive oil, chili powder, cumin, salt, and pepper, then rub this mixture over the sockeye salmon fillets.

    Grill or pan-sear the salmon for about 4-5 minutes on each side, or until cooked through and flaky. While the salmon is cooking, prepare the avocado crema by blending the avocado, Greek yogurt or sour cream, lime juice, and a pinch of salt until smooth.

    Warm the tortillas briefly on the grill or in a dry skillet. Once the salmon is ready, flake it into bite-sized pieces, and assemble the tacos with the salmon, a drizzle of avocado crema, and your choice of optional toppings.

    Extra Tips:

    For added flavor, marinate the salmon in the spice mixture for about 30 minutes before cooking. If you prefer a spicy kick, consider adding chopped jalapeños to the avocado crema or topping the tacos with a spicy salsa.

    To improve the texture, you can grill the tortillas lightly for a bit of char. Finally, feel free to customize your tacos by experimenting with different toppings, such as pickled onions or mango salsa, to suit your taste!

    Teriyaki Sockeye Salmon Bowls

    Teriyaki Sockeye Salmon Bowls are a delicious and nutritious meal that combines the rich flavors of salmon with the sweet and savory notes of teriyaki sauce. This dish isn't only quick to prepare but also packed with protein and healthy fats, making it perfect for a weeknight dinner or a meal prep option.

    Served over a bed of rice and topped with fresh vegetables, these bowls are sure to satisfy your taste buds while nourishing your body.

    Ingredients:

    • 2 sockeye salmon fillets
    • 1/4 cup teriyaki sauce
    • 2 cups cooked jasmine rice
    • 1 cup broccoli florets
    • 1 carrot, julienned
    • 1/2 cup snap peas
    • 1 tablespoon sesame oil
    • 1 tablespoon green onions, chopped
    • Sesame seeds for garnish

    Cooking Instructions:

    Begin by marinating the sockeye salmon fillets in the teriyaki sauce for at least 15 minutes to allow the flavors to penetrate.

    While the salmon is marinating, steam the broccoli, carrots, and snap peas until tender but still crisp, about 5-7 minutes.

    In a large skillet, heat the sesame oil over medium heat and add the marinated salmon fillets, cooking for about 4-5 minutes per side, or until the salmon flakes easily with a fork.

    Once cooked, remove the salmon and assemble the bowls by placing a scoop of jasmine rice at the bottom, followed by the steamed vegetables and a salmon fillet on top.

    Drizzle with any remaining teriyaki sauce, and garnish with chopped green onions and sesame seeds.

    Extra Tips:

    For an added depth of flavor, consider grilling the sockeye salmon instead of pan-searing it; this will impart a nice smoky taste.

    You can also customize your bowls with other vegetables like bell peppers or zucchini, or even switch out the rice for quinoa or cauliflower rice for a low-carb alternative.

    If you prefer a spicier kick, try adding a drizzle of sriracha or a sprinkle of red pepper flakes to the finished dish.

    Enjoy your Teriyaki Sockeye Salmon Bowls as a healthy and satisfying meal!

    Smoked Sockeye Salmon Pasta

    smoked salmon pasta dish

    Smoked Sockeye Salmon Pasta is a delightful dish that combines the rich, smoky flavors of sockeye salmon with the comforting texture of pasta. This recipe is perfect for a quick weeknight dinner or a special occasion.

    The creamy sauce, infused with herbs and lemon, complements the salmon beautifully, creating a dish that's both satisfying and elegant. With just a few simple ingredients, you can whip up a gourmet meal in no time.

    Ingredients:

    • 8 oz. pasta (fettuccine or linguine)
    • 4 oz. smoked sockeye salmon, torn into bite-sized pieces
    • 1 cup heavy cream
    • 1 tablespoon olive oil
    • 2 cloves garlic, minced
    • 1 tablespoon capers, rinsed and drained
    • 1 tablespoon fresh dill, chopped (or 1 teaspoon dried dill)
    • 1 lemon, juiced and zested
    • Salt and pepper, to taste
    • Grated Parmesan cheese, for serving

    Cooking Instructions:

    Cook the pasta according to package instructions until al dente, then drain and set aside.

    In a large skillet, heat the olive oil over medium heat and sauté the minced garlic until fragrant, about 1 minute. Pour in the heavy cream and bring to a gentle simmer, stirring frequently.

    Add the capers, dill, lemon juice, and zest, seasoning with salt and pepper to taste. Gently fold in the smoked sockeye salmon and cooked pasta, tossing to combine and heat through.

    Serve immediately, topped with grated Parmesan cheese.

    Extra Tips:

    For an added layer of flavor, consider incorporating some sautéed spinach or arugula into the dish. They add a nice pop of color and nutrients.

    You can also substitute the heavy cream with a lighter option like half-and-half or even a dairy-free alternative if desired. Be cautious with the salt, as smoked salmon and capers can be quite salty already.

    Finally, garnishing with fresh lemon slices can improve the presentation and provide a revitalizing touch when serving. Enjoy your culinary creation!

    Sockeye Salmon Chowder

    sockeye salmon chowder recipe

    Sockeye salmon chowder is a delightful and hearty dish that combines the rich flavors of fresh salmon with creamy potatoes and vegetables. This chowder isn't only comforting but also a great way to highlight the vibrant taste of sockeye salmon. Perfect for a chilly evening or a family gathering, this dish is sure to impress with its rich texture and savory taste.

    Ingredients:

    • 1 pound sockeye salmon fillets, skin removed and diced
    • 4 medium potatoes, peeled and diced
    • 1 cup corn kernels (fresh, frozen, or canned)
    • 1 medium onion, chopped
    • 2 cloves garlic, minced
    • 4 cups fish or vegetable broth
    • 1 cup heavy cream
    • 2 tablespoons butter
    • 1 teaspoon dried thyme
    • Salt and pepper to taste
    • Chopped fresh parsley for garnish

    Cooking Instructions:

    In a large pot, melt the butter over medium heat and sauté the chopped onion and minced garlic until the onion is translucent.

    Add the diced potatoes and cook for a few minutes before pouring in the broth. Bring the mixture to a boil, then reduce the heat and let it simmer until the potatoes are tender, about 15 minutes.

    Stir in the corn, thyme, and diced sockeye salmon, cooking for another 5-7 minutes until the salmon is cooked through.

    Finally, stir in the heavy cream and season with salt and pepper to taste before removing from heat.

    Extra Tips:

    For an even richer flavor, consider adding a splash of white wine or a teaspoon of smoked paprika to the chowder.

    You can also experiment with additional vegetables like carrots or celery for more texture and nutrients.

    To make the chowder lighter, substitute half-and-half for the heavy cream, or use coconut milk for a dairy-free option.

    Serve your chowder with crusty bread for a complete meal, and enjoy the warmth of this comforting dish!

    Maple-Glazed Sockeye Salmon

    maple glazed salmon recipe

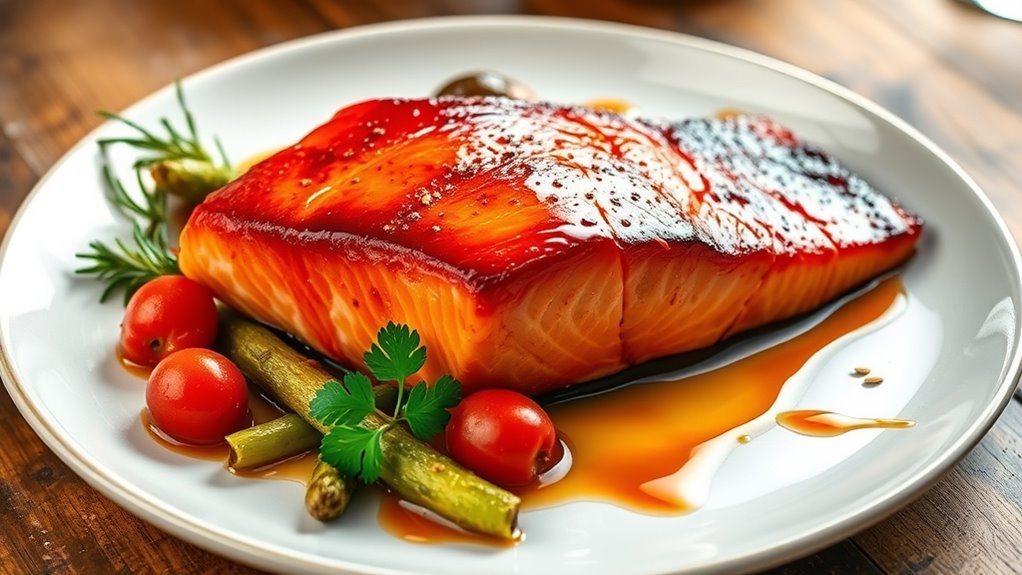
    Maple-glazed sockeye salmon is a delightful dish that combines the rich, buttery flavor of the salmon with the sweet, caramelized notes of maple syrup. This recipe is simple yet elegant, making it perfect for a weeknight dinner or a special occasion.

    The glaze not only improves the natural taste of the salmon but also creates a beautiful, glossy finish that's sure to impress your guests.

    Ingredients:

    • 4 sockeye salmon fillets
    • 1/4 cup pure maple syrup
    • 2 tablespoons soy sauce
    • 1 tablespoon Dijon mustard
    • 1 tablespoon olive oil
    • 2 cloves garlic, minced
    • Salt and pepper to taste
    • Lemon wedges for serving
    • Fresh parsley for garnish (optional)

    Cooking Instructions:

    In a bowl, whisk together the maple syrup, soy sauce, Dijon mustard, olive oil, and minced garlic to create the glaze.

    Season the sockeye salmon fillets with salt and pepper, then place them skin-side down on a lined baking sheet. Drizzle the maple glaze over the salmon, letting it soak in for about 15 minutes.

    Preheat your oven to 400°F (200°C) and bake the salmon for 12-15 minutes, or until the salmon is cooked through and flakes easily with a fork. For an extra caramelized finish, you can broil the salmon for the last 2-3 minutes of cooking.

    Extra Tips:

    To guarantee that your sockeye salmon remains moist and tender, avoid overcooking it. The salmon should reach an internal temperature of 145°F (63°C) but will continue to cook slightly after being removed from the oven.

    If you want to add some extra flavor, consider marinating the salmon in the glaze for a few hours before cooking. Additionally, pairing the dish with fresh vegetables or a light salad can balance the sweetness of the maple glaze beautifully.

    Enjoy your meal!

    Sockeye Salmon Salad With Citrus Vinaigrette

    salmon salad with vinaigrette

    Sockeye Salmon Salad with Citrus Vinaigrette is a revitalizing and nutritious dish that celebrates the rich flavor of sockeye salmon while combining vibrant, fresh ingredients. This salad is perfect for a light lunch or a hearty dinner, and the zesty citrus vinaigrette adds a delightful twist that enhances the overall flavor. Packed with omega-3 fatty acids and a variety of vegetables, this dish is as healthy as it's delicious.

    Ingredients:

    • 2 fillets of sockeye salmon
    • 4 cups mixed greens (arugula, spinach, and romaine)
    • 1 cup cherry tomatoes, halved
    • 1 avocado, diced
    • 1/2 cucumber, sliced
    • 1/4 red onion, thinly sliced
    • 1/4 cup feta cheese, crumbled
    • 1/4 cup olive oil
    • 2 tablespoons fresh lemon juice
    • 1 tablespoon orange juice
    • 1 teaspoon Dijon mustard
    • Salt and pepper to taste

    Instructions:

    Start by preheating your oven to 400°F (200°C).

    Season the sockeye salmon fillets with salt and pepper, then place them on a lined baking sheet. Bake for about 12-15 minutes or until the salmon is cooked through and flakes easily with a fork.

    Meanwhile, in a small bowl, whisk together the olive oil, lemon juice, orange juice, Dijon mustard, salt, and pepper to create the citrus vinaigrette.

    In a large salad bowl, combine the mixed greens, cherry tomatoes, avocado, cucumber, red onion, and feta cheese.

    Once the salmon is ready, let it cool slightly before flaking it into large pieces and adding it to the salad.

    Drizzle the citrus vinaigrette over the salad and toss gently to combine.

    Extra Tips:

    For a more pronounced flavor, consider marinating the sockeye salmon in a mixture of olive oil, lemon juice, garlic, and herbs for 30 minutes before baking.

    You can also customize the salad by adding other favorite ingredients such as nuts, seeds, or different types of cheese.

    If you're short on time, grilled or pan-seared salmon can be used as an alternative to baking.

    Finally, feel free to adjust the acidity of the vinaigrette by adding more lemon or orange juice, depending on your preference.

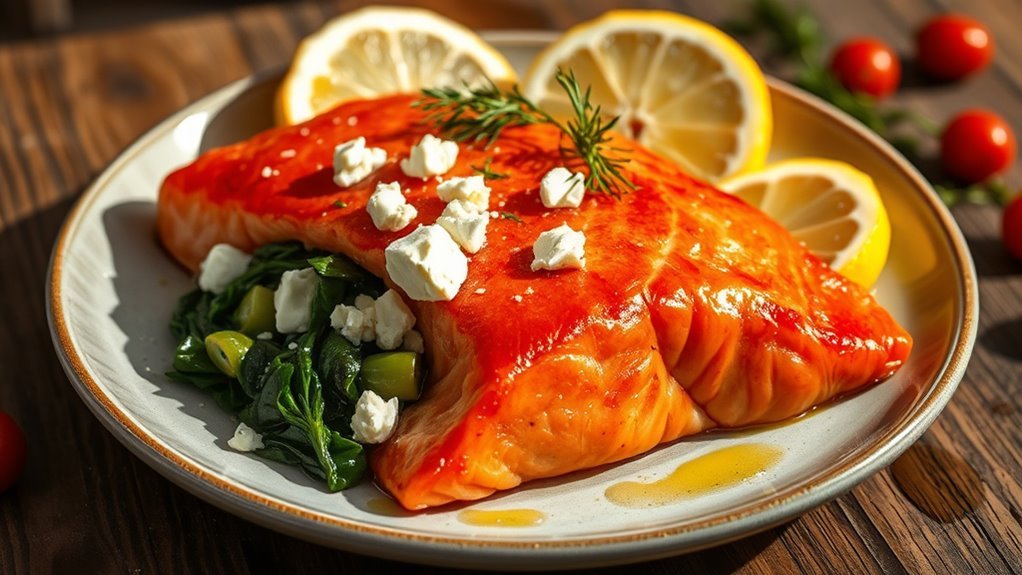
    Stuffed Sockeye Salmon With Spinach and Feta

    stuffed salmon with spinach

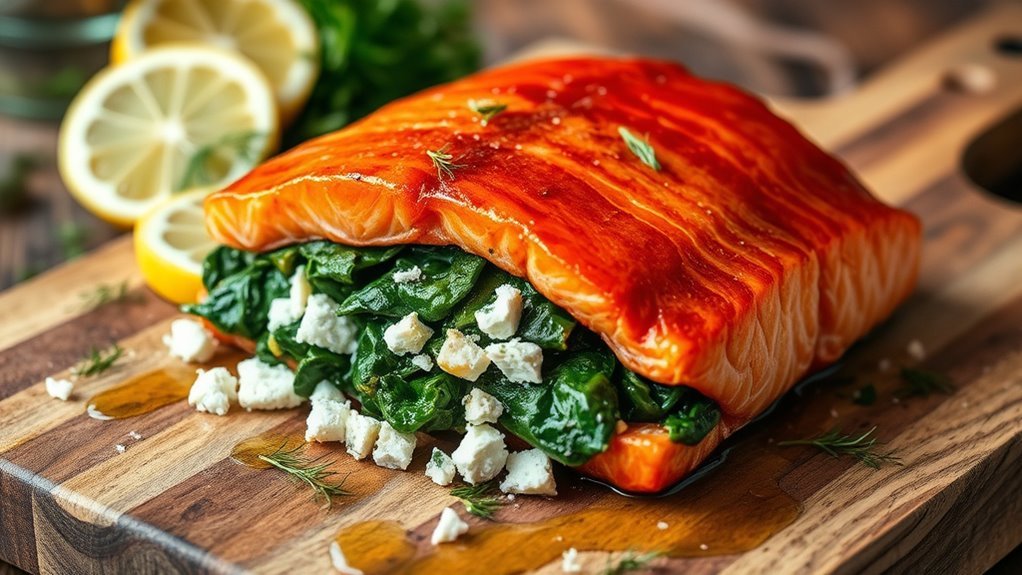
    Stuffed sockeye salmon with spinach and feta is a delightful dish that combines the rich, buttery flavor of salmon with the savory notes of feta cheese and the freshness of spinach.

    This recipe not only highlights the natural taste of the salmon but also adds a nutritious twist, making it perfect for a weeknight dinner or a special occasion. The vibrant colors and flavors will impress your family and friends, while the simple preparation guarantees that you can whip it up without a fuss.

    Ingredients:

    • 2 sockeye salmon fillets
    • 2 cups fresh spinach, chopped
    • 1/2 cup feta cheese, crumbled
    • 1/4 cup cream cheese, softened
    • 1 clove garlic, minced
    • 1 tablespoon olive oil
    • Salt and pepper to taste
    • Lemon wedges for serving
    • Fresh dill, for garnish (optional)

    Instructions:

    Preheat your oven to 375°F (190°C).

    In a skillet, heat the olive oil over medium heat and sauté the minced garlic until fragrant, about 1 minute. Add the chopped spinach and cook until wilted, about 2-3 minutes.

    Remove from heat and let cool slightly before mixing in the feta and cream cheese. Season the mixture with salt and pepper.

    Using a sharp knife, make a pocket in each salmon fillet by slicing gently along the side. Stuff the fillets with the spinach and feta mixture, securing with toothpicks if necessary.

    Place the stuffed salmon on a baking sheet lined with parchment paper and bake for 15-20 minutes, or until the salmon is cooked through and flakes easily with a fork.

    Serve with lemon wedges and garnish with fresh dill if desired.

    Extra Tips:

    When selecting sockeye salmon, look for fillets that are bright red and have a firm texture. This guarantees freshness and quality.

    You can also experiment with the stuffing by adding other ingredients such as sun-dried tomatoes or herbs like basil for added flavor.

    If you prefer a crispy topping, consider broiling the salmon for the last 2-3 minutes of cooking. This will give the dish a beautiful golden finish.

    Pair your stuffed salmon with a light salad or roasted vegetables for a complete meal.

  • 10 Best Fried Catfish Recipes

    10 Best Fried Catfish Recipes

    Fried catfish is a Southern classic that never goes out of style, and you're in for a treat with these top 10 recipes! Whether you crave the crispy goodness of buttermilk fried catfish or something with a spicy Cajun twist, there's a dish here for everyone. And trust me, marinating in buttermilk makes all the difference. So, get ready to investigate some mouthwatering options that'll have you hooked—just wait until you try the po' boy!

    Classic Buttermilk Fried Catfish

    Classic Buttermilk Fried Catfish is a beloved Southern dish that delivers a perfect crunch with every bite. The catfish fillets are marinated in tangy buttermilk, which not only tenderizes the fish but also adds a delightful flavor. Coated in a seasoned cornmeal mixture and fried until golden brown, this dish is best served hot with a side of coleslaw, tartar sauce, or even a squeeze of lemon for that extra zing.

    Ingredients:

    • 1 pound catfish fillets
    • 1 cup buttermilk
    • 1 cup cornmeal
    • 1/2 cup all-purpose flour
    • 1 teaspoon paprika
    • 1 teaspoon garlic powder
    • 1/2 teaspoon cayenne pepper (optional)
    • Salt and pepper to taste
    • Vegetable oil for frying
    • Lemon wedges for serving

    Cooking Instructions:

    Begin by marinating the catfish fillets in buttermilk for at least 30 minutes, allowing the flavors to infuse and the fish to become tender.

    In a separate bowl, combine the cornmeal, flour, paprika, garlic powder, cayenne pepper, salt, and pepper.

    Heat about 1 inch of vegetable oil in a large skillet over medium-high heat until it reaches 350°F (175°C).

    Remove the catfish from the buttermilk, allowing excess liquid to drip off, then dredge each fillet in the cornmeal mixture, making sure they're well-coated.

    Carefully place the fillets in the hot oil, frying for about 4-5 minutes per side or until golden brown and crispy.

    Once cooked, transfer the fried catfish to a paper towel-lined plate to drain any excess oil.

    Extra Tips:

    For the best results, make certain your oil is hot enough before adding the catfish—this helps achieve that crispy exterior while keeping the fish moist inside.

    You can also experiment with different seasonings in the cornmeal mixture to customize the flavor to your liking.

    If you're cooking for a crowd, consider keeping the fried catfish warm in an oven set to low heat until ready to serve.

    Finally, pairing the catfish with a revitalizing side salad or pickles can enhance the meal even more.

    Spicy Cajun Fried Catfish

    crispy flavorful cajun catfish

    Spicy Cajun Fried Catfish is a mouthwatering dish that captures the essence of Southern cooking with its bold flavors and crispy texture. This recipe features catfish fillets coated in a spicy Cajun seasoning blend and fried to perfection. The result is a deliciously crispy exterior that gives way to tender, flaky fish inside. Serve it with your favorite sides like coleslaw, cornbread, or fries for a meal that will satisfy any craving.

    Ingredients:

    • 4 catfish fillets
    • 1 cup buttermilk
    • 1 cup cornmeal
    • 1/2 cup all-purpose flour
    • 1 tablespoon Cajun seasoning
    • 1 teaspoon salt
    • 1/2 teaspoon black pepper
    • 1/2 teaspoon paprika
    • 1/2 teaspoon cayenne pepper (adjust to taste)
    • Oil for frying (vegetable or peanut oil)

    Instructions:

    Begin by marinating the catfish fillets in buttermilk for at least 30 minutes. This will help to tenderize the fish and infuse it with moisture.

    In a separate bowl, combine the cornmeal, flour, Cajun seasoning, salt, black pepper, paprika, and cayenne pepper.

    Heat the oil in a deep skillet or frying pan over medium-high heat. Once the oil is hot, remove the fillets from the buttermilk, allowing excess liquid to drip off, and dredge them in the cornmeal mixture, ensuring they're fully coated.

    Carefully place the coated fillets in the hot oil and fry for about 4-5 minutes on each side, or until they're golden brown and cooked through. Remove the catfish from the oil and let them drain on paper towels.

    Extra Tips:

    For an extra kick, consider adjusting the amount of cayenne pepper based on your spice tolerance.

    It's also a good idea to let the oil reach the right temperature before frying; too cool oil will make the catfish soggy, while too hot will burn the coating.

    For added flavor, you can marinate the fish overnight in the buttermilk, and feel free to experiment with additional spices in the dredging mixture to customize the taste.

    Enjoy this dish hot for the best texture and flavor!

    Lemon Pepper Fried Catfish

    Lemon Pepper Fried Catfish is a delightful twist on traditional fried catfish, infusing it with zesty lemon flavor and a peppery kick. This dish is perfect for a casual family dinner or an outdoor gathering, bringing a taste of Southern cuisine to your table. The crispy coating and tender fish create a mouthwatering combination that's sure to impress your guests while being simple enough for a weeknight meal.

    Ingredients:

    • 4 catfish fillets
    • 1 cup buttermilk
    • 1 cup cornmeal
    • 1/2 cup all-purpose flour
    • 2 tablespoons lemon pepper seasoning
    • 1 teaspoon garlic powder
    • 1 teaspoon paprika
    • Salt to taste
    • Vegetable oil for frying
    • Lemon wedges for serving

    To prepare Lemon Pepper Fried Catfish, start by marinating the catfish fillets in buttermilk for at least 30 minutes to improve tenderness and flavor. In a separate bowl, mix the cornmeal, flour, lemon pepper seasoning, garlic powder, paprika, and salt to create the breading.

    Heat vegetable oil in a deep pan or skillet over medium heat until it reaches 350°F (175°C). Remove the fillets from the buttermilk, allowing excess to drip off, and dredge them in the cornmeal mixture until evenly coated. Carefully place the coated catfish in the hot oil, frying for about 5-7 minutes per side, or until golden brown and cooked through.

    Once done, transfer the fried catfish to a paper towel-lined plate to drain excess oil, and serve hot with lemon wedges.

    When cooking Lemon Pepper Fried Catfish, make sure that the oil is hot enough before adding the fish to prevent sogginess. You can adjust the amount of lemon pepper seasoning according to your taste preference, and feel free to experiment with additional spices like cayenne for more heat.

    For a healthier option, consider baking the catfish in the oven at 400°F (200°C) for about 15-20 minutes, flipping halfway through, while still achieving a crispy texture. Enjoy this dish with sides like coleslaw or cornbread for a true Southern feast!

    Cornmeal Crusted Fried Catfish

    crispy cornmeal catfish fry

    Fried catfish is a beloved Southern dish that brings a delightful crunch and flavor to the table. The cornmeal crust adds a wonderful texture and a hint of sweetness that perfectly complements the tender fish.

    This recipe is simple and quick, making it an ideal choice for a weeknight dinner or a weekend gathering with friends and family. Serve it with a side of coleslaw and tartar sauce for a truly authentic experience.

    Ingredients:

    • 4 catfish fillets
    • 1 cup cornmeal
    • 1/2 cup all-purpose flour
    • 1 tablespoon paprika
    • 1 teaspoon garlic powder
    • 1 teaspoon onion powder
    • 1 teaspoon salt
    • 1/2 teaspoon black pepper
    • 2 large eggs
    • 1/4 cup buttermilk
    • Vegetable oil for frying

    Cooking Instructions:

    Begin by heating about 1 inch of vegetable oil in a large skillet over medium-high heat.

    In a shallow dish, combine the cornmeal, flour, paprika, garlic powder, onion powder, salt, and black pepper. In another bowl, whisk together the eggs and buttermilk.

    Dip each catfish fillet into the egg mixture, allowing any excess to drip off, then coat it generously in the cornmeal mixture, pressing down to stick.

    Once the oil is hot (around 350°F), carefully place the coated fillets in the skillet, frying them for about 4-5 minutes on each side or until golden brown and cooked through.

    Remove the fried catfish and place them on a paper towel-lined plate to drain any excess oil.

    Extra Tips:

    For an even more flavorful crust, consider adding some cayenne pepper to the cornmeal mixture for a touch of heat.

    If you want to improve the fish's flavor, marinate the catfish in a mixture of buttermilk and your favorite hot sauce for a couple of hours before breading.

    Always verify your oil is hot enough before frying, as this helps create a crispy exterior while keeping the fish moist inside.

    Finally, serve your fried catfish immediately for the best texture, but if you need to keep them warm, place them on a wire rack in a low oven until ready to serve.

    Honey Mustard Fried Catfish

    Honey Mustard Fried Catfish is a delightful twist on the classic Southern fried catfish, bringing a sweet and tangy flavor that pairs perfectly with the crispy texture of the fish. This dish isn't only easy to prepare but also makes for a satisfying meal that can be enjoyed by the whole family.

    The honey mustard glaze adds a unique touch that improves the natural flavor of the catfish while keeping it moist and tender. Serve it alongside your favorite sides for a complete dinner experience.

    Ingredients:

    • 4 catfish fillets
    • 1 cup buttermilk
    • 1 cup cornmeal
    • 1/2 cup all-purpose flour
    • 1 tablespoon paprika
    • 1 teaspoon garlic powder
    • 1 teaspoon onion powder
    • 1 teaspoon salt
    • 1/2 teaspoon black pepper
    • Vegetable oil (for frying)
    • 1/4 cup honey
    • 1/4 cup Dijon mustard

    Cooking Instructions:

    Begin by soaking the catfish fillets in buttermilk for at least 30 minutes to tenderize the fish and improve the flavor.

    In a separate bowl, mix together the cornmeal, flour, paprika, garlic powder, onion powder, salt, and pepper. After soaking, remove the fillets from the buttermilk and dredge them in the cornmeal mixture, making sure they're well coated.

    In a large skillet, heat about 1/2 inch of vegetable oil over medium-high heat. Once the oil is hot, carefully place the coated catfish fillets into the skillet and fry for 4-5 minutes on each side or until golden brown and cooked through.

    While the catfish is frying, combine the honey and Dijon mustard in a small bowl to create the honey mustard glaze. Once the catfish is cooked, remove it from the skillet and let it drain on paper towels. Drizzle the honey mustard mixture over the hot catfish before serving.

    Extra Tips:

    For an even crunchier coating, consider double-dipping the catfish by returning it to the buttermilk after the first dredge and then coating it again in the cornmeal mixture.

    Also, make sure your oil is sufficiently hot before adding the fish to prevent it from becoming greasy. If you prefer a spicier kick, add cayenne pepper to the breading mixture or drizzle some hot sauce over the finished catfish.

    To keep your catfish crispy, avoid stacking them on top of each other after frying. Enjoy your Honey Mustard Fried Catfish with sides like coleslaw, fries, or cornbread for a true Southern feast!

    Garlic Butter Fried Catfish

    savory garlic butter catfish

    Garlic Butter Fried Catfish is a delicious and savory dish that boosts the traditional fried catfish experience with the rich flavor of garlic and butter. This recipe is perfect for a casual dinner or a special occasion, offering a delightful crunch on the outside while maintaining the tender and flaky texture of the catfish inside. Serve it with a side of coleslaw or fried okra for a true Southern feast!

    Ingredients:

    • 4 catfish fillets
    • 1 cup buttermilk
    • 1 cup cornmeal
    • 1 teaspoon salt
    • 1 teaspoon black pepper
    • 1 teaspoon paprika
    • 1/2 teaspoon cayenne pepper (optional)
    • 1/2 cup unsalted butter
    • 4 cloves garlic, minced
    • Fresh parsley, chopped (for garnish)
    • Lemon wedges (for serving)

    Instructions:

    Begin by soaking the catfish fillets in buttermilk for at least 30 minutes to improve their tenderness and flavor.

    In a separate bowl, mix together the cornmeal, salt, black pepper, paprika, and cayenne pepper.

    Remove the fillets from the buttermilk and dredge them in the cornmeal mixture, making sure each piece is fully coated.

    In a large skillet, melt the butter over medium heat, then add the minced garlic, cooking until fragrant (about 1 minute).

    Place the coated catfish fillets in the skillet and fry for 4-5 minutes on each side, or until golden brown and cooked through.

    Remove from the skillet and drain on paper towels. Serve hot, garnished with fresh parsley and lemon wedges.

    Extra Tips:

    For an extra layer of flavor, you can infuse the butter with herbs such as thyme or rosemary while melting it.

    If you prefer a lighter version, you can bake the catfish instead of frying it; simply brush the fillets with garlic butter and bake at 400°F (200°C) for about 20 minutes, or until cooked through.

    Additionally, make sure your oil is hot enough before adding the catfish to guarantee a crispy crust; you can test the heat by dropping a small piece of cornmeal into the oil—if it sizzles, it's ready!

    Southern Style Fried Catfish Po' Boy

    fried catfish sandwich delight

    Fried catfish is a beloved staple of Southern cuisine, and when served as a po' boy, it becomes a delicious sandwich that's perfect for any occasion. This Southern Style Fried Catfish Po' Boy is crispy on the outside, tender on the inside, and packed with flavor. It combines perfectly fried catfish fillets with fresh toppings and a zesty sauce all nestled in a soft French roll.

    Whether you're hosting a backyard barbecue or just craving a taste of the South, this recipe will bring authentic flavors right to your table.

    Ingredients:

    • 4 catfish fillets
    • 1 cup buttermilk
    • 1 cup cornmeal
    • 1/2 cup all-purpose flour
    • 1 teaspoon cayenne pepper
    • 1 teaspoon garlic powder
    • 1 teaspoon onion powder
    • Salt and pepper to taste
    • Vegetable oil for frying
    • 4 French rolls or hoagie buns
    • Shredded lettuce
    • Sliced tomatoes
    • Remoulade sauce (store-bought or homemade)

    Cooking Instructions:

    Begin by soaking the catfish fillets in buttermilk for at least 30 minutes to tenderize and add flavor.

    In a separate bowl, mix the cornmeal, flour, cayenne pepper, garlic powder, onion powder, salt, and pepper.

    Remove the catfish from the buttermilk, allowing any excess to drip off, then dredge each fillet in the cornmeal mixture until well-coated.

    Heat about 1 inch of vegetable oil in a deep skillet over medium-high heat. Once the oil is hot, carefully add the catfish and fry for 4-5 minutes on each side or until golden brown and cooked through.

    Remove the fried catfish and place on paper towels to drain excess oil.

    To assemble the po' boys, spread a generous amount of remoulade sauce on the inside of the French rolls, add shredded lettuce and sliced tomatoes, then top with the crispy fried catfish fillets.

    Extra Tips:

    For the best flavor, consider seasoning the buttermilk with a bit of hot sauce or additional spices before soaking the catfish.

    Verify your oil is at the right temperature (around 350°F) to achieve a crispy exterior without absorbing too much oil.

    If you're looking for a healthier option, you can bake the catfish in the oven instead of frying, but be sure to still coat it well in the cornmeal mixture for texture.

    Serve your po' boys with extra remoulade and a side of fries or coleslaw for a complete meal that captures the essence of Southern comfort food.

    Blackened Fried Catfish

    spicy crispy catfish dish

    Blackened fried catfish is a deliciously spicy and smoky dish that's sure to impress any seafood lover. This method of cooking catfish involves coating the fillets in a blend of bold spices before frying them to perfection, creating a crispy exterior while maintaining a moist and flaky interior.

    Ideal for a hearty meal, serve these blackened catfish fillets alongside classic sides like coleslaw, fries, or grits for a truly Southern experience.

    Ingredients:

    • 4 catfish fillets
    • 2 tablespoons paprika
    • 1 tablespoon cayenne pepper
    • 1 tablespoon garlic powder
    • 1 tablespoon onion powder
    • 1 teaspoon dried thyme
    • 1 teaspoon dried oregano
    • 1 teaspoon black pepper
    • 1 teaspoon salt
    • 1/2 cup flour (for dredging)
    • 1/4 cup vegetable oil (for frying)
    • Lemon wedges (for serving)

    Instructions:

    In a small bowl, combine the paprika, cayenne pepper, garlic powder, onion powder, thyme, oregano, black pepper, and salt to create a spice mix.

    Pat the catfish fillets dry with paper towels, then generously coat both sides of each fillet with the spice mix. Dredge the seasoned fillets in flour, shaking off any excess.

    Heat the vegetable oil in a large skillet over medium-high heat. Once the oil is hot, carefully place the catfish fillets in the skillet and fry for about 3-4 minutes on each side, or until they're golden brown and cooked through.

    Remove the fillets from the skillet and place them on a paper towel-lined plate to drain excess oil.

    Extra Tips:

    For an even more intense flavor, let the seasoned catfish sit for about 30 minutes before frying to allow the spices to penetrate the fish.

    If you prefer a healthier option, you can also grill the catfish instead of frying; just brush the fillets with oil and cook them over medium heat until done.

    Additionally, be careful with the cayenne pepper; adjust the amount to suit your heat preference. Pairing the blackened catfish with a cooling sauce, like tartar or remoulade, can balance the spices beautifully. Enjoy your meal!

    Crispy Panko Fried Catfish

    crispy fried catfish recipe

    If you're craving a delicious and crunchy twist on a Southern classic, search no more than crispy panko fried catfish. This recipe combines the delicate flavor of catfish with the light, airy crunch of panko breadcrumbs, resulting in a dish that's perfect for a cozy family dinner or a festive gathering.

    With just a few simple ingredients and straightforward cooking steps, you can create a mouth-watering meal that's sure to impress.

    Ingredients:

    • 4 catfish fillets
    • 1 cup all-purpose flour
    • 2 large eggs
    • 1 tablespoon hot sauce (optional)
    • 1 cup panko breadcrumbs
    • 1 teaspoon garlic powder
    • 1 teaspoon paprika
    • Salt and pepper, to taste
    • Vegetable oil, for frying
    • Lemon wedges, for serving

    To prepare the crispy panko fried catfish, start by setting up a breading station: in one shallow dish, place the flour seasoned with salt, pepper, garlic powder, and paprika.

    In a second dish, whisk together the eggs and hot sauce. In a third dish, add the panko breadcrumbs.

    Dredge each catfish fillet in the flour, shaking off any excess, then dip it into the egg mixture, and finally coat it with the panko breadcrumbs, pressing gently to comply.

    Heat about half an inch of vegetable oil in a large skillet over medium-high heat. Once the oil is hot, carefully add the breaded catfish fillets and fry for about 3-4 minutes on each side, or until golden brown and cooked through.

    Remove the fish from the skillet and place it on paper towels to drain excess oil before serving.

    For best results when making crispy panko fried catfish, verify your oil is hot enough before adding the fillets, as this will help achieve that perfect crunch.

    You can test the oil by dropping a small piece of bread in; if it sizzles immediately, it's ready.

    Additionally, feel free to experiment with different seasonings in the breadcrumb mixture to customize the flavor to your liking.

    Serve your fried catfish with fresh lemon wedges and your favorite dipping sauce for a delightful meal!

    Sweet and Spicy Fried Catfish

    crispy seasoned catfish delight

    Sweet and Spicy Fried Catfish is a delightful dish that combines the rich flavors of catfish with the perfect balance of sweetness and heat. This recipe isn't only easy to follow but also allows you to customize the spice levels according to your taste preferences.

    The crispy coating provides a satisfying crunch that pairs wonderfully with the tender fish inside. Serve it up with your favorite sides for a delicious meal that's sure to impress friends and family.

    Ingredients:

    • 4 catfish fillets
    • 1 cup buttermilk
    • 1 cup cornmeal
    • 1/2 cup all-purpose flour
    • 2 tablespoons brown sugar
    • 1 teaspoon cayenne pepper (adjust to taste)
    • 1 teaspoon paprika
    • 1 teaspoon garlic powder
    • 1 teaspoon onion powder
    • Salt and pepper to taste
    • Vegetable oil for frying

    Cooking Instructions:

    Start by marinating the catfish fillets in buttermilk for at least 30 minutes to guarantee they remain moist and flavorful.

    In a separate bowl, mix together the cornmeal, flour, brown sugar, cayenne pepper, paprika, garlic powder, onion powder, salt, and pepper to create the breading.

    Heat about 1 inch of vegetable oil in a frying pan over medium heat. Once the oil is hot, remove the fillets from the buttermilk, allowing the excess to drip off, and then dredge each fillet in the cornmeal mixture, pressing it onto the fish to guarantee an even coating.

    Fry the fillets for about 4-5 minutes on each side until they're golden brown and cooked through. Remove them from the oil and let them drain on paper towels.

    Extra Tips:

    For an extra layer of flavor, consider adding a splash of hot sauce to the buttermilk marinade.

    Additionally, if you prefer a crunchier texture, double-dip the fillets in the buttermilk and breading before frying.

    Keep an eye on the oil temperature to avoid burning the coating; it should be hot enough to sizzle when the fish is added.

    Finally, serve your Sweet and Spicy Fried Catfish with a side of coleslaw or cornbread to complement the flavors beautifully. Enjoy your meal!

  • 10 Best Tuna Casserole Recipes

    10 Best Tuna Casserole Recipes

    Tuna casserole's one of those dishes that just feels like home, right? It's cozy, comforting, and super versatile. Whether you're craving something cheesy, creamy, or even a bit healthier, there's a tuna casserole out there for you. Plus, it's perfect for family dinners or potlucks! You won't believe the tasty twists you can add. So, what are the best recipes to whip up? Let's explore the top ten that'll make your taste buds dance!

    Classic Tuna Casserole

    Classic Tuna Casserole is a comforting and easy-to-make dish that brings together tender pasta, creamy sauce, and flaky tuna for a satisfying meal.

    Perfect for busy weeknights or family gatherings, this casserole can be prepared in advance and baked just before serving. With its simple ingredients and straightforward steps, you'll have a delicious meal on the table in no time.

    Ingredients:

    • 2 cups egg noodles
    • 1 can (15 oz) tuna, drained and flaked
    • 1 cup frozen peas
    • 1 can (10.5 oz) cream of mushroom soup
    • 1 cup milk
    • 1 cup shredded cheddar cheese
    • 1/2 cup breadcrumbs
    • 1/2 teaspoon garlic powder
    • 1/2 teaspoon onion powder
    • Salt and pepper to taste

    Instructions:

    Preheat your oven to 350°F (175°C). In a large pot, cook the egg noodles according to package instructions until al dente, then drain and return to the pot.

    Stir in the tuna, frozen peas, cream of mushroom soup, milk, garlic powder, onion powder, half of the cheddar cheese, and season with salt and pepper to taste. Mix everything until well combined, then transfer the mixture to a greased 9×13 inch baking dish.

    Top with the remaining cheddar cheese and sprinkle breadcrumbs over the top for added crunch. Bake in the preheated oven for 25-30 minutes, or until the casserole is bubbly and golden brown.

    Extra Tips:

    For added flavor, you can incorporate sautéed onions or bell peppers into the mixture.

    If you prefer a lighter version, substitute Greek yogurt for some of the cream of mushroom soup. Feel free to experiment with different types of cheese or add herbs like parsley or dill for a fresh touch.

    This casserole can be made ahead of time; simply prepare it up to the baking step, cover, and refrigerate for up to 24 hours. When ready to bake, just add a few extra minutes to the baking time if it's coming straight from the fridge.

    Cheesy Tuna Noodle Bake

    creamy tuna noodle casserole

    Cheesy Tuna Noodle Bake is a comforting and delicious dish that brings together tender pasta, savory tuna, and a rich, creamy cheese sauce.

    Perfect for a busy weeknight dinner or a cozy family gathering, this casserole is both filling and easy to prepare. With its layers of flavor and gooey cheese topping, it's sure to become a favorite in your household.

    Ingredients:

    • 8 ounces egg noodles
    • 2 cans (5 ounces each) tuna in water, drained
    • 1 cup frozen peas
    • 1 can (10.5 ounces) cream of mushroom soup
    • 1 cup milk
    • 1 cup shredded cheddar cheese
    • 1/2 cup grated Parmesan cheese
    • 1 teaspoon garlic powder
    • 1/2 teaspoon black pepper
    • 1/2 teaspoon salt
    • 1/2 cup breadcrumbs (optional, for topping)

    Instructions:

    Preheat your oven to 350°F (175°C). Cook the egg noodles according to package instructions until al dente, then drain and set aside.

    In a large mixing bowl, combine the drained tuna, frozen peas, cream of mushroom soup, milk, cheddar cheese, Parmesan cheese, garlic powder, black pepper, and salt. Stir until well combined.

    Gently fold in the cooked egg noodles until everything is evenly coated. Transfer the mixture to a greased 9×13 inch baking dish and spread it out evenly.

    If desired, sprinkle breadcrumbs on top for added crunch. Bake in the preheated oven for about 25-30 minutes or until the casserole is bubbly and golden brown on top.

    Extra Tips:

    For a little extra flavor, consider adding sautéed onions or bell peppers to the mixture.

    You can also use different types of cheese, such as mozzarella or Monterey Jack, for a unique twist. If you want a healthier version, substitute whole wheat noodles and low-fat cheese.

    Feel free to add other vegetables like corn or chopped spinach to boost nutrition. Leftovers can be stored in the refrigerator for up to 3 days, and this casserole also freezes well for future meals.

    Tuna Casserole With Potato Chips

    Tuna Casserole with Potato Chips is a delightful comfort food that combines the savory flavors of tuna, creamy sauce, and the satisfying crunch of potato chips. This easy-to-make dish is perfect for busy weeknights or when you want to whip up a quick and satisfying meal that the whole family will love.

    With just a few simple ingredients, you can create a hearty casserole that's both comforting and delicious.

    Ingredients:

    • 2 cans of tuna, drained
    • 1 can of cream of mushroom soup
    • 1 cup of frozen peas
    • 1 cup of milk
    • 2 cups of cooked egg noodles
    • 1 cup of shredded cheddar cheese
    • 2 cups of crushed potato chips
    • 1 teaspoon of garlic powder
    • Salt and pepper to taste

    Instructions:

    Preheat your oven to 350°F (175°C).

    In a large mixing bowl, combine the drained tuna, cream of mushroom soup, frozen peas, milk, cooked egg noodles, shredded cheddar cheese, garlic powder, salt, and pepper.

    Mix the ingredients thoroughly until well combined.

    Pour the mixture into a greased 9×13 inch baking dish and spread it evenly.

    Top the casserole with the crushed potato chips, ensuring an even layer.

    Bake in the preheated oven for about 25-30 minutes or until the casserole is bubbly and the potato chips are golden brown.

    Extra Tips:

    For added flavor, consider incorporating some sautéed onions or bell peppers into the mixture.

    If you prefer a spicier kick, a dash of hot sauce or some chopped jalapeños can enhance the dish.

    This casserole can also be customized with different types of cheese, such as mozzarella or pepper jack, depending on your taste preference.

    Leftovers can be stored in the refrigerator for up to three days, making it a great option for meal prep.

    Enjoy this comforting dish with a side salad for a complete meal!

    Mediterranean Tuna Casserole

    mediterranean tuna casserole recipe

    Mediterranean Tuna Casserole is a delightful twist on the classic comfort food, combining the savory flavors of the Mediterranean with the heartiness of a traditional casserole.

    This dish features tender pasta, creamy sauce, and nutritious ingredients like olives, sun-dried tomatoes, and fresh herbs, all tied together with canned tuna for an easy and satisfying meal. Perfect for a weeknight dinner or a potluck gathering, this casserole is sure to please both families and guests alike.

    Ingredients:

    • 8 oz pasta (penne or fusilli)
    • 2 cans (5 oz each) tuna in olive oil, drained
    • 1 cup cherry tomatoes, halved
    • 1/2 cup black olives, sliced
    • 1/2 cup sun-dried tomatoes, chopped
    • 1 cup frozen peas
    • 1 cup ricotta cheese
    • 1/2 cup grated Parmesan cheese
    • 1/2 cup shredded mozzarella cheese
    • 1 tsp dried oregano
    • 1 tsp garlic powder
    • Salt and pepper to taste
    • Fresh basil leaves for garnish

    Cooking Instructions:

    Preheat your oven to 375°F (190°C).

    Cook the pasta according to package instructions until al dente, then drain and set aside.

    In a large mixing bowl, combine the drained tuna, cherry tomatoes, olives, sun-dried tomatoes, peas, ricotta cheese, half of the Parmesan cheese, oregano, garlic powder, salt, and pepper.

    Gently fold in the cooked pasta until well mixed.

    Transfer the mixture to a greased 9×13-inch baking dish and sprinkle the top with the remaining Parmesan and mozzarella cheese.

    Bake for 25-30 minutes, or until the cheese is bubbly and golden brown.

    Remove from the oven and let it sit for a few minutes before serving. Garnish with fresh basil leaves.

    Extra Tips:

    For added depth of flavor, consider adding a splash of lemon juice or zest to the mixture before baking.

    You can also customize this casserole by incorporating other Mediterranean ingredients such as artichoke hearts, capers, or spinach.

    If you prefer a gluten-free option, substitute the pasta with a gluten-free variety.

    Leftovers can be stored in an airtight container in the refrigerator for up to three days, making it a great dish to prepare in advance for busy nights!

    Creamy Mushroom Tuna Casserole

    Creamy Mushroom Tuna Casserole is a comforting and delicious dish that brings together tender pasta, savory tuna, and a rich, creamy mushroom sauce. Perfect for a family dinner or a cozy night in, this casserole isn't only easy to prepare but also packs a flavorful punch that will satisfy even the pickiest eaters. With just a few simple ingredients, you can whip up a warm and hearty meal that can be enjoyed by all.

    Ingredients:

    • 8 oz egg noodles
    • 1 can (12 oz) tuna, drained
    • 1 can (10.5 oz) cream of mushroom soup
    • 1 cup sour cream
    • 1 cup frozen peas
    • 1 cup shredded cheddar cheese
    • 1/2 cup chopped onion
    • 1/2 cup milk
    • 1/2 teaspoon garlic powder
    • 1/2 teaspoon black pepper
    • 1/2 teaspoon salt
    • 1 cup breadcrumbs (optional, for topping)
    • 2 tablespoons butter (optional, for topping)

    To prepare the Creamy Mushroom Tuna Casserole, start by preheating your oven to 350°F (175°C) and cooking the egg noodles according to package instructions until al dente.

    While the noodles are cooking, in a large mixing bowl, combine the drained tuna, cream of mushroom soup, sour cream, frozen peas, cheddar cheese, chopped onion, milk, garlic powder, black pepper, and salt.

    Once the noodles are cooked and drained, fold them into the mixture until well combined. Transfer the mixture into a greased 9×13 inch baking dish.

    If desired, melt the butter and mix it with the breadcrumbs before sprinkling them over the top of the casserole for a crunchy topping. Bake in the preheated oven for about 25-30 minutes, or until the casserole is bubbly and golden on top.

    When making Creamy Mushroom Tuna Casserole, feel free to customize it by adding other vegetables like bell peppers, mushrooms, or spinach for extra nutrition and flavor.

    You can also experiment with different types of cheese for a unique twist, such as mozzarella or gouda. For a lighter version, consider using Greek yogurt instead of sour cream, or swap out the egg noodles for whole grain or gluten-free pasta.

    This casserole can be made ahead of time and stored in the refrigerator, making it a convenient option for meal prep. Just remember to cover it well to maintain freshness!

    Spicy Tuna Casserole With Jalapeños

    spicy tuna casserole recipe

    Spicy Tuna Casserole with Jalapeños is a zesty twist on the traditional comfort food that will excite your taste buds while providing the warmth of a classic dish. This casserole combines tender pasta, creamy sauce, and the bold heat of jalapeños, making it a perfect choice for those who enjoy a little kick in their meals.

    It's easy to prepare and can be a hit for family dinners or potlucks, bringing a delightful mix of flavors that everyone will love.

    Ingredients:

    • 12 oz egg noodles
    • 2 cans (5 oz each) tuna, drained
    • 1 can cream of mushroom soup
    • 1 cup sour cream
    • 1 cup shredded cheddar cheese
    • 1 cup diced jalapeños (fresh or pickled)
    • 1/2 cup chopped onion
    • 1/2 cup frozen peas
    • 1 teaspoon garlic powder
    • 1 teaspoon black pepper
    • 1 teaspoon salt
    • 1 cup crushed tortilla chips (for topping)

    Instructions:

    Begin by preheating your oven to 350°F (175°C).

    Cook the egg noodles according to package instructions until al dente, then drain and set aside.

    In a large mixing bowl, combine the drained tuna, cream of mushroom soup, sour cream, half of the shredded cheddar cheese, diced jalapeños, chopped onion, frozen peas, garlic powder, black pepper, and salt.

    Stir in the cooked egg noodles until everything is well coated.

    Pour the mixture into a greased 9×13 inch baking dish, spreading it evenly.

    Top with the remaining cheddar cheese and crushed tortilla chips.

    Bake in the preheated oven for about 25-30 minutes, or until the cheese is bubbly and golden brown.

    Extra Tips:

    For an even spicier kick, consider adding extra jalapeños or using a spicy cheese blend.

    You can also customize this casserole by incorporating other vegetables, such as bell peppers or corn, to amplify the flavor and texture.

    If you're preparing this dish ahead of time, you can assemble it and store it in the fridge for up to a day before baking.

    Just be sure to allow it to sit at room temperature for about 30 minutes before popping it into the oven to guarantee even cooking.

    Tuna and Broccoli Casserole

    tuna and broccoli dish

    Tuna and Broccoli Casserole is a comforting and nutritious dish that brings together the delightful flavors of tender broccoli and hearty tuna in a creamy sauce, all topped with a crispy breadcrumb layer.

    This easy-to-make casserole is perfect for a weeknight dinner or as a dish to share at gatherings, providing both protein and vegetables in one satisfying meal. The combination of creamy, cheesy goodness with the crunch of breadcrumbs creates a delightful texture that's sure to please everyone at the table.

    Ingredients:

    • 2 cups of cooked pasta (elbow macaroni or egg noodles)
    • 1 can (12 oz) of tuna, drained and flaked
    • 2 cups of fresh or frozen broccoli florets
    • 1 can (10.5 oz) of cream of mushroom soup
    • 1 cup of milk
    • 1 cup of shredded cheddar cheese
    • 1/2 cup of breadcrumbs
    • 1/2 teaspoon of garlic powder
    • 1/2 teaspoon of onion powder
    • Salt and pepper to taste
    • 1 tablespoon of olive oil (optional)

    Instructions:

    Preheat your oven to 350°F (175°C).

    In a large mixing bowl, combine the cooked pasta, flaked tuna, broccoli, cream of mushroom soup, milk, garlic powder, onion powder, salt, and pepper. Stir in half of the shredded cheddar cheese until well incorporated.

    Transfer this mixture into a greased 9×13 inch baking dish, spreading it evenly.

    In a separate bowl, mix the breadcrumbs with the remaining cheese and olive oil, then sprinkle this topping over the casserole.

    Bake in the preheated oven for 25-30 minutes, or until the casserole is bubbly and the top is golden brown.

    Extra Tips:

    For an improved flavor, consider adding some diced onions or bell peppers to the mixture before baking.

    You can also experiment with different types of cheese, such as mozzarella or pepper jack, to give the casserole a unique taste.

    If you want a little kick, adding a dash of hot sauce or red pepper flakes can uplift the dish.

    Finally, this casserole is versatile; feel free to substitute other vegetables based on your preference, such as peas or corn, to make it your own.

    Tuna Casserole With Corn and Peas

    tuna casserole with vegetables

    Tuna casserole with corn and peas is a comforting and easy-to-make dish that brings together tender pasta, creamy sauce, and hearty vegetables. This dish is perfect for a weeknight dinner or a potluck gathering, as it combines pantry staples with fresh elements to create a satisfying meal.

    With its rich flavor and delightful texture, this casserole will quickly become a favorite among family and friends.

    Ingredients:

    • 2 cups elbow macaroni
    • 1 can (15 oz) sweet corn, drained
    • 1 cup frozen peas
    • 2 cans (5 oz each) tuna in water, drained and flaked
    • 1 can (10.5 oz) cream of mushroom soup
    • 1 cup milk
    • 1 cup shredded cheddar cheese
    • 1 teaspoon garlic powder
    • 1 teaspoon onion powder
    • Salt and pepper to taste
    • 1 cup breadcrumbs (optional for topping)

    Cooking Instructions:

    Begin by preheating your oven to 350°F (175°C). Cook the elbow macaroni according to package instructions until al dente, then drain and set aside.

    In a large mixing bowl, combine the cooked macaroni, sweet corn, peas, flaked tuna, cream of mushroom soup, milk, garlic powder, onion powder, salt, and pepper. Mix well until all ingredients are evenly coated.

    Transfer the mixture into a greased 9×13 inch baking dish and sprinkle the shredded cheddar cheese on top. If desired, add breadcrumbs for a crunchy topping. Bake in the preheated oven for about 25-30 minutes, or until the casserole is bubbly and the cheese has melted.

    Extra Tips:

    For added flavor, consider incorporating sautéed onions or bell peppers into the mixture. You can also use different types of cheese such as mozzarella or pepper jack for a unique twist.

    If you prefer a lighter version, substitute the cream of mushroom soup with Greek yogurt or a homemade white sauce. Make sure to store any leftovers in an airtight container in the refrigerator, where they can last for up to three days.

    Reheat in the oven for best results, and feel free to add a splash of milk to keep it creamy!

    One-Pot Tuna Pasta Bake

    tuna pasta bake recipe

    One-Pot Tuna Pasta Bake is a hearty and comforting dish that combines the delicious flavors of tuna, pasta, and creamy sauce all baked together in one pot.

    Perfect for busy weeknights, this recipe isn't only simple to prepare but also minimizes cleanup, making it a favorite for families.

    With the goodness of vegetables and cheese, it's a meal that satisfies both taste and nutrition, ensuring everyone at the table will enjoy it.

    Ingredients:

    • 8 ounces pasta (penne or fusilli)
    • 2 cans (5 ounces each) tuna in water, drained
    • 1 cup frozen peas
    • 1 can (10.5 ounces) cream of mushroom soup
    • 1 cup milk
    • 1 cup shredded cheddar cheese
    • 1 teaspoon garlic powder
    • 1 teaspoon onion powder
    • Salt and pepper to taste
    • 1/2 cup breadcrumbs (optional for topping)
    • Fresh parsley for garnish (optional)

    Cooking Instructions:

    Start by preheating your oven to 350°F (175°C).

    In a large oven-safe pot or Dutch oven, cook the pasta according to package directions until al dente, then drain.

    Return the pasta to the pot and stir in the drained tuna, frozen peas, cream of mushroom soup, milk, garlic powder, onion powder, half of the cheddar cheese, and season with salt and pepper to taste.

    Mix everything together until well combined.

    Sprinkle the remaining cheese on top, and if desired, add breadcrumbs for a crunchy topping.

    Cover the pot and bake in the preheated oven for about 25-30 minutes, or until bubbly and golden.

    Extra Tips:

    For added flavor, try incorporating sautéed onions and garlic at the beginning before adding the rest of the ingredients.

    You can also experiment with different types of cheese, such as mozzarella or pepper jack, for a twist on the traditional recipe.

    If you want to make the dish even healthier, consider adding in some chopped spinach or bell peppers along with the peas.

    Finally, this casserole can be made ahead of time; simply assemble it and refrigerate before baking, adding an extra 10-15 minutes to the cooking time if baking from cold.

    Healthy Tuna Quinoa Casserole

    tuna quinoa casserole recipe

    This Healthy Tuna Quinoa Casserole is a nutritious and delicious twist on the classic tuna noodle casserole. Packed with protein from tuna and quinoa, along with a medley of vegetables, this dish isn't only filling but also offers a wealth of vitamins and minerals.

    Perfect for a quick weeknight dinner or as a meal prep option, this casserole is easy to make and sure to please the whole family.

    Ingredients:

    • 1 cup quinoa, rinsed
    • 2 cups vegetable or chicken broth
    • 1 can (15 oz) tuna, drained and flaked
    • 1 cup frozen peas and carrots mix
    • 1 cup Greek yogurt
    • 1 cup shredded cheddar cheese
    • 1 teaspoon garlic powder
    • 1 teaspoon onion powder
    • Salt and pepper to taste
    • 1/2 cup breadcrumbs (optional)
    • Fresh parsley for garnish (optional)

    Instructions:

    Preheat your oven to 350°F (175°C). In a medium saucepan, bring the vegetable or chicken broth to a boil and add the rinsed quinoa.

    Reduce the heat, cover, and simmer for about 15 minutes or until the quinoa is cooked and the liquid is absorbed.

    In a large mixing bowl, combine the cooked quinoa, flaked tuna, frozen peas and carrots, Greek yogurt, half of the cheddar cheese, garlic powder, onion powder, salt, and pepper.

    Stir until well mixed, then transfer the mixture to a greased 9×13 inch baking dish. Top with the remaining cheddar cheese and breadcrumbs if using.

    Bake for 25-30 minutes or until the top is golden and bubbly.

    Extra Tips:

    For added flavor, feel free to mix in your favorite herbs or spices, such as dill or smoked paprika.

    You can also swap out the vegetables based on what you have on hand or prefer, such as broccoli or spinach.

    If you want to make this dish even healthier, try using whole-grain breadcrumbs or omit them entirely.

    Leftovers can be stored in an airtight container in the refrigerator for up to 3 days, making this casserole a great option for meal prep.

  • 10 Best Baked Cod Recipes

    10 Best Baked Cod Recipes

    If you're looking to spice up your dinner routine, baked cod might just be your new best friend. This versatile fish pairs well with so many flavors, you won't get bored! From zesty lemon garlic to rich creamy sauces, there's something for everyone. Get ready to impress your family with these tasty recipes that are easy to whip up. Trust me, you won't want to miss out on these delicious ideas!

    Lemon Garlic Baked Cod

    Lemon Garlic Baked Cod is a simple yet flavorful dish that brings out the best in this mild white fish. The combination of aromatic garlic and zesty lemon amplifies the natural sweetness of the cod, making it a perfect option for a healthy weeknight dinner.

    With minimal preparation and cooking time, this recipe isn't only delicious but also a great way to incorporate more seafood into your diet.

    Ingredients:

    • 4 cod fillets
    • 2 tablespoons olive oil
    • 4 cloves garlic, minced
    • Zest and juice of 1 lemon
    • Salt and pepper, to taste
    • 1 teaspoon dried oregano
    • Fresh parsley, chopped (for garnish)
    • Lemon wedges (for serving)

    Instructions:

    Preheat your oven to 400°F (200°C).

    In a small bowl, mix together the olive oil, minced garlic, lemon zest, lemon juice, salt, pepper, and dried oregano.

    Place the cod fillets on a lined baking sheet and brush the garlic-lemon mixture generously over each fillet.

    Bake in the preheated oven for about 12-15 minutes or until the fish flakes easily with a fork and is opaque throughout.

    Once cooked, remove from the oven and garnish with fresh parsley and lemon wedges before serving.

    Extra Tips:

    To guarantee your cod remains moist and flavorful, avoid overcooking it; check for doneness a couple of minutes before the recommended cooking time.

    For a crispy finish, you can switch the oven to broil for the last 2 minutes of cooking.

    If you'd like to add more depth to the dish, consider including some sliced tomatoes or olives on the baking sheet with the cod.

    Enjoy your Lemon Garlic Baked Cod with a side of roasted vegetables or a fresh salad for a complete meal!

    Creamy Parmesan Baked Cod

    creamy parmesan baked cod

    Indulge in the rich, savory flavors of Creamy Parmesan Baked Cod, a delightful dish that combines tender cod fillets with a creamy, cheesy topping that bakes to perfection. This recipe isn't only easy to prepare but also makes for an impressive main course for any dinner gathering.

    The creamy sauce infused with garlic and parmesan improves the natural flavors of the cod, making it a true crowd-pleaser.

    Ingredients:

    • 4 cod fillets
    • 1 cup heavy cream
    • 1 cup grated Parmesan cheese
    • 2 cloves garlic, minced
    • 1 teaspoon lemon juice
    • 1 teaspoon dried parsley
    • Salt and pepper to taste
    • Olive oil for greasing the baking dish
    • Lemon wedges for serving (optional)

    Instructions:

    Preheat your oven to 400°F (200°C) and lightly grease a baking dish with olive oil.

    In a mixing bowl, combine the heavy cream, grated Parmesan cheese, minced garlic, lemon juice, dried parsley, salt, and pepper, stirring until well blended.

    Place the cod fillets in the baking dish and pour the creamy mixture evenly over the top of each fillet.

    Bake in the preheated oven for about 20-25 minutes, or until the cod is cooked through and flakes easily with a fork.

    For an extra touch, you can broil the dish for the last 2-3 minutes to achieve a golden-brown crust on top.

    Extra Tips:

    For best flavor, use fresh garlic instead of garlic powder, and feel free to experiment with additional herbs like thyme or dill to improve the dish further.

    If you're looking for a lighter version, you can substitute the heavy cream with Greek yogurt or a lighter cream option.

    Additionally, serving this dish with a side of steamed vegetables or a fresh salad can complement the richness of the baked cod beautifully.

    Enjoy your delicious meal!

    Herb-Crusted Baked Cod

    Herb-Crusted Baked Cod is a delightful and healthy dish that showcases the delicate flavors of cod fillets improved by a crunchy herb crust. This easy-to-follow recipe is perfect for a weeknight dinner or an impressive meal for guests. The combination of fresh herbs, breadcrumbs, and a hint of lemon zest creates a fragrant and savory topping that pairs beautifully with the flaky fish.

    Serve it alongside roasted vegetables or a fresh salad for a well-rounded meal.

    Ingredients:

    • 4 cod fillets
    • 1 cup breadcrumbs (preferably panko)
    • 1/4 cup grated Parmesan cheese
    • 2 tablespoons fresh parsley, chopped
    • 1 tablespoon fresh dill, chopped
    • 1 tablespoon fresh thyme, chopped
    • 2 cloves garlic, minced
    • Zest of 1 lemon
    • 2 tablespoons olive oil
    • Salt and pepper to taste
    • Lemon wedges for serving

    Cooking Instructions:

    Preheat your oven to 400°F (200°C) and line a baking sheet with parchment paper.

    In a medium bowl, combine the breadcrumbs, Parmesan cheese, parsley, dill, thyme, garlic, lemon zest, olive oil, salt, and pepper, mixing well until everything is evenly coated.

    Place the cod fillets on the prepared baking sheet and season them lightly with salt and pepper.

    Press the herb and breadcrumb mixture generously onto the top of each fillet, ensuring they're well covered.

    Bake in the preheated oven for 12-15 minutes or until the fish is cooked through and flakes easily with a fork, and the crust is golden brown.

    Extra Tips:

    For an extra burst of flavor, consider marinating the cod fillets in a mixture of olive oil, lemon juice, and herbs for about 30 minutes before applying the herb crust.

    This not only infuses the fish with flavor but also helps keep it moist during baking.

    Additionally, if you prefer a crispier topping, you can briefly broil the cod for the last 2-3 minutes of cooking, watching closely to prevent burning.

    Enjoy your delicious herb-crusted baked cod with your favorite sides!

    Spicy Honey Mustard Baked Cod

    spicy honey mustard cod

    For a deliciously unique twist on baked cod, try this Spicy Honey Mustard Baked Cod recipe. The combination of honey, mustard, and spices creates a flavorful glaze that improves the mild taste of the cod, making it a satisfying dish for any occasion.

    This recipe isn't only simple to prepare but also ideal for a weeknight meal or a special dinner with friends and family.

    Ingredients:

    • 4 cod fillets
    • 2 tablespoons honey
    • 2 tablespoons Dijon mustard
    • 1 tablespoon olive oil
    • 1 teaspoon smoked paprika
    • 1/2 teaspoon cayenne pepper (adjust for spice preference)
    • Salt and pepper to taste
    • Fresh parsley for garnish (optional)
    • Lemon wedges for serving

    Cooking Instructions:

    Preheat your oven to 400°F (200°C) and line a baking dish with parchment paper.

    In a small bowl, whisk together the honey, Dijon mustard, olive oil, smoked paprika, cayenne pepper, salt, and pepper until well combined.

    Place the cod fillets in the prepared baking dish and generously coat them with the honey mustard mixture, ensuring each fillet is evenly covered.

    Bake in the preheated oven for 12-15 minutes or until the cod is opaque and flakes easily with a fork.

    Extra Tips:

    For best flavor, let the cod marinate in the honey mustard mixture for about 30 minutes before baking. This allows the spices to penetrate the fish more deeply.

    Additionally, feel free to adjust the spice level by increasing or decreasing the cayenne pepper according to your taste.

    Pair this dish with a side of roasted vegetables or a fresh salad for a well-rounded meal. Enjoy your flavorful and healthy creation!

    Mediterranean Baked Cod With Tomatoes and Olives

    Mediterranean Baked Cod with Tomatoes and Olives is a delightful dish that brings vibrant flavors and healthy ingredients to your table. This recipe features flaky cod fillets baked to perfection and topped with a zesty mix of ripe tomatoes, briny olives, and aromatic herbs.

    It's a simple yet elegant meal that's perfect for any occasion, whether it's a weeknight dinner or a special gathering with friends and family.

    Ingredients:

    • 4 cod fillets
    • 2 cups cherry tomatoes, halved
    • 1 cup Kalamata olives, pitted and halved
    • 3 cloves garlic, minced
    • ¼ cup olive oil
    • 1 tablespoon fresh lemon juice
    • 1 teaspoon dried oregano
    • 1 teaspoon dried thyme
    • Salt and pepper to taste
    • Fresh parsley for garnish (optional)

    Cooking Instructions:

    Preheat your oven to 400°F (200°C).

    In a large baking dish, combine the cherry tomatoes, Kalamata olives, garlic, olive oil, lemon juice, oregano, thyme, salt, and pepper. Mix well until the vegetables are evenly coated.

    Place the cod fillets on top of the tomato and olive mixture, and drizzle a little extra olive oil over the fish.

    Bake in the preheated oven for 20-25 minutes, or until the cod is cooked through and flakes easily with a fork. If desired, broil for an additional 2-3 minutes to achieve a golden top.

    Extra Tips:

    For a more pronounced flavor, consider marinating the cod fillets in olive oil, lemon juice, and herbs for about 30 minutes before baking.

    You can also add other Mediterranean ingredients like capers or feta cheese to improve the dish further.

    Serve this baked cod with a side of couscous or a fresh green salad for a complete meal.

    Finally, feel free to adjust the quantities of tomatoes and olives based on your taste preferences, as this dish is quite versatile!

    Baked Cod With Pesto and Cherry Tomatoes

    pesto topped baked cod dish

    Baked cod with pesto and cherry tomatoes is a delightful dish that combines the mild flavor of cod with the vibrant tastes of fresh pesto and juicy cherry tomatoes. This recipe isn't only simple to make but also brings a burst of color and flavor to your dinner table, making it perfect for both weeknight meals and special occasions.

    With minimal preparation and cooking time, you'll have a healthy and delicious meal ready in no time.

    Ingredients:

    • 4 cod fillets
    • 1 cup cherry tomatoes, halved
    • 1/2 cup pesto (store-bought or homemade)
    • 2 tablespoons olive oil
    • Salt and pepper to taste
    • Fresh basil leaves for garnish (optional)
    • Lemon wedges for serving (optional)

    Cooking Instructions:

    Preheat your oven to 400°F (200°C). In a baking dish, arrange the cod fillets in a single layer, and drizzle them with olive oil.

    Season with salt and pepper. Spread the pesto evenly over the top of each fillet, then scatter the halved cherry tomatoes around the fish.

    Bake in the preheated oven for about 15-20 minutes, or until the cod is opaque and flakes easily with a fork. Remove from the oven and let it rest for a few minutes before serving.

    Extra Tips:

    For the best results, choose fresh cod fillets that are firm and have a mild scent of the ocean.

    If you want to enhance the dish further, consider adding slices of lemon on top of the cod before baking, as this will infuse a lovely citrus flavor.

    Feel free to customize the recipe by adding other vegetables, such as zucchini or bell peppers, alongside the cherry tomatoes for added nutrition and color.

    Serve the baked cod with a side of rice or a fresh green salad for a complete meal.

    Asian-Inspired Baked Cod With Soy Sauce and Ginger

    asian baked cod recipe

    For a deliciously light and flavorful meal, Asian-Inspired Baked Cod with Soy Sauce and Ginger is a perfect choice. This recipe combines the delicate taste of cod with the savory and tangy notes of soy sauce, complemented by the warmth of fresh ginger.

    It's an easy dish that can be prepared in under 30 minutes, making it ideal for a weeknight dinner or a special occasion.

    Ingredients

    • 4 cod fillets
    • 1/4 cup soy sauce
    • 2 tablespoons rice vinegar
    • 1 tablespoon honey
    • 2 teaspoons fresh ginger, grated
    • 2 cloves garlic, minced
    • 1 tablespoon sesame oil
    • 1 green onion, sliced (for garnish)
    • Sesame seeds (for garnish)
    • Cooked rice or steamed vegetables (for serving)

    Cooking Instructions

    Preheat your oven to 400°F (200°C).

    In a small bowl, whisk together the soy sauce, rice vinegar, honey, grated ginger, minced garlic, and sesame oil to create a marinade.

    Place the cod fillets in a baking dish and pour the marinade over them, ensuring they're well coated.

    Let the fish marinate for about 10 minutes, then bake in the preheated oven for 12-15 minutes, or until the fish flakes easily with a fork.

    Once done, remove from the oven and garnish with sliced green onions and sesame seeds before serving with rice or steamed vegetables.

    Extra Tips

    For the best flavor, allow the cod to marinate for longer if you have the time—up to 30 minutes is ideal.

    You can also customize the marinade by adding a splash of Sriracha for heat or incorporating other fresh herbs like cilantro for added freshness.

    If you're looking for a crispy texture, broil the cod for the last 2-3 minutes of baking.

    Always be careful not to overcook the fish, as it can become dry; the cod should be opaque and flake easily when it's done.

    Enjoy your meal!

    Baked Cod With Creamy Spinach Sauce

    creamy spinach topped cod

    Baked cod with creamy spinach sauce is a delightful dish that combines the delicate flavors of cod with a rich, velvety sauce made from fresh spinach and cream. This recipe isn't only simple to prepare but also provides a nutritious meal that's perfect for a weeknight dinner or a special occasion.

    The combination of flaky fish and creamy sauce creates a comforting and satisfying experience that will please everyone at the table.

    Ingredients:

    • 4 cod fillets
    • 2 cups fresh spinach, chopped
    • 1 cup heavy cream
    • 1 tablespoon olive oil
    • 2 cloves garlic, minced
    • 1/2 cup grated Parmesan cheese
    • Salt and pepper to taste
    • Juice of 1 lemon
    • Fresh parsley for garnish (optional)

    Instructions:

    Preheat your oven to 375°F (190°C).

    In a skillet, heat the olive oil over medium heat and sauté the minced garlic until fragrant, about 1 minute. Add the chopped spinach and cook until wilted, then stir in the heavy cream and bring to a gentle simmer.

    Mix in the Parmesan cheese, and season with salt, pepper, and lemon juice. Place the cod fillets in a greased baking dish and pour the creamy spinach sauce over them.

    Bake for 15-20 minutes or until the cod flakes easily with a fork. Garnish with fresh parsley before serving.

    Extra Tips:

    For added depth of flavor, consider seasoning the cod fillets with a sprinkle of paprika or cayenne pepper before baking.

    If you prefer a lighter version, you can substitute half-and-half for heavy cream. Additionally, feel free to incorporate other vegetables such as mushrooms or sun-dried tomatoes into the spinach sauce for extra texture and taste.

    This dish pairs wonderfully with a side of rice or crusty bread to soak up the creamy sauce. Enjoy!

    Garlic Butter Baked Cod

    garlic butter cod recipe

    Garlic Butter Baked Cod is a delicious and simple dish that highlights the flaky and mild flavor of cod while infusing it with rich garlic and buttery goodness. This recipe is perfect for a weeknight dinner or an elegant gathering, as it requires minimal preparation and can be on your table in under 30 minutes.

    The combination of garlic, butter, and fresh herbs raises the cod to a delightful level, making it a favorite among seafood lovers.

    Ingredients:

    • 4 cod fillets
    • 4 tablespoons unsalted butter, melted
    • 4 cloves garlic, minced
    • 2 tablespoons fresh parsley, chopped
    • 1 tablespoon lemon juice
    • Salt and pepper, to taste
    • Lemon wedges, for serving

    Cooking Instructions:

    Preheat your oven to 400°F (200°C) and prepare a baking dish by lightly greasing it with cooking spray or a bit of olive oil.

    In a small bowl, mix the melted butter, minced garlic, parsley, lemon juice, salt, and pepper. Place the cod fillets in the prepared baking dish and pour the garlic butter mixture over the fillets, making sure they're evenly coated.

    Bake in the preheated oven for about 15-20 minutes, or until the cod is opaque and flakes easily with a fork. Serve hot with lemon wedges on the side for extra zest.

    Extra Tips:

    For an extra layer of flavor, consider adding some grated Parmesan cheese on top of the cod fillets before baking.

    If you prefer a bit of a kick, you can sprinkle some red pepper flakes into the garlic butter mixture. Additionally, confirm that your cod fillets are of even thickness for uniform cooking.

    Pair this dish with steamed vegetables or a fresh salad for a complete meal, making it not only delicious but also nutritious.

    Baked Cod With a Lemon Dill Sauce

    lemon dill baked cod

    Baked cod with a lemon dill sauce is a simple yet elegant dish that highlights the delicate flavors of the fish while infusing it with the bright, zesty notes of lemon and the aromatic coolness of dill. This recipe is perfect for a quick weeknight dinner or for entertaining guests.

    The cod is baked to perfection, ensuring it remains flaky and moist, while the lemon dill sauce adds a revitalizing and tangy finish that complements the fish beautifully.

    Ingredients:

    • 4 cod fillets
    • 3 tablespoons olive oil
    • 2 tablespoons fresh lemon juice
    • 1 teaspoon lemon zest
    • 2 tablespoons fresh dill, chopped
    • 2 cloves garlic, minced
    • Salt and pepper to taste
    • Lemon wedges for serving

    Cooking Instructions:

    Preheat your oven to 400°F (200°C). In a small bowl, whisk together the olive oil, lemon juice, lemon zest, chopped dill, minced garlic, salt, and pepper until well combined.

    Place the cod fillets in a baking dish and pour the lemon dill sauce evenly over the top of each fillet. Bake in the preheated oven for 15-20 minutes, or until the cod is opaque and flakes easily with a fork. Serve with lemon wedges on the side for an extra burst of flavor.

    Extra Tips:

    For an even more flavorful dish, consider marinating the cod in the lemon dill sauce for 30 minutes before baking. This will allow the flavors to penetrate the fish more deeply.

    Additionally, you can serve the baked cod over a bed of steamed vegetables or alongside a light salad for a complete meal. If fresh dill isn't available, dried dill can be used, but reduce the amount to about one teaspoon, as dried herbs are more concentrated in flavor.

    Enjoy your delicious baked cod!

  • 10 Best Baked Salmon Recipes

    10 Best Baked Salmon Recipes

    If you love salmon, you're in for a treat! Baked salmon is not just easy to make, but it's also packed with flavor and nutrients. From zesty Lemon Garlic to sweet Honey Mustard, each recipe offers a unique twist that'll keep your taste buds dancing. And let's not forget about the bold flavors of Spicy Sriracha and Teriyaki! Ready to discover your new favorite way to prepare this delicious fish? Let's get started!

    Lemon Garlic Baked Salmon

    Lemon Garlic Baked Salmon is a delightful and healthy dish that brings together the freshness of lemon, the richness of salmon, and the aromatic flavor of garlic. This simple yet elegant recipe is perfect for a weeknight dinner or a special occasion.

    With just a few ingredients and minimal prep time, you can create a flavorful meal that's sure to impress your family and friends.

    Ingredients:

    • 4 salmon fillets
    • 2 tablespoons olive oil
    • 4 cloves garlic, minced
    • Juice of 1 lemon
    • Zest of 1 lemon
    • Salt, to taste
    • Black pepper, to taste
    • Fresh parsley, chopped (for garnish)
    • Lemon slices (for garnish)

    Cooking Instructions:

    Preheat your oven to 400°F (200°C).

    In a small bowl, mix together the olive oil, minced garlic, lemon juice, lemon zest, salt, and black pepper.

    Place the salmon fillets on a baking sheet lined with parchment paper or aluminum foil.

    Brush the garlic lemon mixture generously over each fillet.

    Bake in the preheated oven for about 12-15 minutes, or until the salmon flakes easily with a fork and is cooked through.

    Remove from the oven and garnish with fresh parsley and lemon slices before serving.

    Extra Tips:

    For the best results, choose salmon fillets that are of uniform thickness to guarantee even cooking.

    You can also marinate the salmon in the lemon garlic mixture for about 30 minutes prior to baking to improve the flavors.

    Serve the baked salmon with a side of roasted vegetables or a fresh salad for a complete meal.

    If you prefer a crispy texture, consider broiling the salmon for the last 2-3 minutes of cooking, keeping a close eye to avoid burning.

    Honey Mustard Glazed Salmon

    honey mustard salmon recipe

    Honey Mustard Glazed Salmon is a delightful dish that combines the rich, flaky texture of salmon with a sweet and tangy glaze. This easy-to-make recipe is perfect for a weeknight dinner or a special occasion.

    The honey mustard glaze caramelizes beautifully in the oven, giving the salmon a wonderful flavor that pairs well with a variety of sides, from roasted vegetables to fluffy rice. With just a few simple ingredients, you can create a restaurant-quality meal right in your own kitchen.

    Ingredients:

    • 4 salmon fillets
    • 1/4 cup honey
    • 1/4 cup Dijon mustard
    • 2 tablespoons soy sauce
    • 1 tablespoon olive oil
    • 1 tablespoon lemon juice
    • Salt and pepper to taste
    • Fresh parsley, chopped (for garnish)

    Cooking Instructions:

    Preheat your oven to 400°F (200°C). In a small bowl, whisk together the honey, Dijon mustard, soy sauce, olive oil, and lemon juice until smooth.

    Season the salmon fillets with salt and pepper, then place them in a baking dish. Pour the honey mustard mixture over the salmon, ensuring each fillet is well coated.

    Bake the salmon for about 15-20 minutes, or until the fish flakes easily with a fork and has a beautiful glaze. Garnish with fresh parsley before serving.

    Extra Tips:

    For an added layer of flavor, consider marinating the salmon in the honey mustard mixture for 30 minutes before baking. This will improve the taste and tenderness of the fish.

    If you prefer a bit of crunch, broil the salmon for the last 2-3 minutes of cooking to achieve a caramelized crust. Always keep an eye on the salmon while broiling to prevent burning.

    Serve with a side of steamed vegetables or a fresh salad for a complete meal. Enjoy your delicious Honey Mustard Glazed Salmon!

    Teriyaki Baked Salmon

    Teriyaki Baked Salmon is a delicious and healthy dish that combines the rich flavors of salmon with the sweet and savory notes of teriyaki sauce. This easy-to-make recipe is perfect for a weeknight dinner or a special occasion, and it pairs beautifully with steamed vegetables or rice.

    With just a few simple ingredients, you can create a mouthwatering meal that your family and friends will love.

    Ingredients:

    • 4 salmon fillets
    • 1/4 cup teriyaki sauce
    • 2 tablespoons honey
    • 1 tablespoon sesame oil
    • 2 cloves garlic, minced
    • 1 teaspoon fresh ginger, grated
    • 1 tablespoon green onions, chopped (for garnish)
    • Sesame seeds (for garnish)

    Cooking Instructions:

    Preheat your oven to 400°F (200°C) and line a baking sheet with parchment paper.

    In a small bowl, whisk together the teriyaki sauce, honey, sesame oil, minced garlic, and grated ginger until well combined.

    Place the salmon fillets skin-side down on the prepared baking sheet and brush generously with the teriyaki mixture.

    Bake the salmon in the preheated oven for 12-15 minutes, or until the fish is cooked through and flakes easily with a fork.

    Remove from the oven and garnish with chopped green onions and sesame seeds before serving.

    Extra Tips:

    For the best flavor, allow the salmon to marinate in the teriyaki sauce mixture for at least 30 minutes before baking. This will improve the taste and guarantee that the salmon absorbs the delicious flavors.

    Additionally, you can customize the dish by adding vegetables such as broccoli or snap peas on the baking sheet for a complete meal.

    If you prefer a crispier texture, broil the salmon for an additional 1-2 minutes at the end of the cooking time.

    Enjoy your Teriyaki Baked Salmon with a side of rice or quinoa for a nutritious and satisfying dinner!

    Pesto Crusted Salmon

    pesto topped salmon dish

    Pesto Crusted Salmon is a delicious and easy-to-make dish that combines the rich flavor of salmon with the fresh, herbaceous notes of pesto. This recipe not only enhances the natural taste of the fish but also adds a vibrant green color that makes for an attractive presentation.

    Perfect for a weeknight dinner or a special occasion, the pesto crust creates a delightful contrast with the tender, flaky salmon, guaranteeing that each bite is packed with flavor.

    Ingredients:

    • 4 salmon fillets (about 6 ounces each)
    • 1/2 cup store-bought or homemade pesto
    • 1/2 cup breadcrumbs (preferably panko for extra crunch)
    • 1/4 cup grated Parmesan cheese
    • Salt and pepper to taste
    • Lemon wedges, for serving

    Cooking Instructions:

    Preheat your oven to 400°F (200°C). Line a baking sheet with parchment paper and place the salmon fillets skin-side down. Season the fillets with salt and pepper.

    In a small bowl, mix together the pesto, breadcrumbs, and Parmesan cheese until well combined. Spread the pesto mixture evenly over the top of each salmon fillet, pressing gently to stick.

    Bake the salmon in the preheated oven for 12-15 minutes, or until the fish flakes easily with a fork and the crust is golden brown.

    Extra Tips:

    For an extra layer of flavor, consider adding minced garlic or lemon zest to the pesto mixture before spreading it on the salmon. If you prefer a bit of heat, a pinch of red pepper flakes can be mixed in as well.

    To verify the salmon is perfectly cooked, use a meat thermometer; the internal temperature should reach 145°F (63°C). Additionally, serving the salmon with a side of roasted vegetables or a fresh salad can complement the dish beautifully and make for a well-rounded meal.

    Maple Soy Baked Salmon

    Maple Soy Baked Salmon is a delightful dish that combines the richness of salmon with the sweet and savory flavors of maple syrup and soy sauce. This recipe isn't only easy to prepare but also boasts a healthy profile, making it a perfect choice for a weeknight dinner or a special occasion.

    The marinade infuses the fish with extraordinary taste while keeping it moist and flaky. Serve it with steamed vegetables or rice for a complete meal.

    Ingredients:

    • 4 salmon fillets
    • 1/4 cup soy sauce
    • 1/4 cup pure maple syrup
    • 2 tablespoons olive oil
    • 2 cloves garlic, minced
    • 1 teaspoon ginger, grated
    • 1/2 teaspoon black pepper
    • 1 tablespoon sesame seeds (optional)
    • Green onions, chopped for garnish (optional)

    Cooking Instructions:

    Preheat your oven to 400°F (200°C). In a bowl, whisk together the soy sauce, maple syrup, olive oil, minced garlic, grated ginger, and black pepper to create the marinade.

    Place the salmon fillets in a shallow baking dish and pour the marinade over the top, ensuring the salmon is well-coated. Allow it to marinate for at least 15 minutes; for best results, let it sit for 1-2 hours in the refrigerator.

    Once marinated, bake the salmon in the preheated oven for 12-15 minutes, or until it flakes easily with a fork. If desired, sprinkle sesame seeds on top in the last few minutes of baking for added texture and flavor.

    Extra Tips:

    For an extra layer of flavor, consider adding a splash of rice vinegar or a squeeze of fresh lemon juice into the marinade.

    Be cautious not to overcook the salmon, as it can become dry; it's best to keep a close eye on it towards the end of the baking time. If you want a slight caramelization, broil the salmon for the last 1-2 minutes of cooking, but watch it closely to avoid burning.

    Enjoy your Maple Soy Baked Salmon with your favorite sides and experiment with the marinade by adding your own herbs and spices!

    Mediterranean Herb Baked Salmon

    mediterranean flavored baked salmon

    Mediterranean Herb Baked Salmon is a delightful dish that captures the essence of Mediterranean flavors, combining fresh herbs, zesty lemon, and succulent salmon. This recipe isn't only quick and easy to prepare but also healthy and packed with nutrients.

    The fragrant herbs and bright citrus complement the rich taste of the salmon, making it a perfect choice for a weeknight dinner or a special occasion.

    Ingredients:

    • 4 salmon fillets
    • 2 tablespoons olive oil
    • 2 tablespoons fresh lemon juice
    • 1 teaspoon dried oregano
    • 1 teaspoon dried thyme
    • 2 cloves garlic, minced
    • Salt and pepper, to taste
    • Fresh parsley, chopped (for garnish)
    • Lemon slices (for serving)

    Instructions:

    Preheat your oven to 400°F (200°C). In a small bowl, whisk together the olive oil, lemon juice, oregano, thyme, garlic, salt, and pepper.

    Place the salmon fillets on a lined baking sheet, skin side down, and brush the herb mixture generously over the top of each fillet. Bake in the preheated oven for about 12-15 minutes, or until the salmon flakes easily with a fork and is cooked through.

    Once cooked, remove from the oven and let it rest for a couple of minutes before garnishing with fresh parsley and serving with lemon slices.

    Extra Tips:

    For the best flavor, consider marinating the salmon in the herb mixture for 30 minutes before baking. You can also experiment with different herbs such as dill or basil to suit your taste preferences.

    Additionally, be careful not to overcook the salmon, as it can dry out quickly; a meat thermometer should read 145°F (63°C) when done. Serve this dish alongside a fresh salad or roasted vegetables for a complete and nutritious meal.

    Spicy Sriracha Baked Salmon

    spicy baked salmon dish

    Spicy Sriracha Baked Salmon is a quick and delicious dish that packs a punch with its vibrant flavors. The combination of sriracha sauce, honey, and garlic creates a mouthwatering glaze that elevates the natural richness of the salmon.

    Perfect for a weeknight dinner or a special occasion, this recipe comes together in no time and is sure to impress anyone at your table. Pair it with steamed vegetables or a fresh salad for a complete meal.

    Ingredients:

    • 4 salmon fillets
    • 2 tablespoons sriracha sauce
    • 2 tablespoons honey
    • 2 cloves garlic, minced
    • 1 tablespoon soy sauce
    • 1 tablespoon olive oil
    • Salt and pepper to taste
    • Lemon wedges (for serving)
    • Chopped green onions (for garnish)

    Cooking Instructions:

    Preheat your oven to 400°F (200°C) and line a baking sheet with parchment paper.

    In a small bowl, whisk together the sriracha sauce, honey, minced garlic, soy sauce, and olive oil until well combined.

    Place the salmon fillets on the prepared baking sheet, skin side down, and season with salt and pepper. Brush the sriracha mixture generously over the salmon.

    Bake in the preheated oven for 12-15 minutes, or until the salmon flakes easily with a fork and is cooked through.

    Remove from the oven and garnish with chopped green onions and lemon wedges before serving.

    Extra Tips:

    For an extra layer of flavor, consider marinating the salmon in the sriracha mixture for 30 minutes before baking. This will allow the spices to penetrate the fish more deeply.

    If you prefer a milder version, you can adjust the amount of sriracha to suit your taste.

    Additionally, keep an eye on the salmon as it bakes, as cooking times can vary depending on the thickness of the fillets.

    Enjoy experimenting with different side dishes, such as quinoa or roasted vegetables, to complement this spicy baked salmon!

    Parmesan Crusted Baked Salmon

    salmon with parmesan crust

    Parmesan Crusted Baked Salmon is a delightful and easy-to-make dish that combines the rich flavors of salmon with a crispy, cheesy topping. This recipe not only brings out the natural taste of the fish but also adds a savory crunch that will please any palate.

    Perfect for a weeknight dinner or a special occasion, this dish is sure to impress with minimal effort.

    Ingredients:

    • 4 salmon fillets
    • 1 cup grated Parmesan cheese
    • 1/2 cup breadcrumbs
    • 2 tablespoons fresh parsley, chopped
    • 2 tablespoons olive oil
    • 1 teaspoon garlic powder
    • 1 teaspoon onion powder
    • Salt and pepper, to taste
    • Lemon wedges, for serving

    Instructions:

    Preheat your oven to 400°F (200°C) and line a baking sheet with parchment paper.

    In a bowl, combine the grated Parmesan cheese, breadcrumbs, chopped parsley, garlic powder, onion powder, salt, and pepper. Drizzle in the olive oil and mix until the ingredients are well combined and form a crumbly topping.

    Place the salmon fillets on the prepared baking sheet, skin-side down, and evenly distribute the Parmesan mixture on top of each fillet.

    Bake in the preheated oven for 12-15 minutes or until the salmon is cooked through and the crust is golden and crispy.

    Extra Tips:

    For an even more flavorful dish, consider marinating the salmon in a mixture of lemon juice, olive oil, and herbs for 30 minutes before applying the Parmesan crust.

    Make sure to adjust the cooking time based on the thickness of your salmon fillets, as thicker pieces may require a few additional minutes in the oven.

    Additionally, serving the baked salmon with a side of roasted vegetables or a fresh salad will complement the dish beautifully and add a healthy touch to your meal.

    Dill and Lemon Baked Salmon

    baked salmon with dill

    Baked salmon with dill and lemon is a simple yet elegant dish that showcases the delicate flavors of the fish while adding a revitalizing twist with herbs and citrus. This recipe is perfect for a weeknight dinner or a special occasion, as it requires minimal effort but delivers a stunning result.

    The combination of fresh dill and tangy lemon complements the rich taste of salmon beautifully, making it a favorite among seafood lovers.

    Ingredients:

    • 4 salmon fillets
    • 2 tablespoons fresh dill, chopped
    • 1 lemon, sliced
    • 3 tablespoons olive oil
    • Salt and pepper to taste
    • 2 cloves garlic, minced (optional)
    • 1 tablespoon Dijon mustard (optional)

    Instructions:

    Preheat your oven to 400°F (200°C). Line a baking dish with parchment paper for easy cleanup.

    Place the salmon fillets skin-side down in the dish and drizzle with olive oil. Season with salt and pepper, and if desired, spread a thin layer of Dijon mustard on top.

    Sprinkle the minced garlic over the fillets and top each piece with fresh dill and a few slices of lemon. Bake in the preheated oven for 12 to 15 minutes, or until the salmon flakes easily with a fork and is cooked through.

    Extra Tips:

    For an even more flavorful dish, consider marinating the salmon in a mixture of olive oil, lemon juice, and dill for 30 minutes before cooking.

    You can also add a sprinkle of red pepper flakes for a hint of heat. Be certain not to overcook the salmon; it should be just opaque in the center to maintain its moisture and tenderness.

    Serve with a side of roasted vegetables or a light salad for a complete meal.

    Baked Salmon With Asparagus and Cherry Tomatoes

    salmon with asparagus and tomatoes

    Baked salmon with asparagus and cherry tomatoes is a delightful dish that combines the rich flavors of salmon with the freshness of seasonal vegetables. This easy-to-prepare recipe not only makes for a nutritious meal but also looks vibrant on the plate, making it perfect for both weeknight dinners and special occasions.

    The combination of tender asparagus and sweet cherry tomatoes pairs beautifully with the flaky salmon, creating a satisfying and wholesome meal that's sure to impress.

    Ingredients:

    • 4 salmon fillets
    • 1 bunch of asparagus, trimmed
    • 1 cup cherry tomatoes, halved
    • 3 tablespoons olive oil
    • 2 cloves garlic, minced
    • 1 lemon, sliced
    • Salt and pepper, to taste
    • Fresh parsley, chopped (for garnish)

    Cooking Instructions:

    Preheat your oven to 400°F (200°C). On a large baking sheet, arrange the salmon fillets in the center. Surround them with the trimmed asparagus and halved cherry tomatoes.

    In a small bowl, whisk together the olive oil, minced garlic, salt, and pepper. Drizzle this mixture over the salmon and vegetables, ensuring everything is well coated. Place lemon slices on top of the salmon and roast in the preheated oven for about 15-20 minutes, or until the salmon is cooked through and flakes easily with a fork.

    Extra Tips:

    For an added layer of flavor, consider marinating the salmon for 30 minutes before baking. You can also experiment with different herbs, such as dill or thyme, to improve the dish.

    If you prefer a slightly crispy texture, broil the salmon for the final 2-3 minutes of cooking. Finally, serve the dish with a wedge of lemon on the side for an extra burst of freshness. Enjoy your delicious and healthy meal!