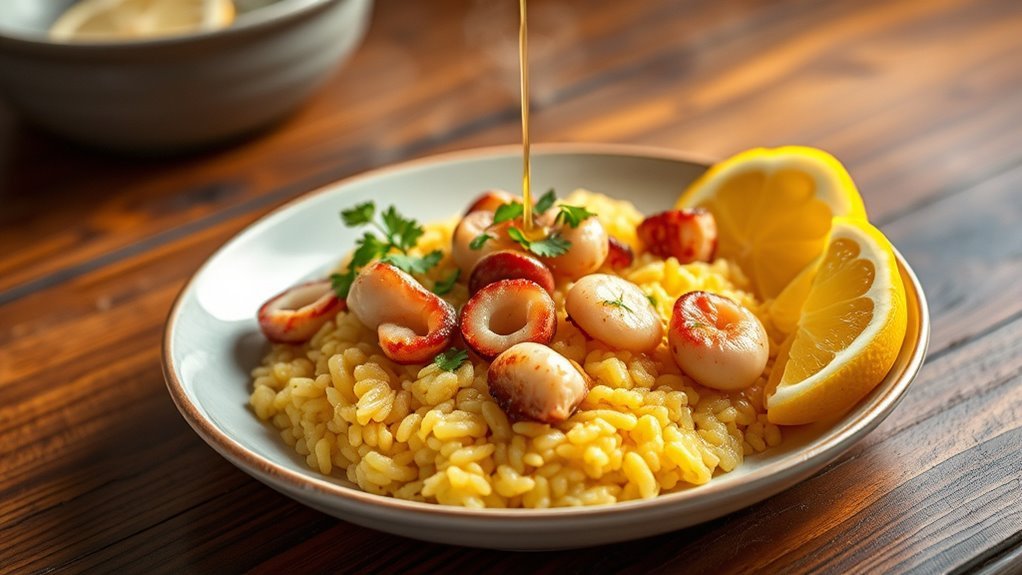
If you love crab, you're in for a treat! There's a whole world of delicious crab recipes just waiting for you to try. From crispy crab cakes that'll make your taste buds dance to creamy pasta that feels like a warm hug, the options are endless. And let's not forget about spicy crab boils that bring the fun to any gathering. Want to know what else is on the menu? Keep on exploring!
Classic Crab Cakes
Classic crab cakes are a delightful seafood dish that brings together the fresh taste of crab meat with a blend of spices and breadcrumbs, creating a crispy exterior and a tender, flavorful interior.
Perfect for an appetizer or a main course, these crab cakes are easy to prepare and can be served with a zesty remoulade or tartar sauce for added flavor.
Whether you're hosting a dinner party or simply craving a taste of the ocean, these classic crab cakes will surely impress your guests.
Ingredients:
- 1 pound fresh crab meat
- 1/2 cup breadcrumbs
- 1/4 cup mayonnaise
- 1 large egg
- 1 tablespoon Dijon mustard
- 1 tablespoon Worcestershire sauce
- 1 teaspoon Old Bay seasoning
- 1/4 cup finely chopped green onions
- 1/4 cup finely chopped red bell pepper
- Salt and pepper to taste
- Oil for frying
Instructions:
In a large bowl, gently combine the crab meat, breadcrumbs, mayonnaise, egg, Dijon mustard, Worcestershire sauce, Old Bay seasoning, green onions, red bell pepper, salt, and pepper.
Be careful not to break up the crab meat too much as you want to maintain some lumpiness for texture.
Once combined, form the mixture into patties, about 2 to 3 inches in diameter.
Heat oil in a skillet over medium heat, then carefully place the crab cakes in the skillet.
Cook for about 4-5 minutes on each side or until they're golden brown and crispy.
Drain on paper towels before serving.
Extra Tips:
For the best flavor, use fresh lump crab meat if possible, as it provides a superior taste and texture.
If you prefer a healthier option, consider baking the crab cakes instead of frying them—just brush them lightly with oil and bake at 375°F for about 15-20 minutes, flipping halfway through.
Additionally, let the crab cake mixture chill in the refrigerator for at least 30 minutes before cooking; this helps them hold their shape better while cooking.
Serve with a squeeze of lemon or your favorite sauce for an extra burst of flavor!
Creamy Crab Pasta
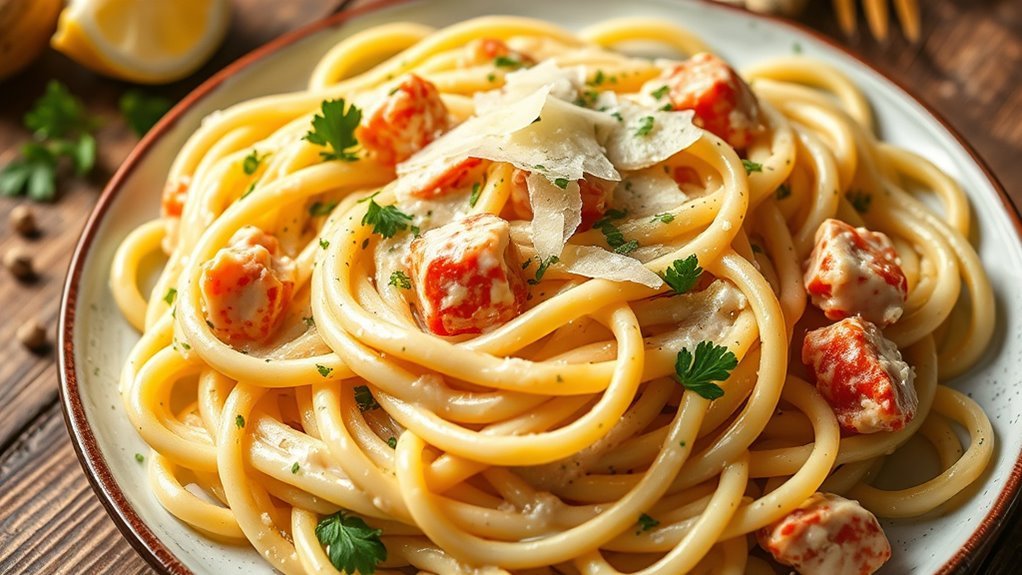
Creamy crab pasta is a delightful dish that combines the rich flavors of crab with a creamy sauce, making it a perfect choice for a special dinner or a comforting meal at home.
This recipe isn't only simple to prepare but also allows the sweet taste of crab to shine through. With just a few ingredients and minimal cooking time, you can create a restaurant-quality dish that will impress your family and friends.
Ingredients:
- 8 ounces of spaghetti or fettuccine
- 1 tablespoon olive oil
- 2 cloves garlic, minced
- 1 cup heavy cream
- 1 cup crab meat (fresh or canned)
- 1/2 cup grated Parmesan cheese
- 1/4 cup chopped fresh parsley
- Salt and pepper to taste
- Lemon wedges for serving
Cooking Instructions:
Begin by cooking the pasta according to the package instructions until al dente.
In a large skillet, heat the olive oil over medium heat and sauté the minced garlic until fragrant, about 1 minute.
Pour in the heavy cream and let it simmer for a few minutes, stirring occasionally, until it thickens slightly.
Gently fold in the crab meat and Parmesan cheese, then season with salt and pepper.
Once the pasta is cooked, drain it and add it to the skillet, tossing to coat the pasta well with the creamy sauce.
Garnish with fresh parsley before serving.
Extra Tips:
For an extra burst of flavor, consider adding a pinch of red pepper flakes for a little heat, or a splash of white wine to the sauce for added depth.
If using canned crab meat, be sure to drain it well to avoid excess moisture in the sauce.
Fresh lump crab meat will provide the best texture and taste.
Serve the creamy crab pasta with a side salad and some crusty bread to soak up any remaining sauce, and don't forget the lemon wedges for a fresh squeeze just before eating!
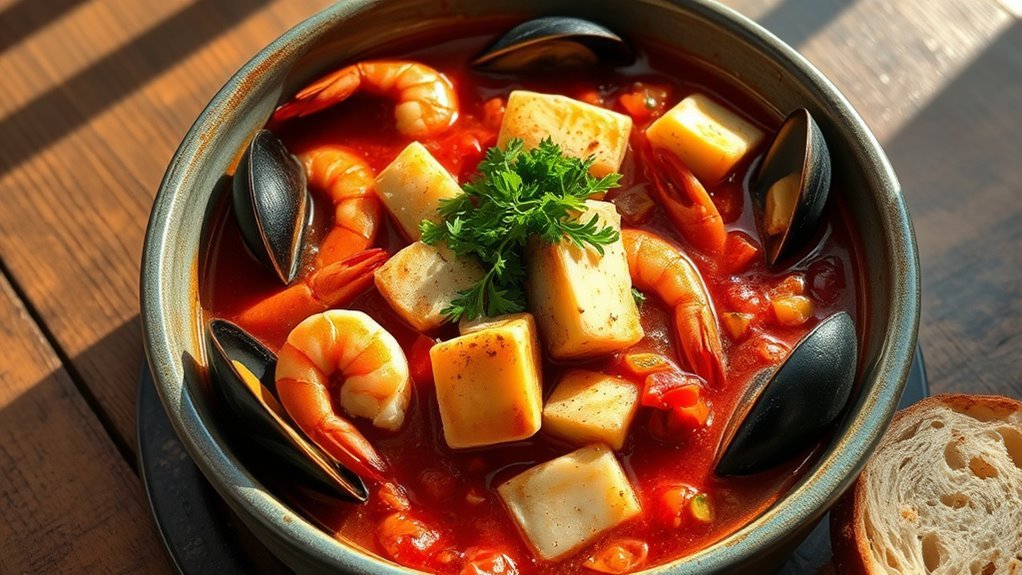
Spicy Crab Boil
Spicy Crab Boil is a vibrant and flavorful dish that brings the essence of a coastal feast right to your kitchen. This dish is perfect for gatherings, as it invites everyone to dig in and enjoy the mouthwatering combination of fresh crab, spices, and aromatic vegetables.
The beauty of a crab boil lies in its simplicity and the ability to customize it according to your taste preferences. Get ready to indulge in a delicious, spicy experience that will transport you to the seaside.
Ingredients:
- 2 pounds of live crabs (blue crabs or Dungeness crabs)
- 4 quarts of water
- 1/4 cup Old Bay seasoning
- 1 tablespoon cayenne pepper (adjust to taste)
- 2 lemons, quartered
- 4 cloves garlic, minced
- 4 ears of corn, cut in half
- 1 pound of baby potatoes
- 1/2 pound of smoked sausage, sliced
- Fresh parsley, chopped (for garnish)
Cooking Instructions:
In a large pot, bring the water to a boil and add the Old Bay seasoning, cayenne pepper, quartered lemons, and minced garlic.
Once boiling, add the baby potatoes and cook for about 10 minutes. Next, add the corn and sausage, and continue boiling for another 5 minutes.
Finally, add the crabs and cook for an additional 10-15 minutes, or until the crabs turn bright red and are fully cooked.
Once done, carefully drain the pot and spread the contents on a large table covered with newspaper or butcher paper. Garnish with fresh parsley before serving.
Extra Tips:
For an even more flavorful crab boil, consider adding other seafood such as shrimp or mussels.
You can also adjust the spice level by varying the amount of cayenne pepper or adding hot sauce to individual servings.
Remember to have plenty of napkins and a mallet on hand for cracking open the crab shells! Enjoy the communal aspect of this dish, as it's all about sharing and savoring each delicious bite together.
Crab Stuffed Avocados
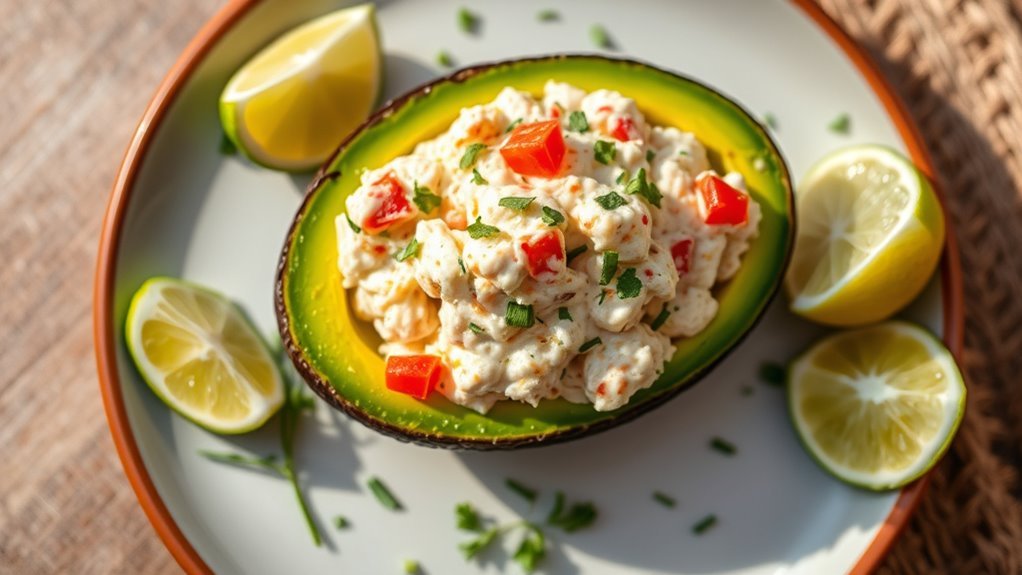
Crab stuffed avocados are a delightful and invigorating dish that combines the creamy texture of ripe avocados with the sweet, delicate flavor of crab meat. This dish is perfect for a light lunch, an appetizer at a dinner party, or even a healthy snack.
The combination of fresh ingredients and simple preparation makes it a favorite among seafood lovers. With a touch of lime and a sprinkle of seasoning, these stuffed avocados are sure to impress your guests and satisfy your taste buds.
Ingredients:
- 2 ripe avocados
- 1 cup cooked crab meat
- 1/4 cup plain Greek yogurt
- 2 tablespoons mayonnaise
- 1 tablespoon fresh lime juice
- 1 tablespoon chopped fresh cilantro
- 1/4 teaspoon garlic powder
- Salt and pepper to taste
- Lime wedges for serving
Instructions:
Start by halving the avocados and removing the pits. In a mixing bowl, combine the crab meat, Greek yogurt, mayonnaise, lime juice, cilantro, garlic powder, salt, and pepper, mixing gently until well combined.
Scoop out a small amount of avocado flesh to create more room for the crab mixture, then fill each avocado half with the crab mixture. Drizzle with additional lime juice if desired and serve immediately with lime wedges on the side.
Extra Tips:
To guarantee your avocados are perfectly ripe, gently press on the skin; they should yield slightly but not be too soft.
If you want to elevate the flavor, consider adding diced red onion, jalapeño, or a dash of hot sauce to the crab mixture for an extra kick. Additionally, this dish can be prepared ahead of time, but it's best to add the crab filling just before serving to keep the avocados from browning.
Enjoy your crab stuffed avocados chilled for the best taste!
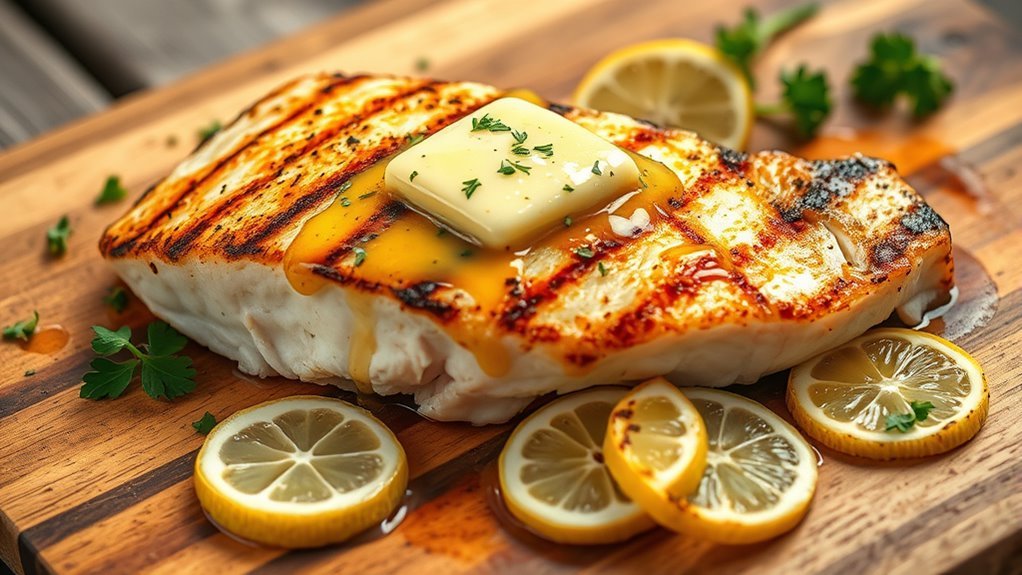
Garlic Butter Crab Legs
Garlic butter crab legs are a delightful dish that brings the taste of the ocean right to your dining table. This recipe is perfect for seafood lovers and can be prepared in under an hour. The combination of tender crab meat with the rich, savory flavor of garlic butter creates a truly indulgent experience.
Whether it's a special occasion or just a cozy night in, garlic butter crab legs are sure to impress.
Ingredients:
- 2 pounds of crab legs (snow crab or king crab)
- 1/2 cup unsalted butter
- 4 cloves garlic, minced
- 1 lemon, juiced
- 1 teaspoon Old Bay seasoning (optional)
- Fresh parsley, chopped (for garnish)
- Salt and pepper to taste
Instructions:
Begin by preheating your oven to 375°F (190°C).
While the oven is heating, place the crab legs in a large baking dish, making sure they're arranged in a single layer.
In a small saucepan, melt the butter over medium heat and add the minced garlic, stirring frequently until fragrant, about 1-2 minutes.
Remove from heat and stir in the lemon juice and Old Bay seasoning if using.
Pour the garlic butter mixture over the crab legs, making certain they're well-coated.
Cover the baking dish with aluminum foil and bake for about 25 minutes, or until the crab legs are heated through.
Remove from the oven, garnish with fresh parsley, and serve immediately.
Extra Tips:
When selecting crab legs, consider buying them pre-cooked, as this will save you time and confirm they're safe to eat.
If you prefer a little heat, feel free to add a pinch of red pepper flakes to the garlic butter mixture.
To make the dish even more enjoyable, serve with additional lemon wedges and melted garlic butter for dipping.
Finally, using kitchen shears can help you easily crack open the crab legs for easier access to the succulent meat.
Enjoy your meal!
Crab Imperial

Crab Imperial is a classic seafood dish that showcases the delicate flavors of crab meat, combined with a creamy sauce and topped with a golden-brown crust. This dish is perfect for special occasions or a cozy dinner at home, and it's sure to impress your guests with its rich flavors and elegant presentation.
With its simple preparation and exquisite taste, Crab Imperial can easily become a favorite in your culinary repertoire.
Ingredients:
- 1 pound lump crab meat
- 1/2 cup mayonnaise
- 1/4 cup heavy cream
- 2 tablespoons Dijon mustard
- 1 tablespoon Worcestershire sauce
- 1 tablespoon lemon juice
- 1/2 teaspoon Old Bay seasoning
- 1/4 teaspoon salt
- 1/4 teaspoon black pepper
- 1/2 cup grated Parmesan cheese
- 1/4 cup breadcrumbs
- 2 tablespoons chopped fresh parsley (for garnish)
Cooking Instructions:
Preheat your oven to 375°F (190°C).
In a large mixing bowl, gently combine the lump crab meat with mayonnaise, heavy cream, Dijon mustard, Worcestershire sauce, lemon juice, Old Bay seasoning, salt, and black pepper. Be careful not to break up the crab meat too much.
Once mixed, transfer the crab mixture to a greased baking dish.
In a small bowl, mix the grated Parmesan cheese with the breadcrumbs and sprinkle it evenly over the crab mixture.
Bake in the preheated oven for about 25-30 minutes, or until the top is golden brown and the filling is heated through.
Once done, remove from the oven and let it cool slightly before serving. Garnish with chopped fresh parsley.
Extra Tips:
For best results, use fresh lump crab meat whenever possible, as it will provide the best flavor and texture.
If using canned crab meat, make sure to drain it thoroughly to avoid excess liquid in the dish.
You can also customize the recipe by adding sautéed vegetables like bell peppers or onions for added flavor and texture.
For an extra touch, serve Crab Imperial in individual ramekins for a beautiful presentation that guests will love.
Crab and Corn Chowder

Crab and Corn Chowder is a delightful, creamy soup that combines the sweetness of corn with the rich, savory flavor of crab. This comforting dish is perfect for chilly evenings or as an impressive starter for a dinner party.
With its vibrant colors and hearty texture, Crab and Corn Chowder brings a taste of the ocean to your table, showcasing the delicate flavors of fresh crab meat. Plus, it's quick to prepare, making it an ideal choice for both novice cooks and seasoned chefs alike.
Ingredients:
- 1 pound fresh crab meat (or canned)
- 4 cups corn kernels (fresh, frozen, or canned)
- 1 medium onion, diced
- 2 cloves garlic, minced
- 2 medium potatoes, diced
- 4 cups chicken or vegetable broth
- 1 cup heavy cream
- 2 tablespoons butter
- 1 teaspoon thyme (dried or fresh)
- Salt and pepper to taste
- Fresh parsley, chopped (for garnish)
Cooking Instructions:
In a large pot, melt the butter over medium heat and add the diced onion and minced garlic, sautéing until they become translucent.
Stir in the diced potatoes and corn, cooking for a few more minutes before adding the broth. Bring the mixture to a boil, then reduce the heat and simmer until the potatoes are tender, about 15-20 minutes.
Once the potatoes are cooked, add the crab meat, cream, thyme, salt, and pepper, stirring gently to combine. Allow the chowder to heat through for an additional 5 minutes, then remove from heat and serve hot, garnished with fresh parsley.
Extra Tips:
For an even richer flavor, consider adding a splash of white wine or a teaspoon of Old Bay seasoning while cooking.
If you prefer a thicker chowder, you can blend a portion of the soup and then return it to the pot. For a touch of spice, add a pinch of cayenne pepper or a few dashes of hot sauce.
This chowder can be made ahead of time and stored in the refrigerator for a couple of days, allowing the flavors to meld beautifully. Just be sure to reheat it gently to avoid overcooking the crab.
Baked Crab Rangoon

Baked Crab Rangoon is a delightful appetizer that combines the rich flavors of crab meat and cream cheese wrapped in crispy wonton wrappers, then baked to perfection.
This dish offers a healthier alternative to the traditional fried version while still delivering on taste and texture. Perfect for parties, gatherings, or a cozy night in, these baked crab rangoon are sure to impress and satisfy your cravings for something savory and delicious.
Ingredients:
- 8 oz cream cheese, softened
- 1 cup cooked crab meat, shredded
- 2 green onions, finely chopped
- 1 tsp garlic powder
- 1 tsp Worcestershire sauce
- 1 package wonton wrappers
- Cooking spray or olive oil for brushing
- Soy sauce, for serving (optional)
Cooking Instructions:
Preheat your oven to 375°F (190°C) and line a baking sheet with parchment paper.
In a mixing bowl, combine the softened cream cheese, crab meat, green onions, garlic powder, and Worcestershire sauce, stirring until well blended.
Take a wonton wrapper and place about a teaspoon of the crab mixture in the center. Moisten the edges with water, fold the wrapper in half to form a triangle, and seal the edges tightly.
Arrange the filled wontons on the prepared baking sheet, brush lightly with cooking spray or olive oil, and bake for 15-20 minutes or until golden brown and crispy.
Extra Tips:
For an extra burst of flavor, consider adding a splash of lemon juice or some Old Bay seasoning to the crab mixture.
Be careful not to overfill the wontons, as this can lead to them bursting open during baking.
If you want to make a larger batch, you can easily double or triple the recipe, but make sure to bake them in batches for even cooking.
Serve your baked crab rangoon with a side of soy sauce or a sweet chili dipping sauce for an extra layer of deliciousness.
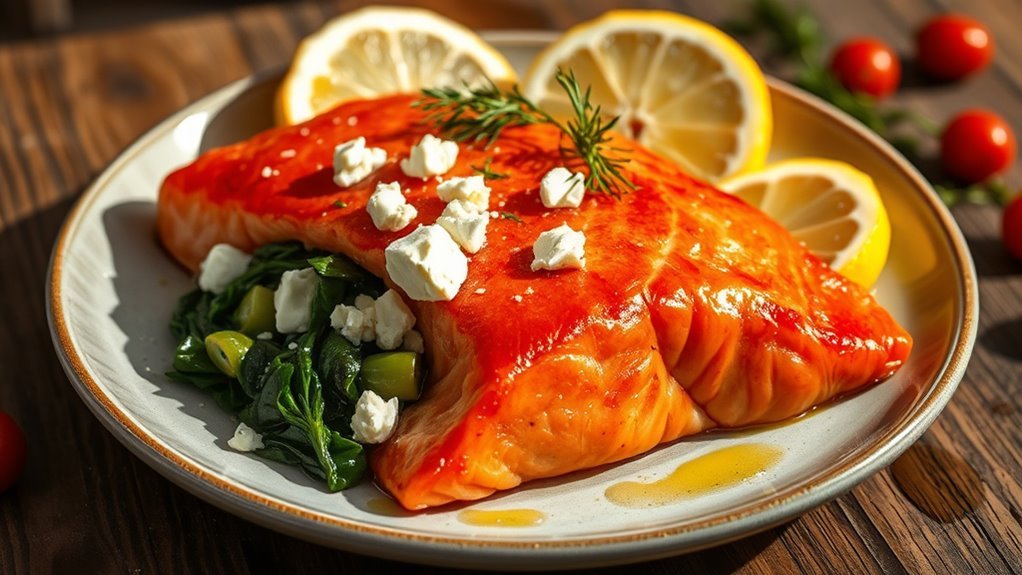
Mediterranean Crab Salad

Mediterranean Crab Salad is a rejuvenating and vibrant dish that beautifully combines the flavors of the sea with the essence of Mediterranean cuisine. This salad is perfect for a light lunch or as an appetizer for a gathering. With its mix of fresh vegetables, herbs, and succulent crab meat, it captures the essence of sunny Mediterranean days, making it a delightful addition to any meal.
Ingredients:
- 1 pound fresh crab meat (cooked and picked)
- 1 cup cherry tomatoes, halved
- 1 cucumber, diced
- 1/2 red onion, finely chopped
- 1/4 cup Kalamata olives, pitted and sliced
- 1/4 cup fresh parsley, chopped
- 1/4 cup feta cheese, crumbled
- Juice of 1 lemon
- 3 tablespoons olive oil
- Salt and pepper to taste
To prepare the Mediterranean Crab Salad, start by combining the fresh crab meat, cherry tomatoes, cucumber, red onion, Kalamata olives, and parsley in a large mixing bowl.
In a separate small bowl, whisk together the lemon juice, olive oil, salt, and pepper until well combined. Pour the dressing over the crab mixture and gently toss to combine, ensuring all ingredients are evenly coated.
Finally, sprinkle crumbled feta cheese on top and serve chilled or at room temperature.
When making Mediterranean Crab Salad, it's important to use fresh crab meat for the best flavor and texture. If you can't find fresh crab, canned or packaged crab meat can be used, but be sure to drain and rinse it well.
Feel free to customize the salad by adding other Mediterranean ingredients like bell peppers or avocado for added richness. For an extra burst of flavor, let the salad marinate in the refrigerator for about 30 minutes before serving, allowing the ingredients to meld together beautifully.
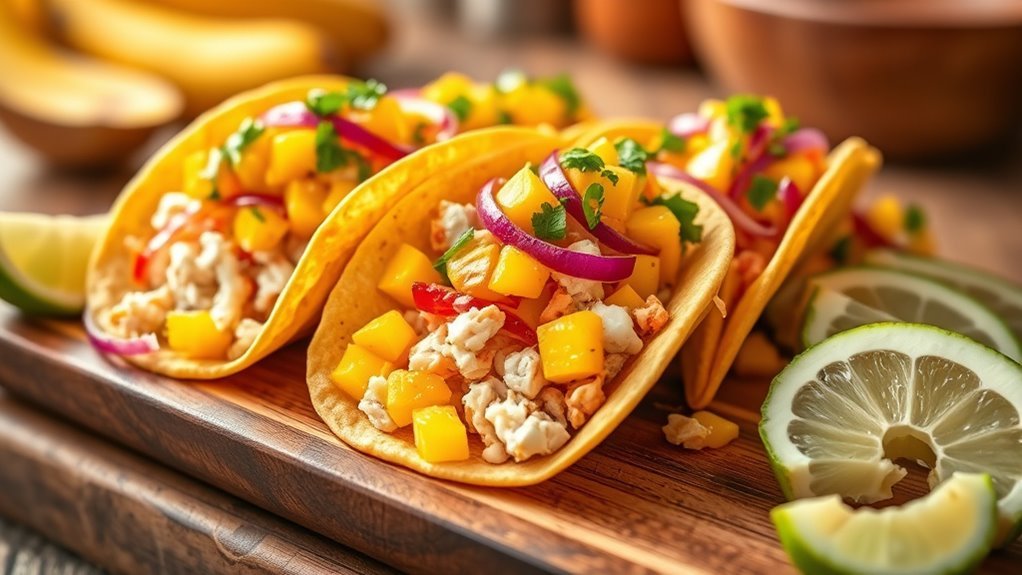
Crab Tacos With Mango Salsa

Crab tacos with mango salsa are a delightful fusion of flavors that makes for a perfect meal any time of the year. The sweet and tangy mango salsa pairs beautifully with the tender, succulent crab meat, all wrapped in warm tortillas.
This dish isn't only quick to prepare but also offers a revitalizing twist on traditional tacos, making it a crowd-pleaser for any gathering or a simple weeknight dinner.
Ingredients:
- 1 pound fresh crab meat, cooked and picked over for shells
- 8 small corn or flour tortillas
- 1 ripe mango, diced
- 1/2 red onion, finely chopped
- 1 jalapeño, seeded and minced
- 1/4 cup fresh cilantro, chopped
- Juice of 1 lime
- Salt and pepper, to taste
- 1 avocado, sliced (optional)
- Lime wedges, for serving
Instructions:
In a mixing bowl, combine the diced mango, red onion, jalapeño, cilantro, lime juice, and season with salt and pepper to taste to create the mango salsa.
In a separate bowl, gently mix the crab meat with a little lime juice and salt.
Warm the tortillas in a skillet or microwave until pliable.
To assemble the tacos, place a generous amount of the crab mixture on each tortilla, top with a spoonful of mango salsa, and add avocado slices if desired.
Serve immediately with lime wedges on the side.
Extra Tips:
For the best flavor, use fresh crab meat if possible, as it will improve the general taste of the dish.
If you prefer a spicier kick, leave some seeds in the jalapeño or add a dash of hot sauce to the crab.
You can also customize the salsa with other ingredients like diced bell peppers or a sprinkle of cumin for added depth.
Serve the tacos with a side of tortilla chips and extra salsa for a complete meal.