Tag: seafood recipes

  • 10 Best Seafood Recipes

    10 Best Seafood Recipes

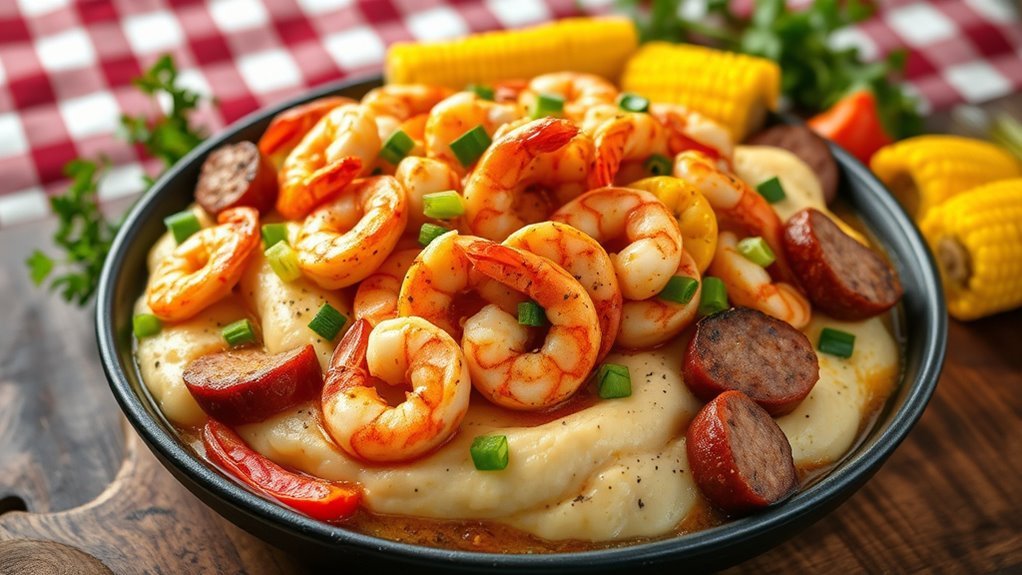
    If you're craving something delicious and easy to whip up, seafood is the way to go! From shrimp scampi that's buttery and rich to zesty fish tacos that pack a flavor punch, there's a seafood dish for everyone. And let's not forget about baked salmon with lemon and dill, which is as classy as it sounds. Curious about the rest? Stick around to find out which recipes will make your taste buds dance!

    Shrimp Scampi

    Shrimp scampi is a delightful seafood dish that combines the succulent flavors of shrimp with a buttery garlic sauce, making it a favorite among seafood lovers.

    This dish isn't only quick to prepare but also impresses with its delightful aroma and rich taste, perfect for a weeknight dinner or a special occasion. Serve it over pasta or with a side of crusty bread to soak up the delicious sauce, and you'll have a meal that's sure to satisfy.

    Ingredients:

    • 1 pound large shrimp, peeled and deveined
    • 4 tablespoons unsalted butter
    • 2 tablespoons olive oil
    • 4 cloves garlic, minced
    • 1/2 teaspoon red pepper flakes (optional)
    • 1/2 cup dry white wine
    • Juice of 1 lemon
    • Salt and pepper to taste
    • 1/4 cup fresh parsley, chopped
    • Cooked pasta or crusty bread for serving

    Instructions:

    In a large skillet, heat the butter and olive oil over medium heat until melted and hot.

    Add the minced garlic and red pepper flakes, sautéing for about 1 minute until fragrant.

    Then, add the shrimp to the skillet and cook for 2-3 minutes on each side, or until they turn pink and opaque.

    Pour in the white wine and lemon juice, season with salt and pepper, and let it simmer for another 2 minutes to allow the flavors to meld.

    Remove from heat, stir in the fresh parsley, and serve immediately over pasta or with bread.

    Extra Tips:

    To improve the flavor of your shrimp scampi, consider using shrimp that are still in their shells for added depth; just remember to peel them before serving.

    Also, for a richer sauce, you can finish the dish with a splash of heavy cream or a sprinkle of Parmesan cheese.

    Make sure not to overcook the shrimp, as they can become tough; they cook quickly, so keep a close eye on them.

    Finally, using a good quality white wine can raise your dish, so choose one that you'd enjoy drinking!

    Zesty Fish Tacos

    flavorful fish taco recipe

    Zesty fish tacos are a delightful and vibrant dish that brings the flavors of the ocean to your table. Perfect for a casual meal or a festive gathering, these tacos feature fresh fish marinated in zesty lime and spices, topped with a crunchy slaw and creamy sauce. The combination of textures and flavors makes each bite a rejuvenating experience that will surely satisfy your seafood cravings.

    Ingredients:

    • 1 pound white fish fillets (such as cod, tilapia, or snapper)
    • 2 tablespoons olive oil
    • 2 tablespoons lime juice
    • 1 teaspoon chili powder
    • 1 teaspoon cumin
    • 1 teaspoon garlic powder
    • Salt and pepper to taste
    • 8 small corn tortillas
    • 1 cup shredded cabbage
    • 1/2 cup diced tomatoes
    • 1/4 cup chopped cilantro
    • 1/2 cup sour cream or Greek yogurt
    • Additional lime wedges for serving

    Cooking Instructions:

    Begin by marinating the fish fillets in a mixture of olive oil, lime juice, chili powder, cumin, garlic powder, salt, and pepper for at least 20 minutes.

    While the fish is marinating, prepare the crunchy slaw by combining shredded cabbage, diced tomatoes, and chopped cilantro in a bowl.

    In a separate small bowl, mix the sour cream or Greek yogurt with a pinch of salt and a squeeze of lime juice to create a creamy sauce.

    Once the fish is marinated, heat a skillet over medium-high heat and cook the fillets for about 3-4 minutes per side, or until they're cooked through and flaky.

    Warm the corn tortillas in a dry skillet or microwave, then assemble the tacos by placing a piece of fish on each tortilla, topping it with the slaw and a drizzle of the creamy sauce.

    Extra Tips:

    For an extra kick, consider adding sliced jalapeños or a drizzle of hot sauce to your tacos.

    You can also experiment with different types of fish or even shrimp for variety.

    If you want to make this dish even more colorful, add some diced avocado or pickled red onions as toppings.

    Don't forget to serve the tacos with lime wedges on the side for an added burst of freshness!

    Enjoy your zesty fish tacos with a side of tortilla chips and salsa for a complete meal.

    Baked Salmon With Lemon and Dill

    Baked Salmon with Lemon and Dill is a simple yet elegant dish that showcases the natural flavors of the salmon improved by the brightness of lemon and the freshness of dill. This recipe is perfect for a weeknight dinner or a special occasion, as it requires minimal prep time and can be on the table in just about 30 minutes.

    The combination of zesty lemon juice and fragrant dill creates a delightful aroma that will fill your kitchen, making it a favorite for seafood lovers.

    Ingredients:

    • 4 salmon fillets
    • 2 tablespoons olive oil
    • 1 lemon (zested and juiced)
    • 2 tablespoons fresh dill, chopped (or 1 tablespoon dried dill)
    • Salt and pepper to taste
    • Lemon slices for garnish

    Cooking Instructions:

    Preheat your oven to 400°F (200°C). In a small bowl, whisk together the olive oil, lemon juice, lemon zest, chopped dill, salt, and pepper.

    Place the salmon fillets on a baking sheet lined with parchment paper, skin side down. Brush the olive oil mixture generously over the salmon fillets, making sure they're well coated.

    Bake in the preheated oven for about 12-15 minutes, or until the salmon is cooked through and flakes easily with a fork. Garnish with lemon slices and additional dill before serving.

    Extra Tips:

    To keep your salmon remains moist, avoid overcooking it; the internal temperature should reach 145°F (63°C).

    If you prefer a crispy skin, you can sear the salmon skin-side down in a hot skillet for 2-3 minutes before transferring it to the oven.

    For added flavor, consider marinating the salmon for 30 minutes prior to baking, and feel free to experiment with other herbs like parsley or thyme to customize the dish to your taste.

    Garlic Butter Clams

    savory garlic butter clams

    Garlic Butter Clams are a delightful seafood dish that brings the taste of the ocean right to your table. This recipe highlights the briny flavor of clams, complemented by the richness of butter and the aromatic kick of garlic. Perfect as an appetizer or a main course, this dish is quick to prepare and sure to impress your guests with its simplicity and elegance.

    Ingredients:

    • 2 pounds of fresh clams (littleneck or Manila)
    • 4 tablespoons unsalted butter
    • 4 cloves garlic, minced
    • 1/2 cup dry white wine
    • 1/4 cup fresh parsley, chopped
    • Salt and pepper to taste
    • Lemon wedges for serving

    To prepare Garlic Butter Clams, begin by rinsing the clams under cold water to remove any grit. In a large pot or skillet, melt the butter over medium heat. Add the minced garlic and sauté for about 1 minute until fragrant, being careful not to burn it.

    Pour in the white wine and bring it to a simmer. Add the clams to the pot, cover it with a lid, and cook for about 5-7 minutes, or until the clams have opened. Discard any clams that remain closed. Stir in the chopped parsley, and season with salt and pepper to taste. Serve immediately with lemon wedges on the side.

    For best results, make sure to soak the clams in cold water for at least 30 minutes before cooking to allow them to expel any sand. Additionally, using fresh, high-quality ingredients will enhance the dish; choose a good dry white wine that you enjoy drinking.

    If you want to add a little heat, consider incorporating red pepper flakes or serving with crusty bread to soak up the delicious garlic butter sauce. Enjoy your culinary adventure with these flavorful Garlic Butter Clams!

    Spicy Tuna Poke Bowl

    A Spicy Tuna Poke Bowl is a delightful and invigorating dish that captures the essence of Hawaiian cuisine. This dish isn't only quick to prepare but also allows for personal customization based on your preferences.

    The combination of fresh tuna, creamy avocado, and zesty dressing creates a mouthwatering experience that can be enjoyed for lunch or dinner. Pair it with rice and your favorite toppings to create a vibrant and satisfying poke bowl that's sure to impress.

    Ingredients:

    • 1 lb sushi-grade tuna, diced
    • 2 cups cooked sushi rice
    • 1 avocado, sliced
    • 1 small cucumber, thinly sliced
    • 2 green onions, chopped
    • 1 tablespoon sesame oil
    • 2 tablespoons soy sauce
    • 1 tablespoon Sriracha (adjust for spice preference)
    • 1 teaspoon sesame seeds
    • Nori strips (optional, for garnish)
    • Pickled ginger (optional, for serving)

    Cooking Instructions:

    In a medium bowl, combine the diced tuna with sesame oil, soy sauce, and Sriracha, gently stirring to coat the tuna evenly. Allow the mixture to marinate for about 10 minutes in the refrigerator.

    While the tuna is marinating, prepare the sushi rice according to package instructions and let it cool slightly.

    To assemble the poke bowl, place a scoop of sushi rice at the bottom of a serving bowl, then top it with the marinated tuna, sliced avocado, cucumber, and green onions. Sprinkle sesame seeds on top and add nori strips if desired.

    Extra Tips:

    When selecting tuna, always opt for sushi-grade to guarantee safety and quality.

    You can adjust the spice level of the poke bowl by adding more or less Sriracha or incorporating other ingredients like kimchi for a kick.

    Feel free to customize your poke bowl with additional toppings such as radishes, edamame, or seaweed salad to improve both flavor and nutrition.

    If you're preparing this dish ahead of time, keep the components separate until serving to maintain freshness.

    Lobster Roll

    delicious seafood sandwich delight

    Lobster rolls are a quintessential New England summer treat, combining the sweet, tender meat of lobster with a creamy dressing and served in a fluffy, buttered roll. This simple yet elegant dish is perfect for a seaside picnic or a backyard barbecue.

    With just a few ingredients, you can whip up this delicious sandwich that highlights the fresh flavors of the ocean.

    Ingredients:

    • 1 pound cooked lobster meat, chopped
    • 1/4 cup mayonnaise
    • 1 tablespoon lemon juice
    • 1 tablespoon chopped fresh chives
    • Salt and pepper, to taste
    • 4 split-top hot dog buns
    • 2 tablespoons unsalted butter, melted
    • Lettuce leaves (optional, for serving)

    Instructions:

    In a medium bowl, combine the chopped lobster meat, mayonnaise, lemon juice, and chives. Season with salt and pepper to taste, mixing gently until all ingredients are well incorporated.

    In a skillet, melt the butter over medium heat. Lightly toast the split-top buns in the buttery skillet until they're golden brown on both sides.

    Once toasted, fill each bun generously with the lobster mixture and add lettuce leaves if desired.

    Extra Tips:

    For the best flavor, use fresh lobster meat; if you can, steam your lobsters at home for the most succulent results.

    If fresh lobster isn't available, high-quality frozen lobster meat can be a good alternative.

    When making the dressing, feel free to adjust the amount of mayonnaise and lemon juice to suit your taste.

    Adding a dash of Old Bay seasoning or finely diced celery can also enhance the flavor profile of your lobster roll.

    Serve your rolls with a side of potato chips or coleslaw for a classic pairing!

    Grilled Mahi-Mahi With Mango Salsa

    mahi mahi topped with salsa

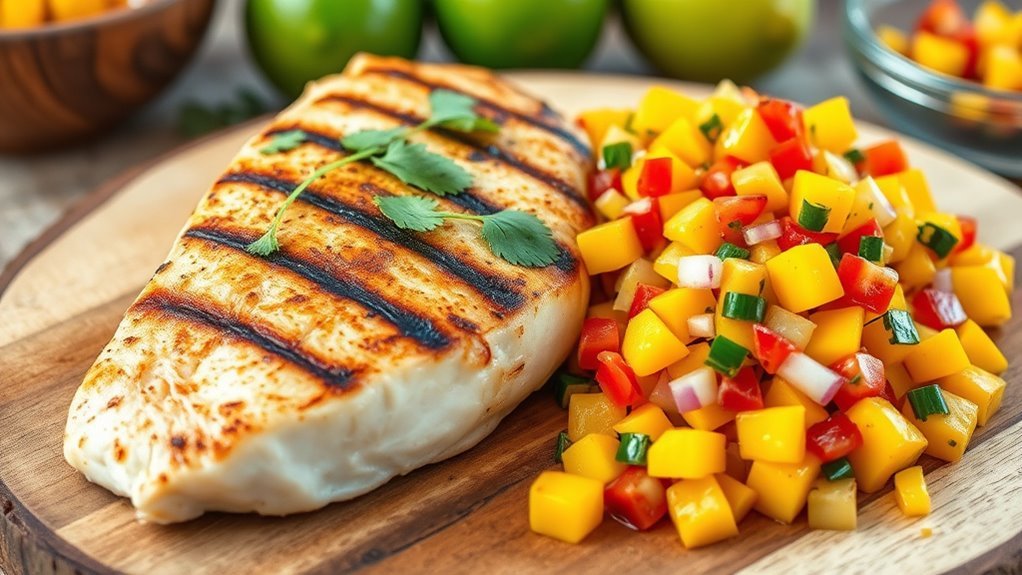
    Grilled Mahi-Mahi with Mango Salsa is a vibrant and invigorating dish that perfectly captures the essence of summer. The mild, flaky Mahi-Mahi pairs beautifully with the sweet and tangy mango salsa, making it a delightful choice for any seafood lover.

    This dish isn't only quick and easy to prepare but also a feast for the eyes and palate, ideal for outdoor grilling or a cozy dinner at home.

    Ingredients:

    • 4 Mahi-Mahi fillets
    • 2 tablespoons olive oil
    • 1 teaspoon garlic powder
    • 1 teaspoon paprika
    • Salt and pepper to taste
    • 1 ripe mango, diced
    • 1/2 red onion, finely chopped
    • 1 jalapeño, seeded and minced
    • Juice of 1 lime
    • Fresh cilantro, chopped (for garnish)

    Instructions:

    Preheat your grill to medium-high heat. In a small bowl, mix the olive oil, garlic powder, paprika, salt, and pepper. Brush this mixture over both sides of the Mahi-Mahi fillets.

    Place the fillets on the grill and cook for about 4-5 minutes on each side, or until the fish flakes easily with a fork.

    While the fish is grilling, combine the diced mango, red onion, jalapeño, and lime juice in a separate bowl to create the mango salsa.

    Once the fish is cooked, remove it from the grill and top each fillet with a generous spoonful of mango salsa. Garnish with chopped cilantro before serving.

    Extra Tips:

    For the best results, choose fresh, high-quality Mahi-Mahi and make sure it's properly thawed if using frozen fillets.

    If you prefer a spicier kick, leave some seeds in the jalapeño or add a pinch of cayenne pepper to the salsa.

    This dish pairs wonderfully with a side of coconut rice or grilled vegetables.

    Don't hesitate to experiment with other fruits for the salsa, such as pineapple or papaya, to add a unique twist to the dish!

    Seafood Paella

    delicious seafood rice dish

    Seafood paella is a vibrant and flavorful Spanish dish that brings together the best of the ocean in a colorful and aromatic presentation. Originating from the Valencia region, this dish is traditionally cooked in a wide, shallow pan and is celebrated for its delicious combination of seafood, rice, and spices. Perfect for gatherings or a special family meal, seafood paella is sure to impress with its rich flavors and stunning presentation.

    Ingredients:

    • 1 ½ cups Bomba rice (or any short-grain rice)
    • 3 cups seafood stock
    • 1 cup dry white wine
    • 200g shrimp, peeled and deveined
    • 200g mussels, cleaned
    • 200g calamari, sliced into rings
    • 1 red bell pepper, diced
    • 1 onion, finely chopped
    • 4 cloves garlic, minced
    • 1 teaspoon smoked paprika
    • ½ teaspoon saffron threads
    • Salt and pepper to taste
    • 2 tablespoons olive oil
    • Fresh parsley, chopped (for garnish)
    • Lemon wedges (for serving)

    Instructions:

    In a large paella pan or wide skillet, heat the olive oil over medium heat. Add the onion and bell pepper, sautéing until softened, about 5 minutes.

    Stir in the garlic and smoked paprika, cooking for another minute until fragrant. Add the Bomba rice, stirring to coat it with the onion mixture, then pour in the white wine, allowing it to simmer and reduce slightly.

    Next, add the seafood stock and saffron, season with salt and pepper, and bring to a boil. Reduce the heat to low, cover, and let it simmer for about 15 minutes.

    Once the rice is nearly cooked, gently nestle the shrimp, mussels, and calamari into the rice, cover, and cook for an additional 5-7 minutes until the seafood is cooked through and the mussels have opened.

    Remove from heat and let it rest for a few minutes before garnishing with fresh parsley and serving with lemon wedges.

    Extra Tips:

    For the best flavor, use homemade seafood stock if possible; it improves the overall taste of the paella considerably.

    Be mindful not to stir the rice once the seafood is added, as a crust will develop at the bottom, known as "socarrat," which is a prized part of the dish.

    Additionally, feel free to customize your seafood selection based on what's fresh or available, such as adding clams or crab for added variety.

    Enjoy your seafood paella with a glass of white wine for a true taste of Spain!

    Creamy Seafood Pasta

    delicious creamy seafood dish

    Creamy seafood pasta is a luxurious dish that combines the rich flavors of fresh seafood with a velvety cream sauce, creating a delightful meal that's perfect for special occasions or a comforting dinner at home.

    This recipe is easy to follow and can be customized with your favorite types of seafood, whether it's shrimp, scallops, or a mix of both. Serve it with a sprinkle of fresh parsley and a side of garlic bread for a complete dining experience.

    Ingredients:

    • 8 oz fettuccine or linguine pasta
    • 1 tablespoon olive oil
    • 1 small onion, finely chopped
    • 2 cloves garlic, minced
    • 8 oz shrimp, peeled and deveined
    • 8 oz scallops
    • 1 cup heavy cream
    • 1/2 cup grated Parmesan cheese
    • Salt and pepper to taste
    • Fresh parsley, chopped (for garnish)

    Instructions:

    Cook the pasta according to package instructions until al dente, then drain and set aside.

    In a large skillet, heat the olive oil over medium heat and sauté the onion until translucent. Add the minced garlic and stir for about 30 seconds before adding the shrimp and scallops; cook until they're just opaque.

    Reduce the heat to low, then stir in the heavy cream and Parmesan cheese, allowing the sauce to thicken slightly.

    Combine the cooked pasta with the seafood mixture, tossing to guarantee the pasta is well coated. Season with salt and pepper to taste, and garnish with fresh parsley before serving.

    Extra Tips:

    For an added depth of flavor, consider incorporating a splash of white wine into the skillet after cooking the seafood to deglaze the pan.

    You can also experiment with different herbs, such as thyme or basil, to improve the dish further.

    If you prefer a lighter option, you can substitute half-and-half for the heavy cream, though the sauce may be less rich.

    Finally, remember to avoid overcooking the seafood to maintain its tenderness and juicy texture.

    Crab Cakes With Remoulade Sauce

    crab cakes with sauce

    Crab cakes are a delightful seafood dish that combines the sweet, delicate flavor of fresh crab meat with a crispy exterior.

    These crab cakes are easy to prepare and are perfect for a special occasion or a casual dinner. Paired with a zesty remoulade sauce, they're sure to impress your family and friends. Follow this simple recipe to create your own delicious crab cakes at home!

    Ingredients:

    • 1 pound fresh lump crab meat
    • 1/2 cup breadcrumbs (preferably panko)
    • 1/4 cup mayonnaise
    • 1 large egg
    • 1 tablespoon Dijon mustard
    • 1 tablespoon Worcestershire sauce
    • 1 teaspoon Old Bay seasoning
    • 1/4 cup finely chopped green onions
    • 1 tablespoon chopped fresh parsley
    • Salt and pepper, to taste
    • Vegetable oil, for frying

    Cooking Instructions:

    In a large mixing bowl, gently combine the crab meat, breadcrumbs, mayonnaise, egg, Dijon mustard, Worcestershire sauce, Old Bay seasoning, green onions, parsley, salt, and pepper until just mixed to avoid breaking up the crab meat.

    Form the mixture into small patties, about 3 inches in diameter. Heat a skillet over medium heat and add enough vegetable oil to coat the bottom.

    Once the oil is hot, carefully add the crab cakes to the skillet and cook for about 4-5 minutes on each side or until golden brown and crispy. Remove from the skillet and drain on paper towels before serving.

    Extra Tips:

    For the best flavor and texture, use fresh crab meat if possible. If you can only find canned crab, choose a high-quality brand and rinse it well to remove excess salt.

    When shaping the crab cakes, be gentle to retain the lumps of crab meat, which is key to a great texture. Chill the formed cakes in the refrigerator for at least 30 minutes before frying to help them hold together better.

    Experiment with the remoulade sauce by adding your favorite spices or herbs for an extra kick!

  • 10 Best Seafood Boil Recipes

    10 Best Seafood Boil Recipes

    Are you ready to delve into the delicious world of seafood boils? These recipes bring friends and family together for a fun, flavorful feast. Whether you're craving the classic Louisiana style or something with a tropical twist, there's a seafood boil for everyone. Each dish is packed with mouthwatering ingredients and bold flavors. So, let's investigate some of the best recipes that'll have you dreaming of coastal shores and unforgettable gatherings!

    Classic Louisiana Seafood Boil

    A classic Louisiana seafood boil is a festive and flavorful dish that brings together a medley of fresh seafood, spices, and vegetables, creating a communal dining experience that's perfect for gatherings.

    This dish is known for its robust flavors, thanks to the blend of spices and the cooking method that allows the seafood to absorb all the delicious seasonings. The vibrant display of shrimp, crab, and sausage, along with corn and potatoes, makes this a meal that's as much about the experience as it's about the taste.

    Ingredients:

    • 4 quarts water
    • 1/2 cup seafood boil seasoning (such as Zatarain's or Old Bay)
    • 1 lemon, halved
    • 1 onion, quartered
    • 4 cloves garlic, smashed
    • 1 pound small red potatoes
    • 1 pound smoked sausage, cut into pieces
    • 2 ears of corn, cut into thirds
    • 2 pounds large shrimp, deveined and shells on
    • 1 pound crab (optional)
    • Fresh parsley, chopped (for garnish)
    • Hot sauce (for serving)

    Instructions:

    In a large pot, bring the water to a rolling boil and stir in the seafood boil seasoning, lemon halves, onion, and garlic.

    Add the red potatoes and cook for about 10 minutes until they start to become tender. Next, add the smoked sausage and corn, cooking for an additional 5 minutes.

    Finally, add the shrimp and crab (if using), cooking for about 3-5 minutes or until the shrimp turn pink and the crab is heated through.

    Carefully drain the pot and transfer the seafood and vegetables to a large serving platter or newspaper-covered table for a rustic presentation.

    Extra Tips:

    For an even richer flavor, consider adding an extra tablespoon of seafood seasoning and a few whole peppercorns to the boiling water.

    If you prefer a spicier kick, toss in some sliced jalapeños or a few dashes of cayenne pepper.

    Make sure to serve the seafood boil with plenty of napkins, as it can get messy! Pair the meal with a revitalizing drink and enjoy the company of friends and family as you feast on this delicious Southern classic.

    Spicy Cajun Shrimp Boil

    cajun shrimp seafood feast

    A Spicy Cajun Shrimp Boil is a delightful and vibrant dish that brings the flavors of the Gulf Coast right to your kitchen. Perfect for gatherings or a fun family dinner, this recipe combines succulent shrimp with bold spices, fresh vegetables, and hearty potatoes. The combination of flavors is sure to impress everyone at the table, making it a perfect choice for any seafood lover.

    Ingredients:

    • 2 pounds large shrimp, deveined and shell-on
    • 1 pound baby potatoes, halved
    • 2 ears of corn, cut into halves
    • 1/4 cup Cajun seasoning
    • 1 tablespoon Old Bay seasoning
    • 1 lemon, halved
    • 4 cloves garlic, minced
    • 8 cups water
    • 1 tablespoon salt
    • 1/2 cup unsalted butter, melted
    • Fresh parsley, chopped (for garnish)

    Instructions:

    In a large pot, bring the water, salt, and half of the Cajun seasoning to a boil. Add the baby potatoes and cook for about 10 minutes until they start to soften.

    Then, add the corn and minced garlic, cooking for an additional 5 minutes. Next, stir in the shrimp and the remaining Cajun seasoning, cooking until the shrimp turn pink and opaque, about 3-4 minutes.

    Remove the pot from heat, and squeeze the juice from the lemon halves into the pot, adding the melted butter and gently stirring to combine.

    Drain the mixture and transfer everything to a large serving platter or a newspaper-covered table for a casual feast.

    Extra Tips:

    For an authentic experience, feel free to customize your seafood boil by adding other ingredients such as sausage, crab legs, or mussels.

    Adjust the level of spiciness by varying the amount of Cajun seasoning according to your taste.

    Always remember to serve with plenty of napkins and some crusty bread on the side to soak up the delicious broth. Enjoy the communal aspect of this dish, encouraging everyone to dig in with their hands for a fun and hearty meal!

    Garlic Butter Seafood Boil

    A Garlic Butter Seafood Boil is a delicious way to enjoy a variety of seafood infused with rich, buttery flavors and aromatic garlic. This dish is perfect for gatherings or a cozy family dinner, as it brings together shrimp, crab, mussels, and potatoes in a single pot, making it both hearty and satisfying.

    The combination of spices and the indulgence of garlic butter creates a mouthwatering experience that will have everyone coming back for seconds.

    Ingredients:

    • 2 pounds of shrimp, peeled and deveined
    • 1 pound of crab legs
    • 1 pound of mussels, cleaned and debearded
    • 1 pound of baby potatoes, halved
    • 1 cup of unsalted butter
    • 6 cloves of garlic, minced
    • 1 tablespoon of Old Bay seasoning
    • 1 teaspoon of paprika
    • 1 lemon, juiced
    • Fresh parsley, chopped for garnish
    • Salt and pepper to taste
    • Water for boiling

    Cooking Instructions:

    Start by bringing a large pot of salted water to a boil, then add the halved potatoes and cook until fork-tender, about 10-15 minutes.

    Drain the potatoes and set them aside. In the same pot, melt the butter over medium heat and add the minced garlic, stirring until fragrant.

    Stir in the Old Bay seasoning, paprika, lemon juice, and cooked potatoes. Then, add the shrimp, crab legs, and mussels to the pot, cover, and cook for an additional 5-7 minutes or until the shrimp turn pink and the mussels open up.

    Season with salt and pepper to taste, and finish by garnishing with fresh parsley before serving.

    Extra Tips:

    To raise your Garlic Butter Seafood Boil, consider adding other seafood options like clams or lobster for a more luxurious touch.

    Make sure to serve the dish with plenty of crusty bread to soak up the flavorful broth. Timing is key, so make certain you don't overcook the seafood; it should be just cooked through for the best texture.

    Finally, enjoy the experience by serving the seafood boil family-style on a large table covered with butcher paper, allowing everyone to dig in and enjoy the feast together!

    Old Bay Crab Boil

    crab boil with old bay

    Old Bay Crab Boil is a classic East Coast dish that brings the flavors of the ocean to your table. This hearty seafood boil isn't only a feast for the senses but also a fun social experience as you gather around with family and friends.

    The combination of succulent crabs, spicy sausage, fresh corn, and potatoes, all seasoned with the iconic Old Bay seasoning, creates a mouthwatering dish that's perfect for summer gatherings or any seafood lover's dream.

    Ingredients:

    • 2 pounds of live blue crabs
    • 1 pound of smoked sausage, cut into 1-inch pieces
    • 4 ears of corn, halved
    • 1 pound of baby potatoes, halved
    • 1/4 cup Old Bay seasoning
    • 2 lemons, halved
    • 4 cloves of garlic, smashed
    • Water (enough to fill a large pot)
    • Salt (to taste)

    Instructions:

    In a large pot, fill it with enough water to cover all the ingredients and bring it to a rolling boil. Add the Old Bay seasoning, salt, garlic, and the lemon halves, stirring to combine.

    Once the water is boiling, add the potatoes and cook for about 10 minutes until they start to soften. Next, add the smoked sausage and corn, cooking for an additional 5 minutes.

    Finally, toss in the live crabs and cover the pot, cooking for another 5-7 minutes or until the crabs turn bright red and are fully cooked. Carefully drain the pot, then spread the seafood and vegetables out on a large table covered with newspaper, and serve hot.

    Extra Tips:

    When selecting crabs, look for lively ones with a strong seawater scent, as freshness is key to a delicious boil.

    You can also customize the recipe by adding other seafood such as shrimp or mussels. For a little extra kick, consider adding some diced jalapeños or a splash of hot sauce to the boil.

    Be sure to have plenty of napkins on hand, and don't forget to provide a dipping sauce, like melted butter or garlic aioli, to elevate the flavors even further. Enjoy the process and the communal aspect of eating with your hands!

    Lemon Herb Seafood Boil

    Lemon Herb Seafood Boil is a delightful and invigorating twist on the classic seafood boil. Packed with fresh flavors from lemon and aromatic herbs, this dish is perfect for summer gatherings or cozy family dinners.

    Combining shrimp, crab, and a medley of vegetables, this recipe isn't only easy to prepare but also brings the vibrant taste of the sea right to your table. Gather your ingredients, invite some friends, and enjoy a feast that's as fun to make as it's to eat!

    Ingredients:

    • 2 pounds of shrimp, deveined
    • 1 pound of crab legs
    • 2 ears of corn, cut into halves
    • 1 pound of baby potatoes, halved
    • 1 lemon, sliced
    • 4 cloves of garlic, minced
    • 1/4 cup of olive oil
    • 1 tablespoon of Old Bay seasoning
    • 1 tablespoon of fresh parsley, chopped
    • Salt and pepper to taste
    • Water for boiling

    Cooking Instructions:

    In a large pot, bring about 4 quarts of water to a boil and add the baby potatoes. Cook for 10-12 minutes until they're tender, then add the corn and cook for an additional 5 minutes.

    Next, stir in the shrimp and crab legs, followed by the Old Bay seasoning, minced garlic, olive oil, and lemon slices. Let everything boil together for about 3-5 minutes until the shrimp turns pink and the crab is heated through.

    Once cooked, drain the seafood and vegetables, then transfer them to a large serving platter. Toss with fresh parsley and season with salt and pepper to taste.

    Extra Tips:

    For an added depth of flavor, consider incorporating other herbs like thyme or cilantro into the boil. You can adjust the spice level by adding red pepper flakes or sliced jalapeños if you enjoy some heat.

    Also, feel free to experiment with different seafood options such as mussels or clams, and always serve your seafood boil with extra lemon wedges on the side for that zesty kick! Enjoy with crusty bread for an authentic experience.

    Southern-Style Shrimp and Grits Boil

    shrimp and grits dish

    Southern-Style Shrimp and Grits Boil is a delightful twist on traditional shrimp and grits, combining the savory flavors of a seafood boil with creamy, cheesy grits. This dish features succulent shrimp, smoky sausage, and vibrant vegetables, all simmered together and served atop a bed of rich, buttery grits.

    Ideal for a family gathering or a cozy dinner, this recipe showcases the comforting elements of Southern cuisine while offering a fun and interactive dining experience.

    Ingredients:

    • 1 pound large shrimp, peeled and deveined
    • 1 pound smoked sausage, sliced
    • 4 cups chicken broth
    • 2 cups corn on the cob, cut into halves or thirds
    • 1 bell pepper, diced
    • 1 onion, diced
    • 3 cloves garlic, minced
    • 2 teaspoons Old Bay seasoning
    • Salt and pepper to taste
    • 1 cup grits
    • 4 tablespoons butter
    • 1 cup shredded cheddar cheese
    • Fresh parsley, chopped for garnish
    • Lemon wedges for serving

    Cooking Instructions:

    In a large pot, bring the chicken broth to a boil and add the smoked sausage, corn, bell pepper, onion, and garlic. Season with Old Bay seasoning, salt, and pepper, and let it simmer for about 10-15 minutes until the vegetables are tender and the flavors meld together.

    While the broth is simmering, prepare the grits according to package instructions, stirring in butter and cheddar cheese until creamy and smooth.

    Once the sausage and vegetables are cooked, add the shrimp and cook for an additional 3-5 minutes until the shrimp are pink and opaque. Serve the shrimp and sausage mixture over a generous scoop of grits, garnished with fresh parsley and lemon wedges on the side.

    Extra Tips:

    For added depth of flavor, consider incorporating other seafood options like crab or mussels into the boil. You can also adjust the spice level by adding red pepper flakes or hot sauce to the broth.

    If you prefer a thicker consistency for the grits, simply reduce the amount of liquid used. Make sure to serve the dish hot, and encourage diners to squeeze fresh lemon juice over their servings for a bright finish.

    Enjoy this hearty meal with some crusty bread and a side salad for a complete Southern feast!

    Beer-Braised Seafood Boil

    seafood simmered in beer

    A Beer-Braised Seafood Boil is a delightful and flavorful dish that brings together the taste of the ocean with the rich, malty notes of beer. This recipe combines succulent shrimp, tender crab legs, and seasonal vegetables, all infused with the aromatic essence of your favorite brew.

    Perfect for gatherings or a cozy night in, this seafood boil showcases how simple ingredients can come together to create a memorable meal.

    Ingredients:

    • 2 pounds of shrimp, deveined and shells on
    • 2 pounds of crab legs
    • 4 ears of corn, cut in half
    • 1 pound of small potatoes, halved
    • 1 onion, quartered
    • 4 cloves of garlic, minced
    • 2-3 bottles of your favorite beer (lager or ale)
    • 1/4 cup of Old Bay seasoning
    • 1 lemon, halved
    • Salt and pepper to taste
    • Fresh parsley, chopped (for garnish)

    Cooking Instructions:

    In a large pot, fill with water and bring to a boil. Add the potatoes and corn, cooking for about 10-15 minutes or until the potatoes are tender.

    Once cooked, drain the water and return the vegetables to the pot. Pour in the beer and add the Old Bay seasoning, garlic, onion, and lemon halves. Bring the mixture back to a simmer.

    After a few minutes, gently fold in the shrimp and crab legs, cooking for an additional 5-7 minutes or until the shrimp are pink and the crab legs are heated through. Stir occasionally to guarantee even cooking.

    Extra Tips:

    For an even more flavorful boil, consider adding additional spices such as cayenne pepper for heat or smoked paprika for a smoky depth.

    You can also play around with different types of beer to find the flavor profile that suits your taste. If you're looking to make this dish a bit heartier, feel free to add sausage or other seafood like mussels and clams.

    Remember to have plenty of napkins on hand, as this dish can get messy but is all part of the fun! Enjoy your seafood boil family-style, with everyone digging in from the same pot for an interactive dining experience.

    Mediterranean-Inspired Seafood Boil

    seafood boil with mediterranean flavors

    A Mediterranean-Inspired Seafood Boil is a vibrant and flavorful dish that brings the tastes of the Mediterranean coast right to your table. This delightful recipe combines a variety of seafood with aromatic herbs, zesty lemon, and fresh vegetables, creating a feast that's perfect for gatherings or a cozy family dinner.

    The blend of spices and ingredients not only boosts the natural sweetness of the seafood but also adds a revitalizing twist that's characteristic of Mediterranean cuisine.

    Ingredients:

    • 1 pound shrimp, deveined
    • 1 pound mussels, cleaned
    • 1 pound clams, cleaned
    • 1 pound baby potatoes, halved
    • 1 pound chorizo sausage, sliced
    • 1 red bell pepper, chopped
    • 1 yellow bell pepper, chopped
    • 1 large onion, diced
    • 4 cloves garlic, minced
    • 2 lemons, quartered
    • 1/4 cup olive oil
    • 1 tablespoon smoked paprika
    • 1 teaspoon red pepper flakes
    • 1 tablespoon fresh oregano, chopped
    • Salt and pepper to taste
    • Fresh parsley for garnish

    Cooking Instructions:

    In a large pot, bring salted water to a boil and add the baby potatoes. Cook for about 10-12 minutes, or until they're fork-tender.

    Add the chorizo, red and yellow bell peppers, onion, and garlic, cooking for an additional 5 minutes. Next, add the shrimp, mussels, and clams, followed by the olive oil, smoked paprika, red pepper flakes, and oregano.

    Squeeze the juice of two lemon quarters into the pot, then toss everything together. Cover and cook for about 5-7 minutes, or until the seafood is fully cooked and the mussels and clams have opened.

    Season with salt and pepper to taste, then serve hot, garnished with fresh parsley and additional lemon wedges.

    Extra Tips:

    For an even richer flavor, consider adding white wine to the pot during the cooking process, which pairs beautifully with seafood.

    You can also customize the vegetables based on what's in season or your personal preferences; zucchini and corn can be fantastic additions.

    Be sure to serve the dish with crusty bread for dipping into the flavorful broth, and don't forget to have some extra lemon on hand to brighten the dish further!

    Tropical Island Seafood Boil

    tropical seafood boil feast

    Indulge in a taste of paradise with this Tropical Island Seafood Boil that brings together the vibrant flavors of the tropics. This dish is perfect for a summer gathering, combining succulent shrimp, tender crab legs, and sweet corn, all infused with tropical spices and served with a zesty dipping sauce.

    The colorful presentation and delightful aromas will transport you and your guests straight to a sun-soaked beach, making it a memorable feast for any occasion.

    Ingredients:

    • 2 pounds of large shrimp, deveined
    • 2 pounds of crab legs
    • 4 ears of corn, cut into halves
    • 1 pound of baby potatoes
    • 1/4 cup of Old Bay seasoning
    • 1 tablespoon of garlic powder
    • 1 tablespoon of onion powder
    • 1 teaspoon of cayenne pepper (adjust to taste)
    • 1 lemon, halved
    • 1/4 cup of fresh parsley, chopped
    • 4 tablespoons of butter, melted
    • Salt and pepper to taste

    Cooking Instructions:

    In a large pot, bring water to a boil and add the baby potatoes. Cook for about 10-15 minutes until they're tender.

    Add the corn halves and continue boiling for an additional 5 minutes. Next, add the shrimp and crab legs, along with the Old Bay seasoning, garlic powder, onion powder, and cayenne pepper.

    Squeeze in the juice from the lemon halves and season with salt and pepper. Cook everything together for about 5-7 minutes, or until the shrimp are pink and the crab legs are heated through.

    Drain the water and transfer the seafood and vegetables onto a large serving platter. Drizzle with melted butter and garnish with fresh parsley before serving.

    Extra Tips:

    For an added tropical flair, consider incorporating other seafood options such as mussels or clams.

    You can also serve the boil with a variety of dipping sauces, such as a spicy garlic butter or a tangy mango salsa, to elevate the flavors.

    To make clean-up easier, line your serving table with butcher paper and serve the seafood directly on it for a fun, communal dining experience.

    Remember to adjust the spice levels according to your preference and enjoy the vibrant culinary journey!

    Vegan-Friendly Seafood Boil Alternative

    plant based seafood boil

    If you're craving the flavors of a seafood boil but want to keep it plant-based, this vegan-friendly seafood boil alternative is the perfect solution. This dish combines a medley of vegetables, protein-rich plant-based seafood alternatives, and bold seasonings to create a satisfying and hearty meal that captures the essence of a traditional seafood boil without the use of any animals.

    With a delightful blend of spices and fresh ingredients, your taste buds will be treated to a delicious seafood experience that everyone can enjoy.

    Ingredients:

    • 1 pound baby potatoes, halved
    • 1 pound corn on the cob, cut into thirds
    • 1 pound green beans, trimmed
    • 1 pound vegan shrimp or scallops
    • 1 large onion, quartered
    • 4 cloves garlic, minced
    • 2 tablespoons Old Bay seasoning
    • 1 tablespoon smoked paprika
    • 1 lemon, sliced
    • 4 tablespoons vegan butter
    • Salt and pepper to taste
    • Fresh parsley, chopped (for garnish)

    Instructions:

    In a large pot, bring water to a boil and add the halved baby potatoes. Cook for about 10 minutes until they start to soften.

    Add the corn, green beans, and onion, and continue boiling for another 5 minutes. Next, stir in the vegan shrimp or scallops, garlic, Old Bay seasoning, smoked paprika, lemon slices, and vegan butter.

    Season with salt and pepper to taste. Allow the mixture to simmer for about 5-7 minutes, or until the vegetables are tender and the vegan seafood is heated through.

    Carefully drain the pot, then transfer the mixture to a large serving platter, garnishing with fresh parsley before serving.

    Extra Tips:

    Feel free to customize this recipe by incorporating your favorite vegetables or vegan seafood alternatives.

    For extra flavor, consider adding a splash of vegetable broth or a sprinkle of cayenne pepper for a bit of heat. If you enjoy a bit of tanginess, a squeeze of fresh lemon juice before serving can enhance the dish even further.

    Serve your vegan seafood boil with crusty bread or over a bed of rice for a complete meal. Enjoy!

  • 10 Best Grilled Shrimp Recipes

    10 Best Grilled Shrimp Recipes

    If you want to take your summer cookouts to the next level, grilled shrimp is the way to go. It's quick, easy, and there are so many flavor-packed recipes to try! From zesty Lemon Garlic to spicy Cajun, each dish is a taste explosion. Plus, who doesn't love a good shrimp skewer? Whether it's a family dinner or a backyard barbecue, your guests will be raving about these dishes. Ready to find out which recipe suits your taste buds?

    Lemon Garlic Grilled Shrimp

    Lemon Garlic Grilled Shrimp is a delightful and flavorful dish that brings together the zesty brightness of lemon and the aromatic essence of garlic, perfectly complementing the natural sweetness of succulent shrimp.

    This quick and easy recipe is ideal for summer barbecues or weeknight dinners, allowing you to enjoy a taste of the coast right in your own backyard. With just a few simple ingredients and a short marinating time, you'll have a delicious seafood dish that's sure to impress family and friends.

    Ingredients:

    • 1 pound large shrimp, peeled and deveined
    • 3 tablespoons olive oil
    • 3 cloves garlic, minced
    • Juice and zest of 1 lemon
    • 1 teaspoon salt
    • ½ teaspoon black pepper
    • ½ teaspoon red pepper flakes (optional)
    • Fresh parsley, chopped (for garnish)

    Cooking Instructions:

    In a mixing bowl, combine the olive oil, minced garlic, lemon juice, lemon zest, salt, pepper, and red pepper flakes if using.

    Add the shrimp to the bowl and toss to coat them evenly in the marinade. Allow the shrimp to marinate for about 15-30 minutes for the flavors to meld.

    Preheat your grill to medium-high heat and lightly oil the grates.

    Thread the marinated shrimp onto skewers, making sure to leave a little space between each shrimp for even cooking.

    Grill the shrimp for 2-3 minutes on each side or until they turn pink and opaque.

    Remove from the grill and garnish with freshly chopped parsley before serving.

    Extra Tips:

    For an even more intense flavor, consider marinating the shrimp for up to an hour, but avoid marinating for too long as the acidity from the lemon can start to "cook" the shrimp.

    If you're using wooden skewers, soak them in water for at least 30 minutes before grilling to prevent them from burning.

    Feel free to customize the marinade with your favorite herbs or spices, and serve the grilled shrimp over a bed of rice or salad for a complete meal. Enjoy!

    Spicy Cajun Grilled Shrimp

    cajun marinated grilled shrimp

    If you're looking to add a kick to your grilled shrimp, this Spicy Cajun Grilled Shrimp recipe is the perfect choice. The bold flavors of Cajun spices combined with the sweetness of the shrimp create a delightful dish that's perfect for a summer barbecue or a quick weeknight meal.

    The shrimp are marinated to absorb all the spicy goodness, then grilled to perfection for a smoky, charred finish. Serve these succulent shrimp with a side of rice, a fresh salad, or in tacos for a delicious and satisfying meal.

    Ingredients:

    • 1 pound large shrimp, peeled and deveined
    • 2 tablespoons olive oil
    • 2 tablespoons Cajun seasoning
    • 1 teaspoon garlic powder
    • 1 teaspoon onion powder
    • 1 teaspoon smoked paprika
    • 1/2 teaspoon cayenne pepper (adjust for spice preference)
    • Salt and pepper to taste
    • Juice of 1 lime
    • Fresh parsley, chopped (for garnish)

    Cooking Instructions:

    In a large bowl, combine the olive oil, Cajun seasoning, garlic powder, onion powder, smoked paprika, cayenne pepper, salt, pepper, and lime juice to create a marinade.

    Add the shrimp to the bowl and toss to coat them evenly with the marinade. Let the shrimp marinate for at least 30 minutes, allowing the flavors to meld.

    Preheat your grill to medium-high heat. Thread the marinated shrimp onto skewers, ensuring they're spaced evenly.

    Grill the shrimp for 2-3 minutes on each side or until they turn pink and opaque, being careful not to overcook them. Remove from the grill and garnish with fresh parsley before serving.

    Extra Tips:

    To improve the flavor, consider adding some fresh herbs like thyme or oregano to the marinade.

    If you prefer an even spicier kick, try adding a dash of hot sauce to the marinade.

    If using wooden skewers, soak them in water for about 30 minutes prior to grilling to prevent burning.

    Additionally, for a smoky flavor, you can use a grill basket or foil to prevent the shrimp from falling through the grates.

    Enjoy your delicious Spicy Cajun Grilled Shrimp with a variety of sides or as a part of a vibrant seafood platter!

    Honey Soy Glazed Shrimp

    Honey Soy Glazed Shrimp is a delightful dish that balances sweet and savory flavors, making it a perfect choice for a quick weeknight dinner or a weekend gathering. The shrimp are marinated in a rich honey soy sauce mixture, then grilled to perfection, resulting in a tender and flavorful seafood dish that pairs beautifully with rice or a fresh salad.

    This recipe isn't only simple to prepare but also offers a great way to impress your family and friends with minimal effort.

    Ingredients:

    • 1 pound large shrimp, peeled and deveined
    • 1/4 cup soy sauce
    • 1/4 cup honey
    • 2 tablespoons olive oil
    • 2 cloves garlic, minced
    • 1 tablespoon fresh ginger, grated
    • 1 tablespoon sesame oil
    • 1 tablespoon rice vinegar
    • 1/2 teaspoon red pepper flakes (optional)
    • Chopped green onions and sesame seeds for garnish

    Cooking Instructions:

    In a mixing bowl, whisk together the soy sauce, honey, olive oil, minced garlic, grated ginger, sesame oil, rice vinegar, and red pepper flakes if using.

    Add the shrimp to the marinade, making sure they're well coated, and let them marinate for at least 30 minutes in the refrigerator.

    Preheat the grill to medium-high heat and thread the marinated shrimp onto skewers. Grill the shrimp for about 2-3 minutes on each side or until they're opaque and slightly charred.

    Remove from the grill and garnish with chopped green onions and sesame seeds before serving.

    Extra Tips:

    For the best flavor, allow the shrimp to marinate for at least an hour, or even overnight if you have the time.

    When grilling, make sure your grill is well-preheated to achieve that lovely char without overcooking the shrimp.

    If you prefer a less sweet glaze, you can adjust the amount of honey to your taste.

    Additionally, consider serving the shrimp over a bed of steamed rice or alongside grilled vegetables for a complete meal.

    Don't forget to keep an eye on the shrimp as they cook, as they can quickly become tough if overcooked.

    Mediterranean Herb Grilled Shrimp

    grilled shrimp with herbs

    Grilled shrimp with Mediterranean herbs is a delightful dish that captures the essence of the Mediterranean coastline. The succulent shrimp are marinated in a mix of fresh herbs and zesty lemon juice, making them a perfect addition to any summer barbecue or a light dinner.

    This recipe isn't only easy to prepare but also bursting with flavor, allowing the natural sweetness of the shrimp to shine through. Serve them with a revitalizing salad or over a bed of couscous for a complete meal.

    Ingredients:

    • 1 pound large shrimp, peeled and deveined
    • 3 tablespoons olive oil
    • Juice of 1 lemon
    • 2 cloves garlic, minced
    • 1 tablespoon fresh parsley, chopped
    • 1 tablespoon fresh basil, chopped
    • 1 tablespoon fresh oregano, chopped
    • 1 teaspoon salt
    • 1/2 teaspoon black pepper
    • Skewers (if using wooden skewers, soak them in water for 30 minutes)

    Cooking Instructions:

    In a medium bowl, whisk together the olive oil, lemon juice, minced garlic, parsley, basil, oregano, salt, and pepper to create the marinade.

    Add the shrimp to the bowl and toss until they're evenly coated. Allow the shrimp to marinate in the refrigerator for at least 30 minutes to absorb the flavors.

    Preheat your grill to medium-high heat and thread the marinated shrimp onto the skewers. Grill the shrimp for about 2-3 minutes on each side, or until they turn pink and opaque, being careful not to overcook them.

    Extra Tips:

    For an extra layer of flavor, consider adding a pinch of red pepper flakes to the marinade for a touch of heat.

    Additionally, make sure your grill is properly preheated to prevent the shrimp from sticking; using a grill basket can also help if you're concerned about the shrimp falling through the grates.

    To improve the presentation, serve the grilled shrimp with lemon wedges and a sprinkle of fresh herbs on top. Enjoy your Mediterranean herb grilled shrimp as a vibrant and tasty dish that's sure to impress your guests!

    Coconut Lime Grilled Shrimp

    Coconut Lime Grilled Shrimp is a delightful dish that combines the tropical flavors of coconut and lime, creating a revitalizing and zesty experience perfect for summer cookouts or casual dinners.

    The shrimp are marinated in a luscious coconut milk mixture infused with fresh lime juice and zest, then grilled to perfection, resulting in tender, juicy shrimp with a subtle sweetness and tang. This dish pairs beautifully with a side of jasmine rice or a crisp green salad, making it a fantastic choice for any seafood lover.

    Ingredients:

    • 1 pound large shrimp, peeled and deveined
    • 1 cup coconut milk
    • 2 tablespoons fresh lime juice
    • Zest of 1 lime
    • 2 tablespoons olive oil
    • 2 cloves garlic, minced
    • 1 teaspoon salt
    • 1/2 teaspoon black pepper
    • 1/4 teaspoon red pepper flakes (optional)
    • Fresh cilantro, for garnish

    Instructions:

    In a mixing bowl, combine the coconut milk, lime juice, lime zest, olive oil, minced garlic, salt, black pepper, and red pepper flakes (if using) to create the marinade.

    Add the shrimp to the bowl, ensuring they're well coated, and cover with plastic wrap. Allow the shrimp to marinate in the refrigerator for at least 30 minutes, or up to 2 hours for more flavor.

    Preheat your grill to medium-high heat and lightly oil the grates. Thread the marinated shrimp onto skewers and grill for 2-3 minutes on each side or until they turn pink and opaque.

    Remove from the grill and garnish with fresh cilantro before serving.

    Extra Tips:

    For the best flavor, choose fresh, high-quality shrimp and avoid overcooking them, as they can become tough and rubbery.

    You can also customize the marinade by adding other spices or herbs, such as ginger or cilantro, to improve the flavor profile.

    If you don't have skewers, you can grill the shrimp directly on the grates or use a grill basket to prevent them from falling through.

    Serve the Coconut Lime Grilled Shrimp with lime wedges for an extra burst of citrus flavor!

    Chimichurri Grilled Shrimp

    grilled shrimp with chimichurri

    Chimichurri Grilled Shrimp is a vibrant and flavorful dish that showcases the delightful combination of fresh herbs and zesty lime. This recipe highlights the succulent shrimp marinated in a bold chimichurri sauce, which adds a punch of garlic, parsley, and a hint of spice.

    Perfect for grilling season, these shrimp can be served as a main dish, in tacos, or atop a fresh salad for a delicious and healthy meal.

    Ingredients:

    • 1 pound large shrimp, peeled and deveined
    • 1 cup fresh parsley, finely chopped
    • 1/2 cup olive oil
    • 1/4 cup red wine vinegar
    • 4 cloves garlic, minced
    • 1 teaspoon red pepper flakes
    • 1 teaspoon dried oregano
    • Salt and pepper to taste
    • Juice of 1 lime
    • Skewers (if using wooden skewers, soak in water for 30 minutes)

    Cooking Instructions:

    In a bowl, whisk together the parsley, olive oil, red wine vinegar, garlic, red pepper flakes, oregano, lime juice, salt, and pepper to create the chimichurri sauce.

    Reserve a small amount of the sauce for serving later. Toss the shrimp in the remaining chimichurri sauce, ensuring they're well-coated, and allow them to marinate for at least 30 minutes.

    Preheat the grill to medium-high heat and thread the shrimp onto skewers. Grill the shrimp for 2-3 minutes per side or until they turn pink and opaque.

    Remove from the grill and drizzle with the reserved chimichurri sauce before serving.

    Extra Tips:

    For an even more intense flavor, consider marinating the shrimp for a few hours or overnight in the chimichurri sauce.

    Be cautious not to overcook the shrimp, as they can become rubbery; they only need to be cooked until just opaque.

    If you're looking for a smoky twist, try adding a pinch of smoked paprika to the marinade.

    Serve your Chimichurri Grilled Shrimp with fresh lime wedges and a side of grilled vegetables or a simple salad for a complete meal.

    Teriyaki Grilled Shrimp Skewers

    grilled shrimp teriyaki skewers

    Teriyaki Grilled Shrimp Skewers are a delightful and savory dish that brings a touch of the grill to your summer gatherings or weeknight dinners. The combination of succulent shrimp marinated in a sweet and tangy teriyaki sauce, grilled to perfection, is sure to impress your family and friends.

    These skewers aren't only flavorful but also quick to prepare, making them an ideal choice for those who want to enjoy a delicious meal without spending hours in the kitchen.

    Ingredients:

    • 1 pound large shrimp, peeled and deveined
    • 1/2 cup teriyaki sauce
    • 2 tablespoons olive oil
    • 2 cloves garlic, minced
    • 1 tablespoon fresh ginger, grated
    • 1 tablespoon honey
    • 1 tablespoon sesame seeds (optional)
    • Green onions, chopped (for garnish)
    • Skewers (soaked in water if wooden)

    Cooking Instructions:

    In a medium bowl, whisk together the teriyaki sauce, olive oil, minced garlic, grated ginger, and honey until well combined.

    Add the peeled and deveined shrimp to the marinade, ensuring they're well coated. Cover the bowl and let the shrimp marinate in the refrigerator for at least 30 minutes, or up to 2 hours for more flavor.

    Preheat your grill to medium-high heat, then thread the marinated shrimp onto the skewers, leaving a little space between each shrimp.

    Grill the skewers for about 2-3 minutes on each side, or until the shrimp are pink and opaque. Remove from the grill and sprinkle with sesame seeds and chopped green onions before serving.

    Extra Tips:

    To improve the flavor of your Teriyaki Grilled Shrimp Skewers, consider adding some colorful vegetables to the skewers, such as bell peppers, zucchini, or red onion.

    These not only add nutrition but also create a visually appealing dish. Additionally, keep an eye on the shrimp while grilling; they cook quickly and can become tough if overcooked.

    Finally, feel free to experiment with different types of teriyaki sauce or add a splash of lime juice for an extra zing!

    Garlic Butter Grilled Shrimp

    garlic butter shrimp recipe

    Garlic Butter Grilled Shrimp is a succulent and flavorful dish that can enhance any summer barbecue or weeknight dinner. The combination of fresh shrimp marinated in a rich garlic butter sauce brings out the natural sweetness of the shrimp while adding a delightful savory touch. This easy recipe is perfect for those who want to impress their guests or simply enjoy a delicious meal at home.

    Ingredients:

    • 1 pound large shrimp, peeled and deveined
    • 1/2 cup unsalted butter, melted
    • 4 cloves garlic, minced
    • 1 tablespoon fresh lemon juice
    • 1 teaspoon paprika
    • 1/2 teaspoon salt
    • 1/4 teaspoon black pepper
    • 2 tablespoons fresh parsley, chopped (for garnish)
    • Lemon wedges (for serving)

    Instructions:

    In a large bowl, whisk together the melted butter, minced garlic, lemon juice, paprika, salt, and black pepper.

    Add the shrimp to the marinade and toss to coat evenly. Allow the shrimp to marinate for at least 30 minutes, but no longer than 1 hour to prevent the shrimp from becoming tough.

    Preheat your grill to medium-high heat and lightly oil the grill grates.

    Thread the marinated shrimp onto skewers and grill for 2-3 minutes on each side, or until they turn pink and opaque.

    Remove from the grill, garnish with fresh parsley, and serve with lemon wedges.

    Extra Tips:

    For the best flavor, be sure to use fresh garlic rather than garlic powder, as the fresh garlic adds a robust taste that complements the shrimp perfectly.

    If you're grilling skewers, consider using metal skewers to prevent sticking, or soak wooden skewers in water for about 30 minutes beforehand to reduce the risk of burning.

    Feel free to customize the marinade by adding a splash of hot sauce for some heat or experimenting with different herbs like thyme or oregano.

    Enjoy your Garlic Butter Grilled Shrimp with a side of grilled vegetables or over a bed of rice for a complete meal!

    Southwest Chipotle Grilled Shrimp

    spicy grilled shrimp recipe

    If you're looking to add a burst of flavor to your grilled shrimp, the Southwest Chipotle Grilled Shrimp recipe is just what you need. This dish combines the smoky, spicy notes of chipotle with the fresh zest of lime and garlic, creating a delightful marinade that will raise your shrimp to new heights.

    Perfect for summer barbecues or a quick weeknight dinner, these shrimp are easy to prepare and sure to impress your guests.

    Ingredients:

    • 1 pound large shrimp, peeled and deveined
    • 2 tablespoons olive oil
    • 2 tablespoons lime juice
    • 1 teaspoon chipotle powder
    • 1 teaspoon smoked paprika
    • 2 cloves garlic, minced
    • 1 teaspoon ground cumin
    • Salt and pepper to taste
    • Fresh cilantro, for garnish (optional)
    • Lime wedges, for serving

    Cooking Instructions:

    In a large bowl, whisk together the olive oil, lime juice, chipotle powder, smoked paprika, minced garlic, ground cumin, salt, and pepper until well combined.

    Add the shrimp to the bowl and toss to coat them evenly with the marinade. Cover the bowl and let the shrimp marinate in the refrigerator for at least 30 minutes, allowing the flavors to meld.

    Preheat your grill to medium-high heat, then skewer the marinated shrimp (if using wooden skewers, soak them in water for at least 30 minutes beforehand).

    Grill the shrimp for 2-3 minutes on each side, or until they turn pink and opaque. Remove from the grill and serve with fresh cilantro and lime wedges.

    Extra Tips:

    For the best results, use fresh shrimp if possible, as they tend to have a better texture and flavor compared to frozen shrimp.

    Be careful not to over-marinate the shrimp, as the acidity from the lime juice can start to "cook" them, making them tough.

    If you want to add even more depth of flavor, consider adding a splash of tequila to the marinade.

    Finally, serve the shrimp with a side of grilled vegetables or a fresh salad to complement the spicy kick of the chipotle.

    Enjoy your delicious Southwest Chipotle Grilled Shrimp!

    Pesto Grilled Shrimp With Veggies

    pesto shrimp with vegetables

    Pesto grilled shrimp with veggies is a delightful dish that combines the freshness of shrimp and seasonal vegetables, all infused with the vibrant flavors of basil pesto. This easy-to-make recipe is perfect for a summer barbecue or a quick weeknight dinner, and it offers a nutritious meal that's both satisfying and full of flavor.

    With just a few simple ingredients and some quick cooking on the grill, you can enjoy a dish that impresses family and friends alike.

    Ingredients:

    • 1 pound large shrimp, peeled and deveined
    • 1 cup cherry tomatoes, halved
    • 1 bell pepper, sliced
    • 1 zucchini, sliced
    • 1 cup basil pesto
    • 2 tablespoons olive oil
    • Salt and pepper to taste
    • Skewers (if using wooden skewers, soak in water for 30 minutes)

    Instructions:

    In a large mixing bowl, combine the shrimp, cherry tomatoes, bell pepper, and zucchini. Add the basil pesto, olive oil, salt, and pepper, tossing everything together until well-coated.

    Preheat your grill to medium-high heat. Thread the shrimp and vegetables onto skewers, alternating between the shrimp and the veggies for a colorful presentation.

    Place the skewers on the grill and cook for about 2-3 minutes per side, or until the shrimp turn pink and opaque, and the vegetables are tender.

    Extra Tips:

    To guarantee the shrimp remain juicy and flavorful, avoid overcooking them; they cook quickly, so keep an eye on them while grilling.

    If you want to add an extra layer of flavor, consider marinating the shrimp in the pesto for 30 minutes before grilling.

    You can also customize the vegetables based on what you have on hand or your personal preferences—asparagus, mushrooms, or even corn can work wonderfully in this dish.

    Finally, serve the skewers with extra pesto on the side for dipping or drizzling for an added burst of flavor.

  • 10 Best Lobster Roll Recipes

    10 Best Lobster Roll Recipes

    Are you ready to plunge into the delicious world of lobster rolls? Whether you love the classic New England style or crave something a bit spicier, there's a perfect recipe waiting for you. Think buttery toasted buns filled with tender lobster meat, or zesty variations that'll make your taste buds dance. Curious about what unique twists you can try? Let's investigate the top 10 lobster roll recipes that'll have you hooked!

    Classic Lobster Roll

    A classic lobster roll is a delightful seafood sandwich that brings the flavors of the coast to your dining table. Typically featuring tender lobster meat mixed with a light dressing and served in a buttery toasted bun, the simplicity of this dish allows the fresh taste of lobster to shine through.

    Perfect for a summer picnic or a casual dinner, this recipe will guide you in creating a lobster roll that's both authentic and delicious.

    Ingredients:

    • 1 pound cooked lobster meat, chopped
    • 1/4 cup mayonnaise
    • 1 tablespoon lemon juice
    • 1 tablespoon chopped fresh chives
    • Salt and pepper to taste
    • 4 New England-style hot dog buns
    • 2 tablespoons unsalted butter
    • Lettuce leaves (for serving, optional)

    Instructions:

    In a mixing bowl, combine the chopped lobster meat, mayonnaise, lemon juice, chives, salt, and pepper, stirring gently to combine without breaking up the lobster too much.

    In a skillet, melt the butter over medium heat, then add the hot dog buns, toasting them until golden brown on both sides.

    Once the buns are toasted, fill each with the lobster mixture and serve immediately, optionally garnished with lettuce leaves for added freshness.

    Extra Tips:

    For the best flavor, use fresh lobster meat if possible, as it improves the general taste of the roll.

    If you're using frozen lobster, be sure to thaw it thoroughly and pat it dry before mixing.

    Additionally, feel free to customize the dressing by adding a touch of Dijon mustard or chopped celery for extra crunch.

    Serve your lobster rolls with a side of chips or coleslaw for a complete meal that screams summer.

    Spicy Lobster Roll

    lobster roll with spice

    If you're looking to spice up your seafood experience, a Spicy Lobster Roll is the perfect dish to tantalize your taste buds. This delicious twist on the classic lobster roll combines succulent lobster meat with a zesty, spicy mayo that brings a kick to each bite.

    Served in a buttery toasted roll and topped with fresh vegetables, it's a delightful way to enjoy this gourmet seafood treat.

    Ingredients:

    • 1 pound cooked lobster meat, chopped
    • 1/4 cup mayonnaise
    • 1 tablespoon sriracha sauce (adjust to taste)
    • 1 tablespoon lemon juice
    • 1 teaspoon Dijon mustard
    • Salt and pepper to taste
    • 4 New England-style hot dog rolls
    • 2 tablespoons unsalted butter, softened
    • 1/4 cup diced celery
    • 1/4 cup diced green onions
    • Lettuce leaves (optional, for serving)

    Instructions:

    In a mixing bowl, combine the chopped lobster meat, mayonnaise, sriracha, lemon juice, Dijon mustard, celery, and green onions. Mix gently until the lobster is well-coated with the spicy mayo mixture.

    Season with salt and pepper to taste.

    Meanwhile, heat a skillet over medium heat and add the butter. Once melted, toast the hot dog rolls in the skillet until golden brown. Remove the rolls from the skillet, and if desired, line them with lettuce leaves.

    Fill each roll generously with the spicy lobster mixture and serve immediately.

    Extra Tips:

    For an extra layer of flavor, try adding diced jalapeños or a sprinkle of cayenne pepper into the lobster mixture for additional heat.

    You can also substitute the sriracha with another hot sauce if you prefer a different flavor profile.

    To improve the crispness, consider adding a squeeze of lime or a dash of hot sauce just before serving.

    Pair your Spicy Lobster Rolls with crispy fries or a revitalizing coleslaw for a complete meal that will impress your guests!

    New England Style Lobster Roll

    New England Style Lobster Rolls are a classic coastal delight, celebrated for their simplicity and fresh flavors. Originating from the shores of Maine, this dish features tender lobster meat tossed in a light dressing and served in a buttery, toasted bun.

    Perfect for summer picnics or casual gatherings, the lobster roll is a true taste of New England that brings the essence of the ocean right to your plate.

    Ingredients:

    • 1 pound cooked lobster meat, chopped
    • 1/4 cup mayonnaise
    • 1 tablespoon lemon juice
    • 1 tablespoon chopped fresh chives
    • Salt and pepper to taste
    • 4 New England-style hot dog buns
    • 2 tablespoons unsalted butter
    • Lettuce leaves (optional, for serving)

    Instructions:

    In a mixing bowl, combine the chopped lobster meat, mayonnaise, lemon juice, chives, salt, and pepper. Mix gently until the lobster is well-coated with the dressing but still retains its chunky texture.

    In a skillet, melt the butter over medium heat, and toast the hot dog buns until golden brown on both sides. Once toasted, place a lettuce leaf inside each bun (if using) and generously fill with the lobster mixture. Serve immediately for the best taste and texture.

    Extra Tips:

    For an even more authentic New England experience, use freshly caught lobster if available, as it has the best flavor and texture.

    You can also experiment with the dressing by adding a pinch of Old Bay seasoning or diced celery for extra crunch. Serve the lobster rolls with a side of potato chips or coleslaw, and enjoy the fresh flavors of the coast!

    Connecticut Lobster Roll

    fresh lobster on bread

    Connecticut lobster rolls are a delightful seafood dish that showcases the fresh, succulent flavor of lobster in a simple, yet elegant way. Unlike its Maine counterpart, which is typically served with mayonnaise, the Connecticut version highlights warm, buttered lobster meat served in a toasted bun. This recipe captures the essence of coastal New England dining, making it perfect for a summer gathering or a cozy dinner at home.

    Ingredients:

    • 1 pound fresh lobster meat (cooked and chopped)
    • 4 tablespoons unsalted butter
    • 2 tablespoons lemon juice
    • 1 teaspoon Old Bay seasoning (optional)
    • Salt and pepper to taste
    • 4 New England-style hot dog buns
    • Fresh chives or parsley for garnish (optional)

    Instructions:

    In a skillet over medium heat, melt the butter until it's bubbling, then add the chopped lobster meat. Stir in the lemon juice, Old Bay seasoning, salt, and pepper, and cook for about 3-5 minutes until the lobster is heated through.

    While the lobster is warming, lightly toast the hot dog buns in a separate pan or under a broiler until golden brown. Once the lobster is hot, generously fill each bun with the mixture and garnish with fresh chives or parsley if desired. Serve immediately for the best experience.

    Extra Tips:

    For the ultimate flavor, try to use freshly cooked lobster if possible, as it will provide the best texture and taste.

    Adjust the seasoning to your liking—some people prefer a bit more lemon juice for brightness or more Old Bay for a spicier kick. If you're looking to enhance your lobster roll further, consider adding a sprinkle of freshly cracked black pepper or a dash of hot sauce for an extra layer of flavor.

    Lobster Roll With Lemon Herb Butter

    Indulge in a delightful Lobster Roll with Lemon Herb Butter that perfectly balances the richness of lobster with the zesty brightness of lemon and fresh herbs. This recipe will guide you through the process of creating a luxurious lobster roll that's sure to impress your guests or make for a delicious treat for yourself.

    With tender lobster meat coated in a flavorful lemon herb butter and served in a toasted bun, this dish is the epitome of summer dining.

    Ingredients:

    • 1 pound cooked lobster meat, chopped
    • 4 tablespoons unsalted butter, melted
    • Zest and juice of 1 lemon
    • 2 tablespoons fresh parsley, finely chopped
    • 1 tablespoon fresh chives, finely chopped
    • Salt and pepper, to taste
    • 4 New England-style hot dog buns
    • 1 tablespoon olive oil
    • Lettuce leaves (optional)

    Instructions:

    In a medium bowl, combine the melted butter, lemon zest, lemon juice, parsley, chives, salt, and pepper to create the lemon herb butter.

    Gently fold in the chopped lobster meat until well coated.

    Heat a skillet over medium heat and add the olive oil.

    Lightly toast the hot dog buns in the skillet until golden brown on both sides.

    If using, place a lettuce leaf inside each bun, then generously fill with the lobster mixture.

    Serve immediately while the rolls are warm and the lobster is fresh.

    Extra Tips:

    For the best flavor, try to use fresh lobster meat rather than pre-packaged options, as it will improve the taste of your roll.

    If you're feeling adventurous, consider adding a pinch of cayenne pepper or a dash of hot sauce to the lobster mixture for a spicy kick.

    Additionally, serving your lobster rolls with a side of crispy potato chips or a light salad can complement the richness of the dish beautifully.

    Enjoy your cooking!

    Avocado Lobster Roll

    creamy avocado lobster sandwich

    Avocado lobster rolls are a fresh and modern twist on the classic seafood sandwich, combining the sweet, succulent flavors of lobster with the creamy richness of ripe avocado. This light yet satisfying dish is perfect for a summer lunch or dinner, and it can be prepared in just a matter of minutes.

    By using fresh ingredients and simple techniques, you can create a delicious and elegant meal that showcases the delicate taste of lobster while adding a hint of avocado's buttery texture.

    Ingredients:

    • 1 pound cooked lobster meat, chopped
    • 1 ripe avocado, diced
    • 2 tablespoons mayonnaise
    • 1 tablespoon fresh lemon juice
    • 1 tablespoon fresh cilantro or parsley, chopped
    • Salt and pepper to taste
    • 4 hot dog buns or split-top rolls
    • 2 tablespoons butter (for toasting the buns)
    • Lettuce leaves (for serving)

    Instructions:

    In a mixing bowl, combine the chopped lobster meat, diced avocado, mayonnaise, lemon juice, chopped cilantro or parsley, and season with salt and pepper to taste.

    Gently fold the ingredients together until well mixed, taking care not to mash the avocado too much.

    In a skillet over medium heat, melt the butter and toast the hot dog buns until golden brown.

    Once the buns are toasted, place a leaf of lettuce inside each bun and generously fill them with the lobster and avocado mixture.

    Serve immediately for the best flavor and texture.

    Extra Tips:

    For an extra layer of flavor, consider adding a pinch of cayenne pepper or a dash of hot sauce to the lobster mixture for a bit of heat.

    You can also experiment with different herbs, such as dill or chives, to customize the flavor to your liking.

    If you prefer a healthier option, substitute Greek yogurt for the mayonnaise.

    Additionally, using freshly caught lobster will enhance the taste, but if that's not available, high-quality frozen or pre-cooked lobster can work well too.

    Enjoy your delicious avocado lobster rolls!

    Lobster Roll With Celery and Chives

    lobster roll with chives

    Lobster rolls are a delightful way to enjoy the sweet, succulent meat of lobster, and this version with celery and chives adds a revitalizing crunch and flavor. Perfect for a summer picnic or a casual lunch at home, this recipe combines tender lobster meat with crisp celery and aromatic chives, all enveloped in a buttery toasted roll.

    Serve it alongside some potato chips or a crisp salad for a complete meal that will impress your family and friends.

    Ingredients:

    • 1 pound cooked lobster meat, chopped
    • 2 tablespoons mayonnaise
    • 1 tablespoon Dijon mustard
    • 1 cup celery, finely diced
    • 2 tablespoons fresh chives, chopped
    • Salt and pepper to taste
    • 4 New England-style hot dog buns
    • 2 tablespoons unsalted butter, softened
    • Lemon wedges for serving

    Instructions:

    In a mixing bowl, combine the chopped lobster meat, mayonnaise, Dijon mustard, diced celery, and chopped chives. Season the mixture with salt and pepper to taste, stirring until all ingredients are well incorporated.

    Next, heat a skillet over medium heat and spread softened butter on the outside of each hot dog bun. Toast the buns in the skillet until golden brown on both sides.

    Once toasted, generously fill each bun with the lobster mixture and serve immediately with lemon wedges on the side.

    Extra Tips:

    For the best flavor, use fresh lobster meat when possible, as it will improve the overall taste of the roll. If you're using frozen lobster, make sure to thaw it properly before cooking.

    You can adjust the amount of celery and chives according to your preference for crunch and flavor. Additionally, feel free to experiment with other ingredients like a splash of lemon juice or a sprinkle of Old Bay seasoning for an extra kick.

    Enjoy your lobster rolls with a chilled beverage for a revitalizing summer treat!

    Lobster Roll With Sriracha Mayo

    spicy lobster sandwich delight

    Lobster rolls are a delightful seafood treat, perfect for summer picnics or a casual lunch. The combination of sweet, succulent lobster meat with a zesty Sriracha mayo boosts this classic dish to new heights.

    This recipe is simple yet flavorful, providing a perfect balance of creaminess and heat, making it a hit for lobster lovers and newcomers alike.

    Ingredients:

    • 1 pound cooked lobster meat, chopped
    • 4 hot dog buns or split-top rolls
    • 1/4 cup mayonnaise
    • 2 tablespoons Sriracha sauce (adjust to taste)
    • 1 tablespoon fresh lemon juice
    • 1 tablespoon chopped fresh chives or scallions
    • Salt and pepper to taste
    • Butter for toasting buns
    • Lettuce leaves for garnish (optional)

    Instructions:

    In a mixing bowl, combine the chopped lobster meat, mayonnaise, Sriracha sauce, lemon juice, chives, and season with salt and pepper.

    Mix gently until all ingredients are well incorporated. In a skillet, melt a little butter over medium heat and toast the hot dog buns until golden brown on both sides.

    Once the buns are toasted, fill each bun generously with the lobster mixture. Serve immediately, garnished with lettuce if desired.

    Extra Tips:

    For the best flavor, use fresh lobster meat if you can. If using frozen lobster, make sure to thaw it completely and drain any excess moisture to prevent a soggy roll.

    You can also experiment with the Sriracha quantity to suit your spice preference. For added crunch, consider incorporating diced celery or cucumber into the lobster mixture.

    Enjoy your lobster rolls with a side of potato chips or a light salad for a complete meal!

    Lobster Roll With Garlic Aioli

    lobster roll with aioli

    Lobster rolls are a classic New England delicacy that perfectly combines the sweet, tender meat of lobster with a creamy, flavorful sauce. This recipe features a delightful garlic aioli that boosts the richness of the lobster, making each bite a luxurious treat.

    Whether you're enjoying it on a sunny day by the beach or as a special dinner at home, this lobster roll with garlic aioli is sure to impress your guests and satisfy your seafood cravings.

    Ingredients:

    • 1 pound cooked lobster meat, chopped
    • 4 hot dog buns or New England-style rolls
    • 2 tablespoons unsalted butter, melted
    • 1 tablespoon lemon juice
    • Salt and pepper to taste
    • 1/2 cup mayonnaise
    • 2 cloves garlic, minced
    • 1 tablespoon fresh parsley, chopped
    • Optional: lettuce leaves for serving

    Cooking Instructions:

    In a bowl, combine the chopped lobster meat, mayonnaise, minced garlic, lemon juice, parsley, salt, and pepper, mixing well until the lobster is fully coated in the aioli.

    In a skillet over medium heat, brush the outside of the hot dog buns with melted butter and toast them until golden brown.

    Once toasted, fill each bun with the lobster mixture, and if desired, place a leaf of lettuce inside for added crunch. Serve immediately and enjoy your delicious lobster rolls!

    Extra Tips:

    For an extra layer of flavor, consider adding a dash of Old Bay seasoning or a sprinkle of paprika to the lobster mixture.

    If you want a bit of heat, a few dashes of hot sauce can uplift the dish.

    When selecting lobster, fresh or frozen lobster meat can be used, but make sure it's cooked and chilled before preparing the rolls.

    Additionally, serving the lobster rolls with a side of coleslaw or chips can add a nice contrast to the meal. Enjoy your culinary creation!

    Lobster Roll Salad Wrap

    lobster salad wrapped delight

    Lobster Roll Salad Wrap is a fresh and delicious twist on the classic lobster roll, combining the succulent flavors of lobster with crisp vegetables and a light dressing, all wrapped up in a tender tortilla.

    This dish is perfect for a summer picnic, a light lunch, or an elegant appetizer. With minimal cooking required, it allows the natural sweetness of the lobster to shine through while adding a rejuvenating crunch from the veggies.

    Ingredients:

    • 1 pound cooked lobster meat, chopped
    • 1/4 cup mayonnaise
    • 1 tablespoon Dijon mustard
    • 1 tablespoon lemon juice
    • 1/2 cup celery, diced
    • 1/4 cup red onion, finely chopped
    • 1/4 cup fresh chives, chopped
    • Salt and pepper to taste
    • 4 large lettuce leaves (Romaine or Butter lettuce)
    • 4 large tortillas (flour or whole wheat)

    Instructions:

    In a large mixing bowl, combine the chopped lobster meat, mayonnaise, Dijon mustard, lemon juice, diced celery, red onion, and chives.

    Gently mix until all ingredients are well-coated with the dressing. Season the mixture with salt and pepper to taste.

    Lay out the tortillas and place a lettuce leaf on each. Spoon the lobster salad mixture evenly onto the lettuce leaves, then roll the tortillas tightly to create wraps.

    Slice in half at an angle and serve immediately, or chill in the refrigerator for a short while before serving.

    Extra Tips:

    For best results, use fresh lobster meat if possible, as it improves the flavor of the wrap considerably.

    If you want to add more texture, consider incorporating some diced cucumbers or avocados into the salad.

    Feel free to experiment with different herbs, such as dill or parsley, to customize the flavor to your liking.

    Finally, if you're preparing these wraps ahead of time, keep the lobster salad and tortillas separate until you're ready to serve to prevent sogginess.

  • 10 Best Clam Chowder Recipes

    10 Best Clam Chowder Recipes

    If you love clam chowder, you're in for a treat! There are so many delicious ways to whip up this classic dish. From the creamy goodness of New England Clam Chowder to the zesty Manhattan version, each recipe has its own flair. And don't forget the fun twists like Spicy Clam Chowder with Chorizo or even a vegan option! Curious about what else is out there? Let's investigate some of the best recipes together!

    Classic New England Clam Chowder

    Classic New England Clam Chowder is a rich and creamy soup that showcases the delightful flavors of fresh clams, potatoes, and aromatic vegetables. This comforting dish is perfect for chilly days and can be served as an appetizer or a main course.

    The combination of tender clams and a velvety broth makes it a favorite among seafood lovers. Follow this recipe to create your own bowl of delicious clam chowder that will warm you from the inside out.

    Ingredients:

    • 4 slices of bacon, chopped
    • 1 medium onion, diced
    • 2 celery stalks, diced
    • 2 medium potatoes, peeled and diced
    • 2 cups clam juice
    • 1 cup heavy cream
    • 1 can (about 10 ounces) chopped clams, drained (reserve juice)
    • 1 teaspoon dried thyme
    • Salt and pepper to taste
    • Fresh parsley, chopped (for garnish)

    Cooking Instructions:

    In a large pot, cook the chopped bacon over medium heat until crispy. Remove the bacon and set aside, leaving the drippings in the pot.

    Add the diced onion and celery to the pot and sauté until the vegetables are tender. Stir in the diced potatoes and add the clam juice, reserved clam juice, and thyme. Bring to a simmer and cook until the potatoes are tender, about 15-20 minutes.

    Lower the heat and stir in the heavy cream and chopped clams. Season with salt and pepper to taste, then let the chowder heat through for a few more minutes. Serve hot, garnished with crispy bacon and fresh parsley.

    Extra Tips:

    For a more robust flavor, consider using fresh clams instead of canned, but be sure to clean them thoroughly before cooking.

    If you prefer a thicker chowder, you can mash some of the cooked potatoes before adding the cream, or create a roux with butter and flour to thicken it. Additionally, letting the chowder sit for an hour after cooking allows the flavors to meld beautifully.

    Enjoy your homemade clam chowder with crusty bread for a complete meal!

    Manhattan Clam Chowder

    tomato based seafood soup

    Manhattan Clam Chowder is a deliciously hearty soup that offers a delightful twist on the traditional creamy clam chowder. Instead of a milky base, this version incorporates a tomato-based broth that perfectly complements the briny flavor of the clams and the freshness of vegetables.

    It's a comforting dish that can be enjoyed year-round, making it perfect for a family dinner or a gathering with friends.

    Ingredients:

    • 2 cans (6.5 oz each) of chopped clams, drained and juice reserved
    • 4 strips of bacon, diced
    • 1 medium onion, chopped
    • 2 cloves garlic, minced
    • 2 medium potatoes, diced
    • 1 cup celery, chopped
    • 1 cup carrots, chopped
    • 1 can (14.5 oz) diced tomatoes, undrained
    • 2 cups clam juice (or water)
    • 1 teaspoon dried thyme
    • 1 teaspoon dried oregano
    • Salt and pepper to taste
    • Fresh parsley, chopped (for garnish)

    Cooking Instructions:

    In a large pot, cook the diced bacon over medium heat until crisp. Remove the bacon with a slotted spoon and set aside, leaving the rendered fat in the pot.

    Add the onions, garlic, celery, and carrots to the pot, cooking until the vegetables are tender. Stir in the diced potatoes, reserved clam juice, diced tomatoes, thyme, oregano, and the cooked bacon.

    Bring the mixture to a boil, then reduce the heat and let it simmer for about 20-25 minutes, or until the potatoes are soft. Finally, add the drained clams and cook for an additional 5 minutes to heat through. Adjust seasoning with salt and pepper.

    Extra Tips:

    For an added depth of flavor, consider using fresh clams if available; just be sure to steam them open before adding them to the chowder.

    Additionally, feel free to customize the vegetables according to your preference—corn or bell peppers can add a nice sweet crunch. If you prefer a thicker chowder, you can mash some of the potatoes in the pot or add a tablespoon of cornstarch mixed with water before simmering.

    Serve the chowder hot and garnish with fresh parsley for a vibrant finish!

    Creamy Corn and Clam Chowder

    Creamy Corn and Clam Chowder is a delightful twist on the classic clam chowder, combining the sweetness of corn with the briny flavor of clams to create a rich and comforting bowl of goodness. This chowder is perfect for chilly days or whenever you need a hearty meal.

    The creamy base, infused with seasonings, improves the natural flavors of the clams and corn, making it an irresistible dish for both clam lovers and newcomers alike.

    Ingredients:

    • 4 slices of bacon, diced
    • 1 medium onion, chopped
    • 2 cloves garlic, minced
    • 2 medium potatoes, peeled and diced
    • 2 cups corn kernels (fresh or frozen)
    • 1 can (10 oz) chopped clams, drained (reserve the juice)
    • 2 cups clam juice
    • 2 cups heavy cream
    • 1 teaspoon thyme
    • Salt and pepper to taste
    • Chopped parsley for garnish

    Cooking Instructions:

    In a large pot, cook the diced bacon over medium heat until crispy. Remove the bacon and set aside, leaving the rendered fat in the pot.

    Add the chopped onion to the pot and sauté until translucent, about 5 minutes, then stir in the minced garlic and cook for an additional minute.

    Add the diced potatoes, corn, reserved clam juice, and clam juice to the pot, and bring to a simmer. Cook until the potatoes are tender, approximately 15-20 minutes.

    Once the potatoes are cooked, stir in the heavy cream, thyme, and clams. Let it heat through for a few minutes, then season with salt and pepper. Serve hot, garnished with bacon and chopped parsley.

    Extra Tips:

    For an extra depth of flavor, consider using fresh clams if available, as they can improve the taste of your chowder.

    You can also adjust the thickness of the chowder by adding more or less cream based on your preference. If you want a bit of spice, a dash of cayenne pepper or a sprinkle of red pepper flakes can add a pleasant kick.

    Finally, this chowder keeps well in the refrigerator for a couple of days, making it perfect for leftovers or meal prep!

    Spicy Clam Chowder With Chorizo

    spicy chorizo clam chowder

    Spicy clam chowder with chorizo is a delicious twist on the classic seafood soup, combining the rich flavors of clams and creamy potatoes with the smokiness and heat of chorizo sausage. This dish is perfect for chilly evenings or as a hearty meal to impress your guests.

    The blend of spices and ingredients gives it a unique kick that enhances the traditional chowder to new heights, making it both comforting and exciting.

    Ingredients:

    • 1 lb chorizo sausage, casings removed
    • 4 slices bacon, diced
    • 1 onion, diced
    • 3 cloves garlic, minced
    • 2 medium potatoes, peeled and diced
    • 2 cups clam juice
    • 1 cup heavy cream
    • 2 cans (6.5 oz each) chopped clams, drained
    • 1 teaspoon smoked paprika
    • 1 teaspoon cayenne pepper (adjust to taste)
    • Salt and pepper to taste
    • Fresh parsley, chopped (for garnish)

    Cooking Instructions:

    In a large pot over medium heat, cook the chorizo and bacon until browned and crispy, about 5-7 minutes. Remove the chorizo and bacon from the pot, leaving the rendered fat.

    In the same pot, add diced onions and cook until translucent, then add garlic and sauté for another minute. Stir in the diced potatoes, clam juice, smoked paprika, cayenne pepper, and season with salt and pepper.

    Bring the mixture to a boil, then reduce heat to a simmer and cook until the potatoes are tender, about 15 minutes. Add the heavy cream and clams, returning the chorizo and bacon to the pot. Simmer for an additional 5 minutes until heated through.

    Extra Tips:

    For an even richer flavor, consider adding a splash of white wine when sautéing the onions and garlic.

    If you prefer a thicker chowder, you can mash some of the potatoes against the side of the pot after they've cooked, or stir in a tablespoon of cornstarch mixed with a little water.

    Adjust the spice levels to your liking, and feel free to top each bowl with a dollop of sour cream or a sprinkle of crushed red pepper for an extra kick. Enjoy with crusty bread for the full experience!

    Coconut Curry Clam Chowder

    Coconut Curry Clam Chowder is a delightful twist on the classic clam chowder, combining the richness of coconut milk with the warm spices of curry to create a unique and flavorful dish. This chowder isn't only comforting but also brings a vibrant taste that's sure to impress your family and friends.

    With tender clams, aromatic vegetables, and a hint of heat, this soup is perfect for a cozy dinner or a special occasion.

    Ingredients:

    • 2 cans (8 oz each) of chopped clams, drained and juice reserved
    • 1 can (14 oz) of coconut milk
    • 1 medium onion, diced
    • 2 cloves garlic, minced
    • 2 medium potatoes, diced
    • 1 carrot, diced
    • 2 tablespoons curry powder
    • 1 tablespoon olive oil
    • 4 cups vegetable or seafood broth
    • Salt and pepper to taste
    • Fresh cilantro, for garnish
    • Lime wedges, for serving

    In a large pot, heat the olive oil over medium heat and sauté the diced onion and minced garlic until fragrant and translucent.

    Add the diced carrots and potatoes, stirring for about 5 minutes. Sprinkle in the curry powder, mixing well to coat the vegetables.

    Pour in the vegetable or seafood broth along with the reserved clam juice and bring to a simmer. Cook until the potatoes and carrots are tender, about 15 minutes.

    Once the vegetables are cooked, stir in the coconut milk and clams, cooking for an additional 5 minutes to heat through.

    Season with salt and pepper to taste, and serve hot, garnished with fresh cilantro and lime wedges.

    When making Coconut Curry Clam Chowder, feel free to adjust the amount of curry powder to suit your taste preferences; if you enjoy a spicier kick, consider adding a pinch of red pepper flakes.

    You can also customize the vegetables based on what you have on hand—zucchini or bell peppers would work well.

    For a creamier texture, blend a portion of the chowder before adding the clams, or use an immersion blender.

    This chowder can be made ahead of time and reheated, but be sure to add the clams just before serving to keep them tender.

    Enjoy this unique take on chowder with crusty bread or over a bed of rice for a hearty meal!

    Clam Chowder With Bacon and Leeks

    bacon leek clam chowder recipe

    Clam chowder with bacon and leeks is a delicious variation of the classic dish, bringing a smoky richness from the bacon and a subtle sweetness from the leeks. This creamy soup is perfect for chilly evenings and can be served with crusty bread for dipping.

    The combination of fresh clams and tender vegetables creates a comforting bowl of flavor that will warm you from the inside out.

    Ingredients:

    • 4 slices of bacon, chopped
    • 2 leeks, white and light green parts only, sliced
    • 2 cloves garlic, minced
    • 2 cups diced potatoes
    • 4 cups clam juice
    • 2 cups fresh clams, cleaned and chopped (or 2 cans of clams)
    • 1 cup heavy cream
    • Salt and pepper to taste
    • Fresh parsley, chopped (for garnish)

    Cooking Instructions:

    In a large pot, cook the chopped bacon over medium heat until crispy, then remove it with a slotted spoon and set aside, leaving the rendered fat in the pot.

    Add the sliced leeks to the pot and sauté for about 5 minutes until they're softened. Stir in the minced garlic and cook for an additional minute.

    Add the diced potatoes and clam juice, bringing the mixture to a gentle boil. Once boiling, reduce the heat and let it simmer for about 15 minutes, or until the potatoes are tender.

    Stir in the chopped clams, heavy cream, and season with salt and pepper. Allow it to heat through for an additional 5 minutes before serving, garnished with the reserved bacon and fresh parsley.

    Extra Tips:

    For a richer flavor, consider using a combination of fresh and canned clams, and don't hesitate to add a splash of white wine to the pot while sautéing the leeks.

    Adjust the thickness of the chowder by adding more or less cream to your taste. To improve the smoky flavor, try using smoked bacon or adding a dash of smoked paprika.

    Finally, let the chowder sit for a few minutes after cooking; it will allow the flavors to meld beautifully.

    Vegan Clam Chowder With Cauliflower

    If you're craving the creamy comfort of clam chowder but want to keep it plant-based, this Vegan Clam Chowder with Cauliflower is the perfect solution. This recipe uses cauliflower to create a rich and velvety base, mimicking the creaminess of traditional chowder while incorporating a medley of vegetables for added flavor and nutrition.

    Simple to make and packed with savory goodness, this chowder will delight vegans and non-vegans alike.

    Ingredients:

    • 1 medium head of cauliflower, chopped
    • 1 tablespoon olive oil
    • 1 onion, diced
    • 2 cloves garlic, minced
    • 2 medium potatoes, diced
    • 3 cups vegetable broth
    • 1 can (15 oz) coconut milk
    • 1 teaspoon dried thyme
    • 1 teaspoon smoked paprika
    • Salt and pepper to taste
    • 1 cup corn (fresh, frozen, or canned)
    • 2 tablespoons nutritional yeast (optional)
    • Fresh parsley, for garnish

    Instructions:

    In a large pot, heat the olive oil over medium heat and sauté the diced onion until translucent, about 5 minutes.

    Add the minced garlic and cook for an additional minute until fragrant.

    Stir in the chopped cauliflower, diced potatoes, vegetable broth, dried thyme, and smoked paprika.

    Bring to a boil, then reduce the heat and simmer for about 15-20 minutes, or until the cauliflower and potatoes are tender.

    Once cooked, blend the mixture using an immersion blender until smooth and creamy.

    Stir in the coconut milk, corn, and nutritional yeast (if using), then season with salt and pepper to taste.

    Heat through, and serve hot, garnished with fresh parsley.

    Extra Tips:

    For an extra layer of flavor, consider adding a splash of lemon juice or a dash of hot sauce before serving to brighten the dish.

    If you prefer a chunkier chowder, reserve some of the cooked cauliflower and potatoes, and stir them back into the blended mixture.

    Additionally, this chowder can be made ahead of time and reheated, as the flavors only get better with time.

    Just be sure to stir well before serving, as the chowder may thicken upon cooling.

    Enjoy your delicious and satisfying vegan clam chowder!

    Clam Chowder With Roasted Garlic

    Clam Chowder with Roasted Garlic is a delicious twist on the classic recipe, infusing the creamy goodness of traditional clam chowder with the rich, sweet flavors of roasted garlic. This dish is perfect for a cozy evening at home or to impress guests at a dinner party.

    The roasted garlic adds depth and complexity, making every spoonful a comforting delight. Paired with fresh clams and a blend of aromatic ingredients, this chowder is sure to become a favorite in your home.

    Ingredients:

    • 2 heads of garlic
    • 2 tablespoons olive oil
    • 4 cups clams, cleaned and chopped (or canned clams)
    • 4 slices of bacon, chopped
    • 1 onion, diced
    • 2 celery stalks, diced
    • 2 medium potatoes, peeled and cubed
    • 4 cups clam juice or seafood stock
    • 1 cup heavy cream
    • 2 tablespoons fresh thyme, chopped
    • Salt and pepper to taste
    • Chopped parsley for garnish

    Cooking Instructions:

    Preheat your oven to 400°F (200°C) and wrap the heads of garlic in aluminum foil with a drizzle of olive oil, then roast for about 30-35 minutes until soft and caramelized.

    While the garlic is roasting, in a large pot, cook the chopped bacon over medium heat until crispy, then remove and set aside. In the same pot, add the diced onion and celery, cooking until softened.

    Stir in the cubed potatoes and clam juice, bringing to a boil before reducing to a simmer. Once the garlic is roasted, squeeze the cloves into the pot, add the clams, and let everything simmer for about 15 minutes.

    Finally, stir in the heavy cream and chopped thyme, seasoning with salt and pepper to taste, and garnish with parsley before serving.

    Extra Tips:

    For an added depth of flavor, consider using a mix of fresh and canned clams to improve the texture and taste.

    If you prefer a thicker chowder, you can mash some of the potatoes in the pot to create a creamier consistency.

    Don't forget to taste and adjust the seasoning as you go, as the flavors will develop with time.

    Serve the chowder with crusty bread for dipping, making it a complete and satisfying meal. Enjoy your culinary creation!

    Instant Pot Clam Chowder

    creamy seafood soup recipe

    Instant Pot clam chowder is a quick and easy way to enjoy this classic dish without spending hours in the kitchen. Using the Instant Pot not only speeds up the cooking process but also melds the flavors beautifully, resulting in a rich and creamy chowder that's perfect for any occasion.

    With just a handful of ingredients and minimal prep time, you can have a comforting bowl of clam chowder ready to serve in no time.

    Ingredients:

    • 4 slices of bacon, chopped
    • 1 medium onion, diced
    • 2 cloves garlic, minced
    • 3 medium potatoes, peeled and diced
    • 3 cups clam juice
    • 1 cup heavy cream
    • 2 (6.5 oz) cans of chopped clams, drained (reserve liquid)
    • 1 teaspoon dried thyme
    • Salt and pepper, to taste
    • Fresh parsley, chopped (for garnish)

    Instructions:

    Start by setting your Instant Pot to the sauté function. Add the chopped bacon and cook until crispy, then remove and set aside, leaving the grease in the pot.

    Add the diced onion and sauté until translucent, followed by the minced garlic for another minute. Stir in the diced potatoes, clam juice, reserved clam liquid, and thyme.

    Seal the Instant Pot lid and cook on high pressure for 8 minutes. Once the cooking time is complete, carefully release the pressure.

    Stir in the heavy cream and chopped clams, and season with salt and pepper. Serve hot, garnished with crispy bacon and fresh parsley.

    Extra Tips:

    For a thicker chowder, you can mash some of the potatoes after cooking or add a cornstarch slurry (1 tablespoon of cornstarch mixed with 1 tablespoon of water) before serving.

    Feel free to customize your chowder by adding other vegetables like corn or celery for extra flavor and texture. If you prefer a smokier taste, try using smoked bacon or adding a dash of smoked paprika.

    Always taste and adjust the seasoning before serving to guarantee the flavors are just right.

    Seafood Medley Clam Chowder

    seafood clam chowder recipe

    Seafood Medley Clam Chowder is a delightful twist on the traditional clam chowder, bringing an array of flavors from the ocean right to your bowl. This recipe combines tender clams with a variety of seafood, creating a rich and hearty chowder that's perfect for a cozy night in or a special gathering. The creamy base, infused with the essence of fresh herbs and spices, raises the dish to a new level of deliciousness.

    Ingredients:

    • 2 cups chopped clams (fresh or canned)
    • 1 cup shrimp, peeled and deveined
    • 1 cup scallops
    • 1 cup chopped potatoes
    • 1 cup chopped celery
    • 1 cup chopped onions
    • 1 cup chopped carrots
    • 4 cups fish or seafood stock
    • 2 cups heavy cream
    • 2 tablespoons butter
    • 2 cloves garlic, minced
    • 1 teaspoon thyme
    • 1 teaspoon parsley
    • Salt and pepper to taste

    Instructions:

    In a large pot over medium heat, melt the butter and sauté the onions, celery, and carrots until they become tender, about 5 minutes.

    Add the garlic and thyme, cooking for an additional minute until fragrant.

    Stir in the potatoes and seafood stock, bringing the mixture to a simmer. Allow it to cook for about 15 minutes, or until the potatoes are tender.

    Next, add the clams, shrimp, and scallops, cooking for another 5 minutes until the seafood is just cooked through.

    Finally, stir in the heavy cream and parsley, seasoning with salt and pepper to taste, then remove from heat.

    Extra Tips:

    For a deeper flavor, consider adding a splash of white wine to the pot while sautéing the vegetables.

    If you prefer a thicker chowder, you can mix a tablespoon of cornstarch with a bit of water and stir it in after adding the cream.

    Additionally, serving the chowder with crusty bread or oyster crackers can improve the experience, making it a comforting meal.

    Remember to adjust the seasoning based on the saltiness of your seafood stock, and feel free to customize the seafood medley according to your preferences!

  • 10 Best Mahi Mahi Recipes

    10 Best Mahi Mahi Recipes

    If you're looking to spice up your dinner routine, Mahi Mahi is the perfect fish to investigate. It's mild, flaky, and super versatile, making it ideal for all sorts of tasty dishes. From zesty tacos topped with fresh mango salsa to a comforting coconut stew, the options are endless. Ready to take your taste buds on a flavorful journey? Let's plunge into some of the best Mahi Mahi recipes that'll have everyone asking for seconds!

    Grilled Mahi Mahi Tacos With Mango Salsa

    Grilled Mahi Mahi Tacos with Mango Salsa is a delightful dish that combines the succulent flavors of grilled fish with the sweetness of fresh mango salsa, making it perfect for a summer meal or a fun taco night.

    The Mahi Mahi is seasoned to perfection and grilled until flaky, then served in warm tortillas and topped with a vibrant mango salsa that adds a tropical twist. This dish isn't only delicious but also healthy, packed with protein and fresh ingredients that will have everyone coming back for seconds.

    Ingredients:

    • 1 pound Mahi Mahi fillets
    • 1 tablespoon olive oil
    • 1 teaspoon chili powder
    • 1 teaspoon garlic powder
    • 1 teaspoon cumin
    • Salt and pepper to taste
    • 8 small corn tortillas
    • 1 ripe mango, diced
    • 1/2 red onion, finely chopped
    • 1 jalapeño, seeded and diced
    • 1/4 cup fresh cilantro, chopped
    • Juice of 1 lime

    Cooking Instructions:

    Preheat your grill to medium-high heat and lightly oil the grates.

    In a small bowl, mix together the olive oil, chili powder, garlic powder, cumin, salt, and pepper to create a marinade. Brush the marinade onto both sides of the Mahi Mahi fillets.

    Grill the fillets for about 4-5 minutes per side, or until the fish is opaque and flakes easily with a fork.

    While the fish is grilling, prepare the mango salsa by combining the diced mango, red onion, jalapeño, cilantro, and lime juice in a bowl.

    Once the fish is done, let it rest for a couple of minutes, then flake it into pieces and serve in warmed corn tortillas, topped with the mango salsa.

    Extra Tips:

    For the best flavor, allow the Mahi Mahi to marinate for at least 30 minutes before grilling.

    You can also customize your salsa by adding ingredients like diced avocado or bell peppers for extra flavor and texture.

    If you don't have a grill, this recipe can easily be modified to cook the Mahi Mahi in a skillet or under a broiler.

    Additionally, serve with lime wedges on the side for an extra burst of freshness!

    Baked Mahi Mahi With Lemon and Capers

    lemon caper baked mahi mahi

    Baked Mahi Mahi with Lemon and Capers is a delightful dish that combines the fresh, mild flavor of mahi mahi with the zesty brightness of lemon and the briny notes of capers.

    This recipe isn't only easy to prepare but also makes for a healthy and delicious meal that can be served on any occasion. The combination of ingredients enriches the natural flavor of the fish, making it a perfect choice for a quick weeknight dinner or a special gathering.

    Ingredients:

    • 4 mahi mahi fillets
    • 2 tablespoons olive oil
    • 2 tablespoons capers, drained and rinsed
    • 1 lemon, juiced and zested
    • 2 cloves garlic, minced
    • Salt and pepper, to taste
    • Fresh parsley, chopped (for garnish)
    • Lemon slices (for garnish)

    Cooking Instructions:

    Preheat your oven to 375°F (190°C).

    In a small bowl, mix together the olive oil, lemon juice, lemon zest, minced garlic, capers, salt, and pepper.

    Place the mahi mahi fillets in a baking dish and pour the lemon-caper mixture over the top, ensuring the fish is well coated.

    Bake in the preheated oven for 15-20 minutes, or until the fish flakes easily with a fork.

    Once done, remove from the oven, garnish with fresh parsley and lemon slices, and serve immediately.

    Extra Tips:

    For the best flavor, try to use fresh mahi mahi if possible, as frozen fish can sometimes lose its texture and taste.

    Additionally, you can adjust the amount of capers based on your preference for saltiness.

    To add a bit more depth, consider including a sprinkle of paprika or red pepper flakes for a hint of spice.

    This dish pairs beautifully with steamed vegetables or a light salad for a complete meal.

    Blackened Mahi Mahi With Avocado Crema

    Blackened Mahi Mahi with Avocado Crema is a delicious and flavorful dish that brings a taste of the tropics to your dinner table. The mahi mahi is seasoned with a bold blend of spices, then seared to perfection, giving it a delightful crust while maintaining its tender and flaky texture.

    Paired with a creamy avocado crema, this dish isn't only visually appealing but also bursting with fresh and zesty flavors that will impress your family and guests alike.

    Ingredients:

    • 4 mahi mahi fillets
    • 2 tablespoons olive oil
    • 1 tablespoon paprika
    • 1 teaspoon cayenne pepper
    • 1 teaspoon garlic powder
    • 1 teaspoon onion powder
    • 1 teaspoon dried thyme
    • 1 teaspoon salt
    • 1/2 teaspoon black pepper
    • 1 ripe avocado
    • 1/2 cup sour cream
    • Juice of 1 lime
    • Salt to taste

    Instructions:

    Start by preparing the blackened seasoning by mixing paprika, cayenne pepper, garlic powder, onion powder, dried thyme, salt, and black pepper in a small bowl.

    Pat the mahi mahi fillets dry with paper towels and rub the spice mixture evenly over both sides of the fish.

    Heat olive oil in a skillet over medium-high heat until shimmering. Add the seasoned mahi mahi fillets to the skillet and cook for about 3-4 minutes on each side, or until the fish is cooked through and has a charred crust.

    While the fish cooks, prepare the avocado crema by blending the ripe avocado, sour cream, lime juice, and a pinch of salt in a food processor until smooth and creamy.

    Serve the blackened mahi mahi hot, drizzled with avocado crema.

    Extra Tips:

    For the best results, make sure your skillet is hot enough before adding the fish to achieve that perfect blackened crust.

    If you're sensitive to spice, adjust the amount of cayenne pepper in the seasoning mix according to your taste.

    This dish pairs well with a side of rice or a fresh salad, making it a versatile option for any meal.

    Feel free to garnish with fresh cilantro or lime wedges for an added touch of brightness!

    Mahi Mahi Stir-Fry With Vegetables

    mahi mahi vegetable stir fry

    Mahi Mahi stir-fry with vegetables is a vibrant and healthy dish that combines the succulent flavors of fresh fish with the crunch of colorful vegetables. This quick and easy recipe is perfect for a weeknight dinner, packed with protein and nutrients while delivering a satisfying meal that can be served over rice or noodles. With the right balance of seasoning and fresh ingredients, this stir-fry will become a family favorite.

    Ingredients:

    • 1 pound Mahi Mahi fillets, cut into bite-sized pieces
    • 2 tablespoons vegetable oil
    • 1 bell pepper, sliced
    • 1 cup broccoli florets
    • 1 cup snap peas
    • 2 cloves garlic, minced
    • 1 tablespoon ginger, minced
    • 3 tablespoons soy sauce
    • 1 tablespoon sesame oil
    • Salt and pepper to taste
    • Cooked rice or noodles, for serving
    • Sesame seeds and green onions for garnish (optional)

    To prepare the stir-fry, heat the vegetable oil in a large skillet or wok over medium-high heat. Add the Mahi Mahi pieces and cook for about 3-4 minutes until they start to brown and are opaque throughout. Remove the fish from the pan and set aside.

    In the same pan, add the garlic and ginger, sautéing for about 30 seconds until fragrant. Then, add the bell pepper, broccoli, and snap peas, cooking for another 4-5 minutes until the vegetables are tender but still crisp.

    Return the Mahi Mahi to the pan, pour in the soy sauce and sesame oil, and toss everything together, cooking for an additional 1-2 minutes to heat through. Season with salt and pepper to taste. Serve over cooked rice or noodles, garnished with sesame seeds and green onions if desired.

    When cooking Mahi Mahi stir-fry, make sure that you don't overcook the fish, as it can become dry. For added flavor, consider marinating the Mahi Mahi in a mix of soy sauce, garlic, and ginger for 30 minutes before cooking.

    You can also customize the vegetables based on what you have at home or what's in season; zucchini, carrots, and snap peas all work well. Finally, serve the stir-fry immediately to enjoy the best texture and flavor.

    Citrus-Glazed Mahi Mahi

    Citrus-Glazed Mahi Mahi is a vibrant and flavorful dish that brings a revitalizing taste to your dining table. The combination of citrus juices and zesty flavors improves the natural sweetness of the mahi mahi, making it a perfect choice for a light yet satisfying meal.

    This recipe isn't only easy to prepare but is also a fantastic way to impress your guests with a delightful dish that captures the essence of the tropics.

    Ingredients:

    • 4 mahi mahi fillets
    • 1/4 cup orange juice
    • 1/4 cup lime juice
    • 2 tablespoons honey
    • 1 tablespoon soy sauce
    • 2 cloves garlic, minced
    • 1 tablespoon olive oil
    • Salt and pepper to taste
    • Fresh cilantro for garnish (optional)

    Instructions:

    In a small bowl, whisk together the orange juice, lime juice, honey, soy sauce, and minced garlic to create the citrus glaze.

    Season the mahi mahi fillets with salt and pepper, then heat olive oil in a skillet over medium-high heat.

    Add the fillets to the skillet and cook for about 4-5 minutes on each side or until they're golden brown and cooked through.

    During the last minute of cooking, pour the citrus glaze over the mahi mahi, allowing it to caramelize slightly.

    Once cooked, remove from heat and serve garnished with fresh cilantro if desired.

    Extra Tips:

    When cooking mahi mahi, be careful not to overcook it, as it can become dry.

    Using a meat thermometer to check for doneness (145°F) can help guarantee the fish remains moist and tender.

    If you want to add more depth to the flavor, consider marinating the mahi mahi in the citrus glaze for 30 minutes before cooking.

    This will infuse the fish with even more citrusy goodness.

    Additionally, pairing the dish with a side of grilled vegetables or a light salad can complement the flavors beautifully.

    Mahi Mahi Fish Stew With Coconut Milk

    coconut milk fish stew

    Mahi Mahi Fish Stew with Coconut Milk is a delightful and vibrant dish that combines the rich flavors of fresh fish with the creaminess of coconut milk, creating a comforting and hearty meal. This stew isn't only easy to prepare but also brings a tropical twist to your dining table, making it perfect for family gatherings or cozy dinners.

    The combination of spices and fresh vegetables improves the natural sweetness of the Mahi Mahi, resulting in a dish that's both satisfying and flavorful.

    Ingredients

    • 1 pound Mahi Mahi fillets, cut into bite-sized pieces
    • 1 can (13.5 oz) coconut milk
    • 1 medium onion, chopped
    • 2 cloves garlic, minced
    • 1 bell pepper, chopped
    • 1 medium carrot, sliced
    • 1 cup diced tomatoes (fresh or canned)
    • 2 cups vegetable or fish broth
    • 1 tablespoon olive oil
    • 1 teaspoon ground cumin
    • 1 teaspoon paprika
    • 1 teaspoon turmeric
    • Salt and pepper to taste
    • Fresh cilantro or parsley for garnish
    • Lime wedges for serving

    Cooking Instructions

    In a large pot, heat the olive oil over medium heat and sauté the chopped onion and garlic until they're soft and fragrant.

    Add the bell pepper and carrot, cooking for an additional 5 minutes until the vegetables begin to soften.

    Stir in the diced tomatoes, cumin, paprika, and turmeric, allowing the spices to toast slightly before adding the vegetable or fish broth and coconut milk.

    Bring the mixture to a gentle boil, then reduce the heat and let it simmer for about 10 minutes.

    Gently add the Mahi Mahi pieces to the pot, cooking for another 5-7 minutes until the fish is cooked through and flakes easily with a fork.

    Season with salt and pepper to taste, and finish with a sprinkle of fresh cilantro or parsley before serving with lime wedges on the side.

    Extra Tips

    For a more intense flavor, consider marinating the Mahi Mahi in lime juice, garlic, and spices for about 30 minutes before cooking.

    If you enjoy a spicier kick, add some chopped jalapeños or a dash of cayenne pepper to the stew.

    Feel free to experiment with additional vegetables like spinach or sweet potatoes for added nutrition.

    This stew pairs wonderfully with jasmine rice or crusty bread to soak up the delicious coconut broth, making it a complete and satisfying meal.

    Teriyaki Mahi Mahi With Pineapple

    grilled fish with pineapple

    Teriyaki Mahi Mahi with pineapple is a delightful dish that brings together the rich flavors of the ocean and the sweetness of tropical fruit. This recipe is perfect for a summer barbecue or a cozy dinner at home. The savory teriyaki glaze complements the flaky texture of the mahi mahi, while the pineapple adds a rejuvenating burst of sweetness.

    With minimal preparation, this dish can be on your table in no time, making it an excellent choice for both novice and experienced cooks.

    Ingredients:

    • 2 mahi mahi fillets (about 6 oz each)
    • 1 cup teriyaki sauce
    • 1 cup fresh pineapple, diced
    • 2 tablespoons olive oil
    • 1 tablespoon soy sauce
    • 1 tablespoon sesame seeds
    • 2 green onions, sliced (for garnish)
    • Salt and pepper to taste

    Cooking Instructions:

    In a shallow dish, combine the teriyaki sauce, olive oil, and soy sauce to create a marinade.

    Season the mahi mahi fillets with salt and pepper, then place them in the marinade, turning to coat evenly. Allow the fish to marinate for at least 30 minutes (or up to 2 hours for more flavor).

    Preheat a grill or skillet over medium-high heat, and cook the mahi mahi for about 4-5 minutes on each side, or until the fish is cooked through and flakes easily with a fork.

    In the last few minutes of cooking, add the diced pineapple to the grill or skillet, allowing it to caramelize slightly.

    Serve the mahi mahi topped with grilled pineapple and sprinkled with sesame seeds and sliced green onions.

    Extra Tips:

    For an added touch, consider garnishing your dish with a drizzle of extra teriyaki sauce or a squeeze of lime for some acidity.

    If you can't find fresh pineapple, canned pineapple works as well—just make sure to drain it well.

    Also, cooking times may vary based on the thickness of the mahi mahi fillets, so keep an eye on them to avoid overcooking.

    Pair this dish with steamed rice or a fresh salad for a complete and satisfying meal.

    Mahi Mahi Pesto Pasta

    pasta with mahi mahi

    Mahi Mahi Pesto Pasta is a delightful dish that combines the rich flavors of fresh mahi mahi with the aromatic essence of pesto, creating a satisfying meal that's perfect for any occasion. This recipe is simple yet elegant, making it an excellent choice for a weeknight dinner or a special gathering.

    The combination of protein-packed fish and al dente pasta tossed in vibrant pesto results in a dish that's as nutritious as it's delicious.

    Ingredients:

    • 2 fillets of mahi mahi
    • Salt and pepper, to taste
    • 2 tablespoons olive oil
    • 8 ounces pasta (spaghetti or linguine)
    • 1 cup fresh basil pesto
    • ½ cup cherry tomatoes, halved
    • ¼ cup grated Parmesan cheese
    • Fresh basil leaves, for garnish
    • Lemon wedges, for serving

    Instructions:

    Start by seasoning the mahi mahi fillets with salt and pepper. In a large skillet, heat olive oil over medium heat and cook the fish for about 4-5 minutes on each side, or until it's cooked through and flakes easily with a fork.

    While the mahi mahi is cooking, bring a pot of salted water to a boil and cook the pasta according to package instructions until al dente. Once the pasta is cooked, drain it, reserving a cup of pasta water.

    In a large bowl, combine the pasta, pesto, and cherry tomatoes, adding reserved pasta water as needed to achieve the desired consistency. Flake the mahi mahi and gently toss it with the pasta mixture.

    Serve with a sprinkle of Parmesan cheese and fresh basil leaves, along with lemon wedges on the side.

    Extra Tips:

    For the best flavor, use homemade pesto if you have the time, as it will enhance the dish considerably.

    Additionally, feel free to customize the recipe by adding your favorite vegetables, such as spinach or zucchini, for extra nutrition. If you prefer a bit of heat, consider adding red pepper flakes to the pasta for a spicy kick.

    Finally, make sure not to overcook the mahi mahi, as it can become dry; it should remain moist and flaky for the best texture. Enjoy your meal!

    Crispy Mahi Mahi Sandwiches

    crispy mahi mahi delight

    Crispy Mahi Mahi sandwiches make for a delicious and satisfying meal, perfect for lunch or dinner. The flaky, tender fish is coated in a crunchy breading and served on a toasted bun with fresh toppings.

    Whether you're grilling for a crowd or enjoying a quiet night in, these sandwiches are sure to impress with their flavor and texture.

    Ingredients:

    • 2 Mahi Mahi fillets
    • 1 cup all-purpose flour
    • 1 cup breadcrumbs (panko for extra crunch)
    • 2 large eggs
    • 1 teaspoon garlic powder
    • 1 teaspoon paprika
    • Salt and pepper, to taste
    • 4 sandwich buns
    • Lettuce leaves
    • Tomato slices
    • Tartar sauce or aioli (for serving)
    • Olive oil (for frying)

    Instructions:

    Begin by patting the Mahi Mahi fillets dry with paper towels and seasoning them with salt, pepper, garlic powder, and paprika.

    Set up a dredging station with three shallow bowls: one with flour, one with beaten eggs, and one with breadcrumbs.

    Dip each fillet into the flour, shaking off any excess, then into the egg, and finally coat with breadcrumbs, pressing gently to stick.

    Heat olive oil in a large skillet over medium-high heat, then carefully place the breaded fillets in the skillet.

    Cook for about 3-4 minutes on each side, or until golden brown and cooked through.

    Once done, remove the fillets and place them on a paper towel to drain excess oil.

    Assemble your sandwiches by placing a crispy fillet on a toasted bun, topped with lettuce, tomato, and tartar sauce or aioli.

    Extra Tips:

    For the best results, make sure the oil is hot enough before adding the fish to achieve a crispy texture.

    You can also add spices like cayenne pepper or lemon zest to the breadcrumb mixture for an extra kick of flavor.

    If you prefer a healthier option, consider baking the breaded Mahi Mahi in the oven at 400°F (200°C) for about 15-20 minutes instead of frying.

    Serve the sandwiches with a side of sweet potato fries or a fresh salad for a complete meal!

    Mahi Mahi Ceviche With Lime and Cilantro

    fresh fish citrus salad

    Mahi Mahi Ceviche with Lime and Cilantro is a revitalizing and vibrant dish that showcases the delicate flavors of this tropical fish. Perfect for warm weather gatherings or as an appetizer, this ceviche balances the brightness of fresh lime juice with the herbal notes of cilantro, making it a delightful experience for your taste buds.

    The key to a successful ceviche is using the freshest Mahi Mahi available, allowing the citric acid from the lime juice to "cook" the fish while preserving its tender texture.

    Ingredients:

    • 1 pound fresh Mahi Mahi fillet, diced into small cubes
    • 1 cup fresh lime juice (about 8-10 limes)
    • 1/2 cup red onion, finely chopped
    • 1 small jalapeño, seeded and minced
    • 1 cup cherry tomatoes, quartered
    • 1/2 cup fresh cilantro, chopped
    • Salt and pepper to taste
    • Tortilla chips or lettuce leaves for serving

    Instructions:

    In a medium bowl, combine the diced Mahi Mahi with the fresh lime juice, guaranteeing the fish is completely submerged.

    Cover the bowl and refrigerate for 2-3 hours, allowing the fish to marinate and "cook" in the acidity of the lime juice.

    Once the Mahi Mahi appears opaque, add the red onion, jalapeño, cherry tomatoes, and cilantro.

    Season with salt and pepper to taste, and gently mix until well incorporated.

    Serve chilled with tortilla chips or on lettuce leaves for a fresh bite.

    Extra Tips:

    For the best flavor, use fresh, high-quality Mahi Mahi, and make sure to prepare the ceviche just before serving to maintain its freshness.

    You can adjust the level of spiciness by adding more or less jalapeño according to your preference.

    If you want to add a twist, consider incorporating diced avocado or mango for added creaminess and sweetness.

    Always taste and adjust seasoning before serving to guarantee a balanced flavor profile.