If you love seafood and pasta, you're in for a treat! Imagine twirling spaghetti around your fork, topped with succulent shrimp or rich lobster. Sounds delicious, right? From quick weeknight meals to impressive dishes for special occasions, there's a seafood pasta recipe for every taste. You'll want to stick around to discover which one will make your dinner table shine and leave everyone asking for seconds!
Shrimp Scampi Pasta
Shrimp Scampi Pasta is a delightful dish that combines the rich flavors of succulent shrimp with the comforting texture of pasta, all brought together by a fragrant garlic and butter sauce. This recipe is perfect for a quick weeknight dinner or an elegant weekend meal, making it a versatile choice for any occasion. The fresh ingredients and simple preparation will impress your family and guests alike.
Ingredients:
- 8 oz linguine or spaghetti
- 1 lb large shrimp, peeled and deveined
- 4 tbsp unsalted butter
- 3 tbsp olive oil
- 4 cloves garlic, minced
- 1/2 tsp red pepper flakes (optional)
- 1/2 cup dry white wine
- Juice of 1 lemon
- Salt and pepper to taste
- Fresh parsley, chopped (for garnish)
- Grated Parmesan cheese (for serving)
Cooking Instructions:
Begin by cooking the linguine or spaghetti according to package instructions until al dente.
While the pasta cooks, heat the olive oil and 2 tablespoons of butter in a large skillet over medium heat. Add the minced garlic and red pepper flakes, sautéing for about 1 minute until fragrant.
Next, add the shrimp to the skillet, seasoning with salt and pepper, and cook for approximately 2-3 minutes on each side until they turn pink and opaque.
Pour in the white wine and lemon juice, allowing it to simmer for a couple of minutes to reduce slightly.
Once the pasta is ready, drain it and toss it into the skillet with the shrimp mixture. Add the remaining butter and mix everything together until well combined.
Serve hot, garnished with fresh parsley and grated Parmesan cheese.
Extra Tips:
For the best flavor, use high-quality shrimp and don't overcook them, as they can become rubbery.
You can also customize the dish by adding vegetables such as spinach or cherry tomatoes for extra color and nutrients.
If you prefer a creamier sauce, consider adding a splash of heavy cream at the end of cooking.
To make it a complete meal, serve with a side salad and some crusty bread to soak up the delicious sauce!
Creamy Lobster Fettuccine
Creamy Lobster Fettuccine is a luxurious pasta dish that combines the rich flavors of succulent lobster with a creamy, garlic-infused sauce. This dish is perfect for special occasions or a romantic dinner at home.
The fettuccine is coated in a velvety sauce that's both satisfying and elegant, making it a true crowd-pleaser. Prepare to impress your guests or loved ones with this delectable recipe that showcases the best of seafood and pasta.
Ingredients:
- 8 oz fettuccine pasta
- 2 lobster tails, cooked and meat removed
- 2 tablespoons unsalted butter
- 2 cloves garlic, minced
- 1 cup heavy cream
- 1/2 cup grated Parmesan cheese
- 1/2 teaspoon red pepper flakes (optional)
- Salt and pepper, to taste
- Fresh parsley, chopped (for garnish)
Cooking Instructions:
Begin by cooking the fettuccine according to the package instructions until al dente.
While the pasta cooks, melt the butter in a large skillet over medium heat. Add the minced garlic and sauté for about 1 minute until fragrant.
Pour in the heavy cream and bring it to a gentle simmer, then stir in the grated Parmesan cheese, red pepper flakes, salt, and pepper.
Once the cheese is melted and the sauce has thickened slightly, add the cooked lobster meat, allowing it to warm through.
Drain the fettuccine and toss it in the skillet with the sauce until well coated.
Extra Tips:
For an even richer flavor, consider adding a splash of white wine to the sauce after sautéing the garlic and letting it reduce before adding the cream.
You can also improve the dish with fresh herbs such as basil or chives for added freshness.
Be sure to reserve some pasta water in case your sauce needs thinning.
Finally, serve immediately for the best texture and to enjoy the creaminess at its peak!
Spaghetti Alle Vongole
Spaghetti Alle Vongole is a classic Italian dish that beautifully combines the flavors of fresh clams and al dente pasta, creating a delightful symphony of taste that transports you to the coastal shores of Italy.
This simple yet elegant recipe highlights the natural brininess of the clams while allowing the garlic and parsley to improve the overall flavor profile. Perfect for a romantic dinner or a casual gathering, this dish comes together quickly, making it a fantastic option for any occasion.
Ingredients:
- 400g spaghetti
- 1kg fresh clams (such as vongole)
- 4 cloves garlic, minced
- 1/2 cup dry white wine
- 1/4 cup extra virgin olive oil
- 1/4 teaspoon red pepper flakes (optional)
- Fresh parsley, chopped (for garnish)
- Salt and pepper, to taste
- Lemon wedges (for serving)
Cooking Instructions:
Start by soaking the clams in cold water for about 30 minutes to allow them to purge any sand.
Meanwhile, bring a large pot of salted water to a boil and cook the spaghetti according to package instructions until al dente.
In a large skillet over medium heat, heat the olive oil and add the minced garlic and red pepper flakes, sautéing until fragrant but not browned.
Add the clams and white wine to the skillet, covering it with a lid. Cook for about 5-7 minutes or until the clams open up.
Drain the spaghetti and toss it into the skillet with the clams, allowing it to absorb the flavors.
Season with salt and pepper, then finish with a sprinkle of fresh parsley.
Extra Tips:
For the best results, use the freshest clams you can find, and make sure to discard any that don't open during cooking as they may not be safe to eat.
You can improve the dish further by adding a splash of lemon juice for acidity or a dash of fish stock for depth.
Pair Spaghetti Alle Vongole with a crisp white wine and serve with crusty bread to soak up the delicious sauce.
Enjoy this quick yet impressive meal that will surely impress your guests!
Seafood Linguine With Garlic and Olive Oil
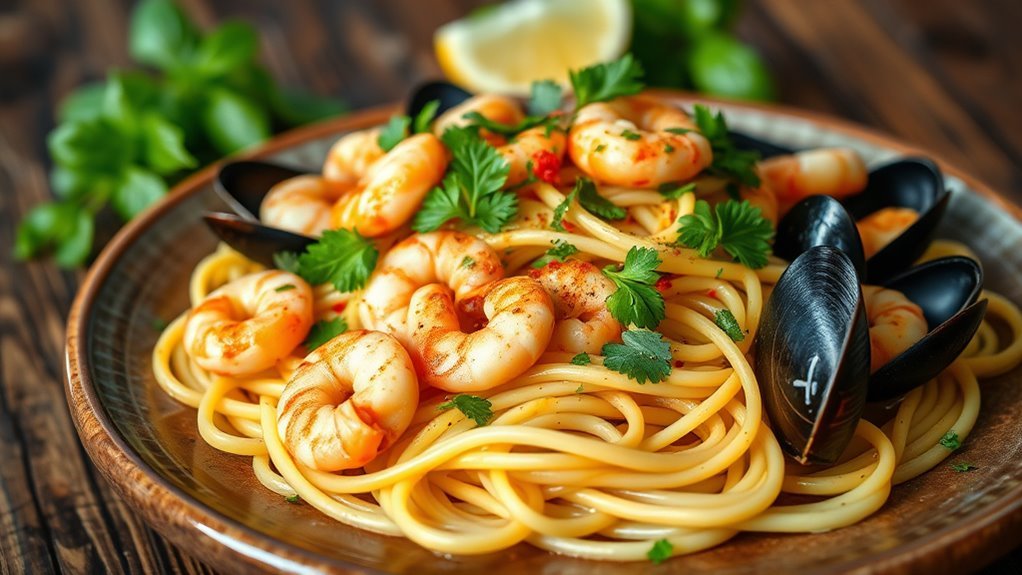
Seafood linguine with garlic and olive oil is a delightful dish that showcases the fresh flavors of the ocean combined with the aromatic richness of garlic. This quick and easy recipe is perfect for a weeknight dinner or an elegant meal to impress guests. With its simple preparation and a handful of high-quality ingredients, you can create a delicious seafood pasta that's bound to satisfy.
Ingredients:
- 8 ounces linguine pasta
- 2 tablespoons olive oil
- 3 cloves garlic, minced
- 1 pound mixed seafood (shrimp, scallops, and mussels)
- 1/2 teaspoon red pepper flakes (optional)
- Salt and pepper, to taste
- 1/2 cup white wine (optional)
- Fresh parsley, chopped (for garnish)
- Lemon wedges (for serving)
Cooking Instructions:
Begin by cooking the linguine according to the package instructions until al dente.
While the pasta is cooking, heat the olive oil in a large skillet over medium heat. Add the minced garlic and red pepper flakes, sautéing for about 1 minute until fragrant.
Next, add the mixed seafood to the skillet and cook for 3-5 minutes, stirring frequently, until the seafood is cooked through and opaque. If using, pour in the white wine and let it simmer for a couple of minutes to reduce slightly.
Once the linguine is cooked, drain it and add it to the skillet, tossing everything together to combine. Season with salt and pepper to taste, and garnish with freshly chopped parsley before serving with lemon wedges on the side.
Extra Tips:
For the best flavor, use fresh seafood whenever possible, as it can make a noteworthy difference in the dish's overall taste.
If you're using frozen seafood, make certain it's completely thawed and drained before cooking.
Additionally, feel free to customize the seafood selection based on your preferences or what's available at your local market.
Finally, don't skimp on the garlic; it's the key ingredient that brings this dish to life!
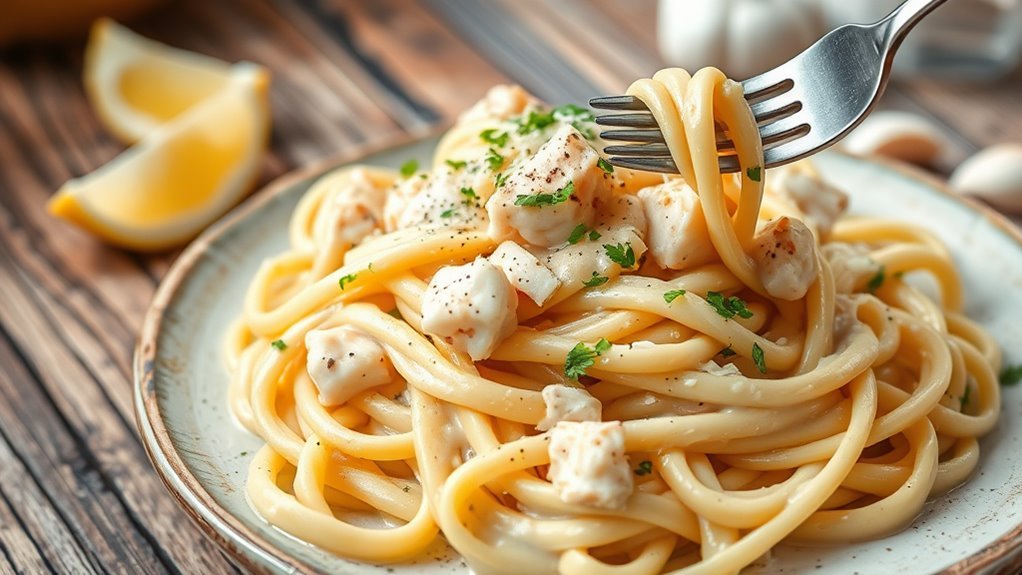
Lemon Garlic Butter Shrimp Pasta
Lemon Garlic Butter Shrimp Pasta is a delightful and quick dish that brings together the succulent flavors of shrimp with a zesty lemon and garlic sauce. This recipe is perfect for a weeknight dinner or a special occasion, as it combines fresh ingredients and simple cooking techniques to create a meal that's both elegant and satisfying.
The combination of al dente pasta, tender shrimp, and a rich butter sauce infused with garlic and lemon makes for a dish that's sure to impress.
Ingredients:
- 8 ounces spaghetti or linguine
- 1 pound large shrimp, peeled and deveined
- 4 tablespoons unsalted butter
- 4 cloves garlic, minced
- 1 teaspoon red pepper flakes (optional)
- Juice and zest of 1 lemon
- Salt and pepper, to taste
- Fresh parsley, chopped, for garnish
- Grated Parmesan cheese, for serving
Instructions:
Start by cooking the spaghetti or linguine according to package instructions until al dente, then drain and set aside.
In a large skillet over medium heat, melt the butter and add the minced garlic, cooking until fragrant but not browned, about 1 minute.
Add the shrimp to the skillet, season with salt, pepper, and red pepper flakes if using, and cook until they turn pink and opaque, about 3-4 minutes.
Once the shrimp are cooked, add the lemon juice and zest, followed by the drained pasta, tossing everything together to combine and heat through.
Remove from heat and garnish with fresh parsley and grated Parmesan cheese before serving.
Extra Tips:
For the best flavor, consider using fresh shrimp rather than frozen, as they tend to have a sweeter taste and firmer texture.
Don't be afraid to customize the dish by adding vegetables like spinach or cherry tomatoes for an extra burst of color and nutrition.
If you prefer a creamier sauce, a splash of heavy cream can be added just before serving.
Finally, be sure not to overcook the shrimp, as they can become rubbery; they're done when they turn a lovely pink color!
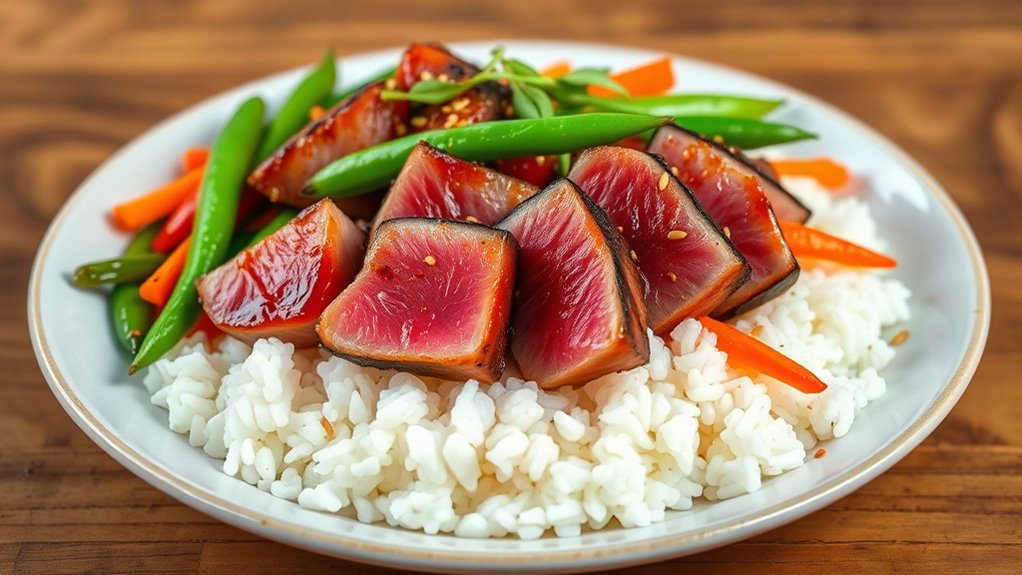
Tuna Pasta Salad

Tuna pasta salad is a delightful and invigorating dish that combines the protein-rich goodness of tuna with the heartiness of pasta, making it a perfect meal for lunch, picnics, or potlucks. This recipe is simple to prepare and can be customized with various vegetables and dressings to suit your taste.
With a bright and tangy flavor profile, this salad isn't just delicious but also a great way to incorporate more seafood into your diet.
Ingredients:
- 8 ounces pasta (elbow, rotini, or your choice)
- 1 can (15 ounces) tuna, drained and flaked
- 1 cup cherry tomatoes, halved
- 1 cup cucumber, diced
- 1/2 cup red onion, finely chopped
- 1/2 cup mayonnaise
- 2 tablespoons lemon juice
- 1 teaspoon Dijon mustard
- Salt and pepper to taste
- Fresh parsley, chopped (for garnish)
Instructions:
Begin by cooking the pasta according to the package instructions until al dente. Drain and rinse the pasta under cold water to cool it down.
In a large mixing bowl, combine the cooled pasta, flaked tuna, cherry tomatoes, cucumber, and red onion.
In a separate bowl, whisk together the mayonnaise, lemon juice, Dijon mustard, salt, and pepper until well combined.
Pour the dressing over the pasta mixture and toss gently to combine all ingredients evenly. Serve chilled or at room temperature, garnished with fresh parsley.
Extra Tips:
To improve the flavor of your tuna pasta salad, consider adding additional ingredients such as olives, bell peppers, or capers for a briny kick.
You can also substitute Greek yogurt for mayonnaise for a lighter version. If you want to make it a heartier meal, adding some cooked beans or chickpeas can provide extra protein.
Make sure to chill the salad for at least 30 minutes before serving to allow the flavors to meld beautifully.
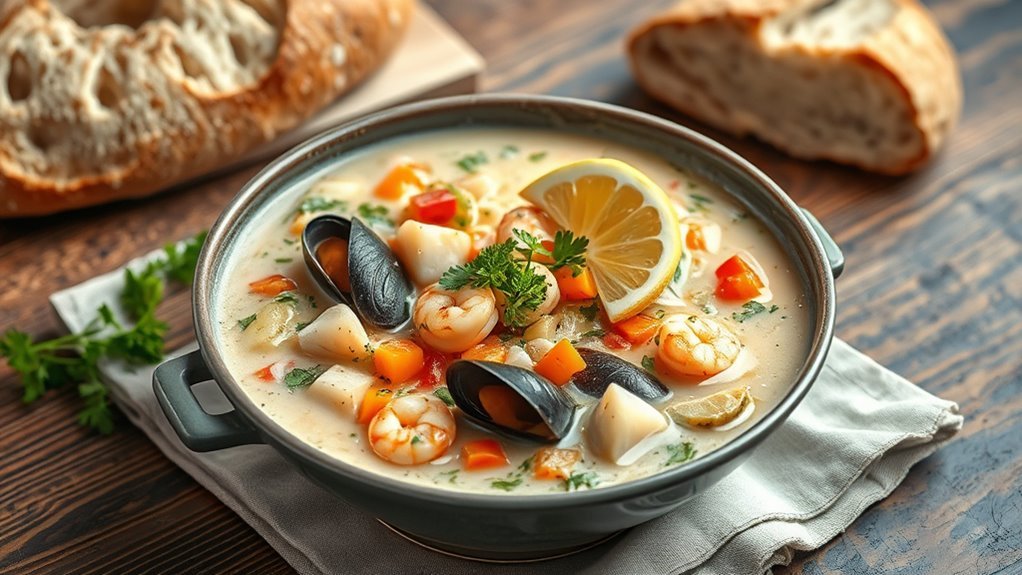
Clam Chowder Pasta

Clam chowder pasta is a delightful fusion dish that combines the creamy, savory flavors of traditional clam chowder with the comforting texture of pasta. This recipe is perfect for seafood lovers looking to enjoy a hearty meal that's both satisfying and easy to prepare.
Whether you're cooking for family or friends, this dish is sure to impress with its rich flavors and delightful presentation.
Ingredients:
- 8 oz pasta (such as fettuccine or linguine)
- 1 can (10 oz) diced clams, drained (reserve juice)
- 1 cup heavy cream
- 1 cup chicken or vegetable broth
- 4 strips bacon, chopped
- 1 small onion, diced
- 2 cloves garlic, minced
- 2 medium potatoes, peeled and diced
- 1 cup corn kernels (fresh, frozen, or canned)
- 1 tsp dried thyme
- Salt and pepper to taste
- Fresh parsley for garnish (optional)
Cooking Instructions:
Begin by cooking the pasta according to package instructions until al dente, then drain and set aside.
In a large pot over medium heat, cook the chopped bacon until crispy, then add the diced onion and garlic, sautéing until softened.
Stir in the diced potatoes, corn, reserved clam juice, and broth, bringing the mixture to a simmer. Cook until the potatoes are tender, about 10-15 minutes.
Next, reduce the heat to low and stir in the heavy cream, thyme, and clams, allowing the chowder to heat through.
Finally, add the cooked pasta to the pot, stirring gently to combine, and season with salt and pepper to taste.
Extra Tips:
For an extra depth of flavor, consider adding a splash of white wine to the pot after cooking the bacon and before adding the onions. This will improve the overall taste of the dish.
You can also customize this recipe by adding vegetables like celery or bell peppers for added texture and nutrition.
If you prefer a thicker chowder, simply mix a tablespoon of cornstarch with a little cold water and stir it into the chowder as it simmers.
Garnishing with fresh parsley not only adds color but also a fresh flavor burst. Enjoy your delicious clam chowder pasta!
Pesto Salmon Pasta

Pesto Salmon Pasta is a delightful dish that combines the rich flavors of salmon with the aromatic freshness of basil pesto, all tossed together with al dente pasta. This quick and easy recipe is perfect for a weeknight dinner or a special occasion, offering a burst of flavor that will impress your family and friends.
The creamy texture of the salmon pairs beautifully with the vibrant green of the pesto, making it a visually appealing and satisfying meal.
Ingredients:
- 8 oz pasta (linguine or fettuccine works well)
- 2 salmon fillets (about 6 oz each)
- 1 cup basil pesto (store-bought or homemade)
- 2 tbsp olive oil
- Salt and pepper to taste
- 1 cup cherry tomatoes, halved
- 1/4 cup grated Parmesan cheese (optional)
- Fresh basil leaves for garnish (optional)
Cooking Instructions:
Begin by cooking the pasta according to package instructions in a large pot of salted boiling water until al dente.
While the pasta is cooking, heat olive oil in a skillet over medium heat and season the salmon fillets with salt and pepper. Place the salmon in the skillet, cooking for about 4-5 minutes on each side or until cooked through and flaky.
Once the pasta is ready, drain it and return it to the pot, adding the pesto and cherry tomatoes, stirring to combine. Flake the cooked salmon and gently fold it into the pasta mixture. Serve warm, topped with grated Parmesan cheese and fresh basil leaves if desired.
Extra Tips:
For added depth of flavor, consider marinating the salmon in a little lemon juice and garlic before cooking.
If you want a creamier sauce, mix in a splash of heavy cream or a dollop of cream cheese with the pesto. You can also customize the dish by adding vegetables like spinach or peas for extra nutrition.
This recipe is versatile, so feel free to experiment with different types of pasta or even substitute the salmon for shrimp or chicken if you prefer!
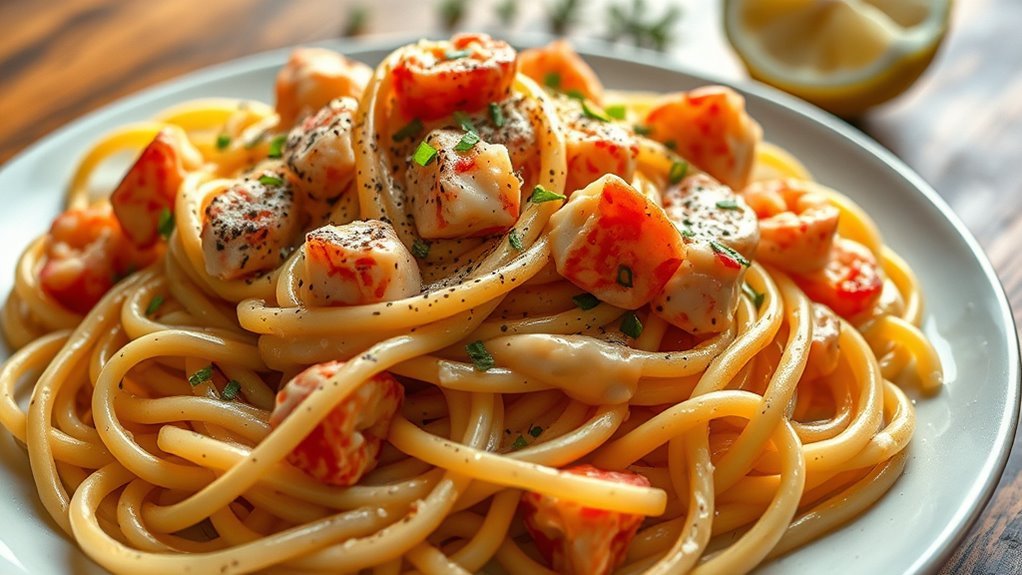
Crab Alfredo
Crab Alfredo is a luxurious seafood dish that combines tender pasta with rich and creamy Alfredo sauce, enhanced by the sweet, delicate flavor of crab meat. This dish is perfect for a special occasion or a cozy dinner at home, providing a satisfying blend of flavors and textures.
Whether you're using fresh lump crab from the market or canned crab meat, this recipe is sure to impress your family and friends.
Ingredients:
- 8 oz fettuccine pasta
- 1 cup heavy cream
- 1/2 cup grated Parmesan cheese
- 2 tablespoons unsalted butter
- 2 cloves garlic, minced
- 1 cup lump crab meat
- Salt and pepper to taste
- Fresh parsley, chopped (for garnish)
Instructions:
Begin by cooking the fettuccine pasta according to the package instructions until al dente.
While the pasta is cooking, melt the butter in a large skillet over medium heat and add the minced garlic, sautéing for about 1 minute until fragrant.
Pour in the heavy cream and bring to a gentle simmer, then stir in the grated Parmesan cheese until melted and smooth.
Add the lump crab meat to the sauce, gently folding it in to avoid breaking it up too much.
Once the pasta is cooked and drained, combine it with the crab Alfredo sauce, mixing well to coat the pasta evenly.
Season with salt and pepper to taste, and garnish with fresh parsley before serving.
Extra Tips:
For the best flavor, consider using fresh crab meat if available, as it adds a delightful sweetness that canned crab may lack.
You can also customize the dish by adding sautéed vegetables like spinach or asparagus for added nutrition and color.
If you'd like a bit of spice, a pinch of red pepper flakes can be added to the sauce.
Serve immediately for the creamiest texture, as the sauce may thicken as it cools.
Enjoy your delicious Crab Alfredo with a side of garlic bread or a light salad for a complete meal!
Seafood Paella Pasta

Seafood Paella Pasta is a delightful fusion dish that brings together the rich flavors of traditional Spanish paella and the comforting texture of pasta. This vibrant meal is perfect for special occasions or a cozy family dinner, as it combines succulent seafood, aromatic spices, and perfectly cooked pasta.
With a burst of color and flavor in every bite, this dish is certain to impress your guests and leave them craving more.
Ingredients:
- 8 ounces of spaghetti or fettuccine
- 1 tablespoon olive oil
- 1 onion, finely chopped
- 3 cloves garlic, minced
- 1 red bell pepper, diced
- 1 cup Arborio rice
- 1 teaspoon smoked paprika
- 1/2 teaspoon saffron threads
- 4 cups chicken or seafood broth
- 1 cup diced tomatoes (canned or fresh)
- 1 cup shrimp, peeled and deveined
- 1 cup mussels, cleaned
- 1 cup calamari rings
- Salt and pepper to taste
- Fresh parsley, chopped (for garnish)
- Lemon wedges (for serving)
To prepare the Seafood Paella Pasta, start by cooking the spaghetti or fettuccine in a large pot of salted boiling water according to package instructions until al dente. Drain and set aside.
In a large, deep skillet or paella pan, heat the olive oil over medium heat. Add the chopped onion, garlic, and red bell pepper, sautéing until softened. Stir in the Arborio rice, smoked paprika, and saffron, cooking for another minute.
Pour in the broth and diced tomatoes, bringing the mixture to a simmer. Add the shrimp, mussels, and calamari, cooking until the seafood is cooked through and the mussels have opened, about 5-7 minutes.
Finally, toss in the cooked pasta, mixing gently to combine. Season with salt and pepper to taste, and garnish with fresh parsley before serving with lemon wedges.
When making Seafood Paella Pasta, it's essential to confirm that the seafood is fresh for the best flavor. You can customize the seafood mix based on your preferences or availability; feel free to substitute with other shellfish or fish.
Additionally, for a spicier kick, consider adding a pinch of cayenne pepper or red pepper flakes. The saffron is key to achieving that authentic paella flavor, so don't skip it, but remember that a little goes a long way.
Enjoy this dish with a glass of white wine for a truly delightful dining experience!